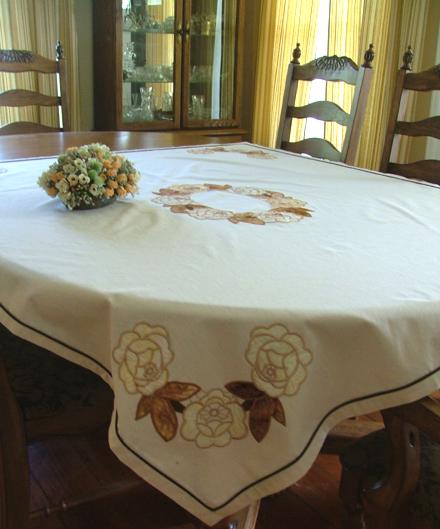
The Rose Wreath and Corner Freestanding Appliqué Set can be used on quilts, table linen, curtains, decarative panels and so on. We used it to make a tablecloth.
We embroidered the Rose Wreath designs on water-soluble stabilizer and then stitched them onto the tablecloth. This way, if we made a mistake or changed our mind about the choice of fabric and thread colors, it would have been very easy to correct without ruining the whole project!
The finished size of this tablecloth is 55" x 70". You can easily make it larger or smaller if you wish.
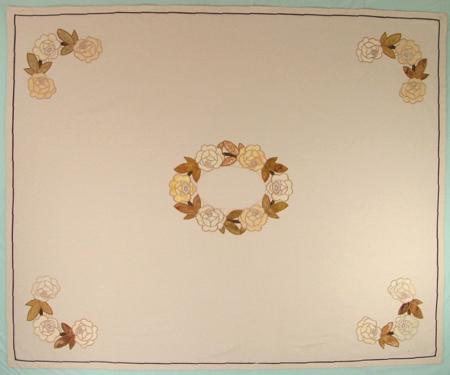
For the tablecloth, we used light cream linen/cotton blend fabric 60" wide. For the applique we used scraps of dark cream, pale yellow and brown fabrics. All fabric should be prewashed. You will also need a mesh water soluble stabilizer, such as Vilene.
Instead of sewing the table cloth, you can use a ready one. There are a lot of blank linen tableclothes of different colors on the market.
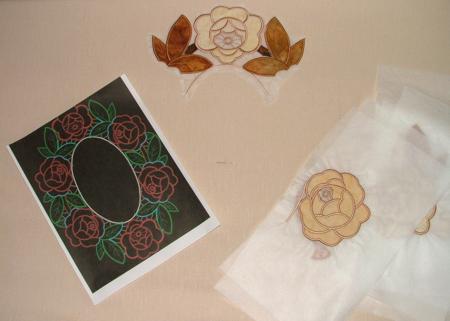
Step One: Hoop two layers of Vilene and embroider each design for the rose wreath once.
The machine first stitches an outline of the first shape. Place a scrap of fabric on this outline and start the machine again. It will make the same outline over the fabric and stop. Take the hoop out of the machine (DO NOT open the hoop!) and cut away the excess fabric as close to the outline as possible. Return the hoop to the machine and start it again. The same procedure will have to be repeated for each shape before the machine does a final outline.
After you embroider the designs, do not dissolve the stabilizer yet.
Step Two: Cut away the excess stabilizer close to the stitches.
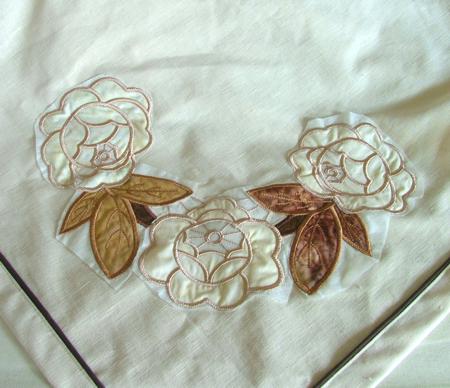
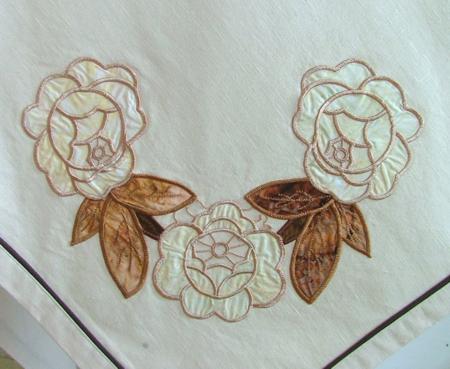
Mark the central point on the piece of fabric.
Open on your computer screen or print out the file "layout1". Using diagram 1, start laying out the applique parts into the wreath. Pin the parts in place.
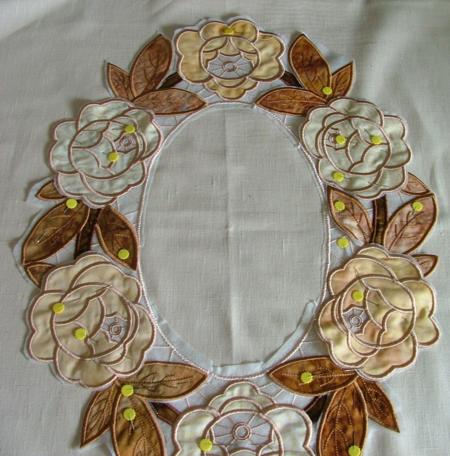
Step Three: Thread the needle with the same thread with which you made the embroidery. Using zigzag stitch (2:2) attach the applique to the fabric.
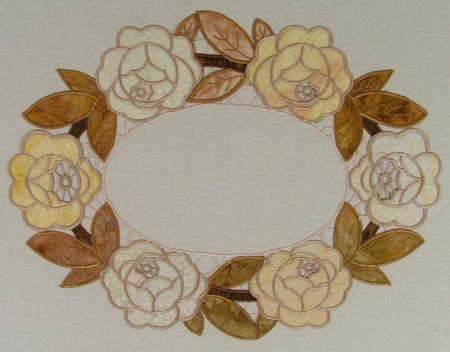
Step Four: Check that the wreath is in the center of the working piece. Trim the sides. Finish the raw edges as you like. We made mitered corners and used brown piping.
Step Five: Embroider the designs for the corners. Follow the same procedure as described in Step One.
Step Six: Cut away the excess stabilizer close to the stitches.
Open on your computer screen or print out the file "layout2". Using diagram 2, lay out the applique parts in the corner. Pin the parts in place.
Step Seven: Thread the needle with the same thread with which you made the embroidery. Using zigzag stitch (2:2) attach the applique to the fabric.
Repeat for each corner.
When the tablecloth is finished, place it in warm water for an hour or so. Do not wring. Place on a clothes line to air dry. Press slightly wet.
We hope that you liked our idea and will come up with many of your own.


