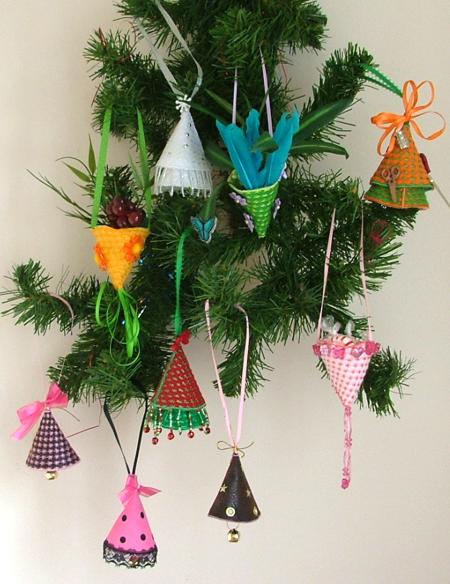
The Designs in Machine Embroidery was preparing an issue with the six themed Christmas trees: Pink Cow Girl, Quilter's Tree, Baby's Fisrt Christmas, Sweets Tree, Tropical Tree, North Woods Tree
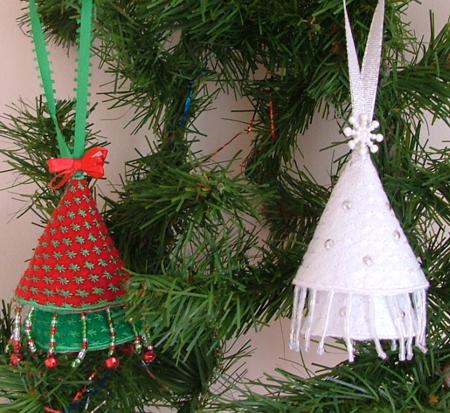
We offered a very simple ornament, a cone, which can be turned into a bell, a basket, or a tree.
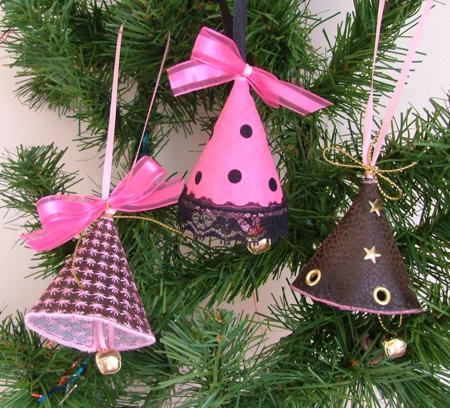
Pink Cowgirl's cows can't do without stylish neck bells:
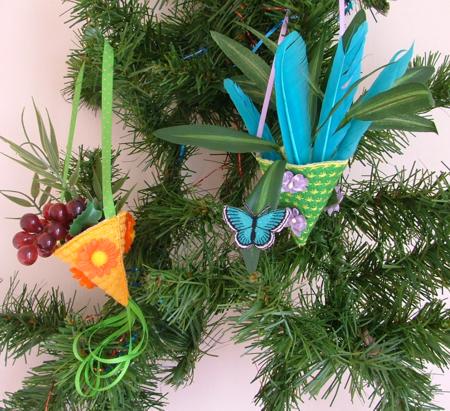
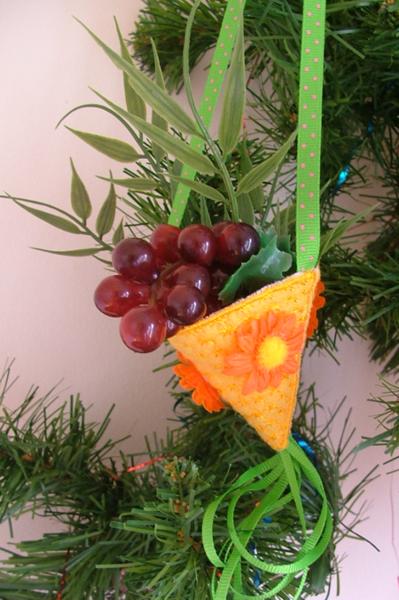
For the Tropical Tree, we made baskets with exotic flowers, fruit and foliage.
We decorated the North Woods Tree with miniature fir trees.
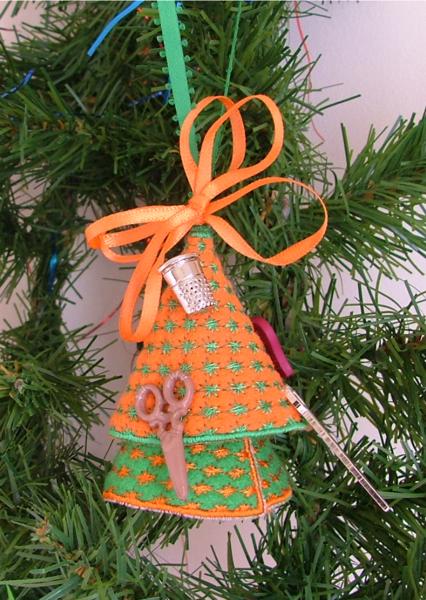
The Quilter's Tree ornament is a miniature tree embellished with notions.
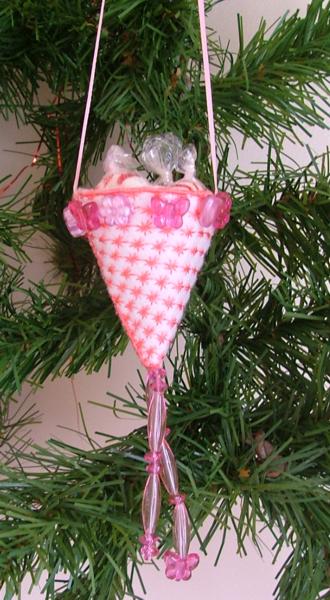
The ornament for the Sweets Tree is a basket of sweets.
All these ornaments are based on a simple cone, which can be embroidered very quickly in a 4" x 4" hoop.
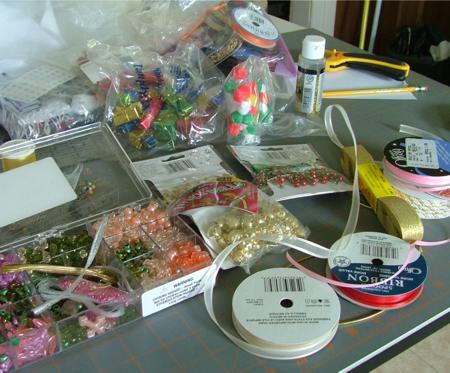
You'll need any lightweight stabilizer, light weight cut-away mesh is preferable but any stabilizer will work. You'll also need small pieces of fabrics and a lot of embellishments, such as beads, crystals, ribbons, silk flowers, etc. You can compeletely alter the look of your ornaments by changing the color of the threads, fabrics and embellishments.
Step One: Download the design. The zip file contains the embroidery file in the corresponding format and instructions.
|
|
|
|
|
|
|
|
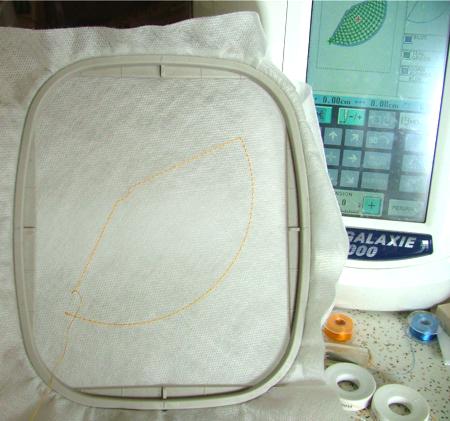
Step Two: Hoop the stabilizer, insert the hoop into the machine and start the machine. It will embroider the outline of the cone and stop.
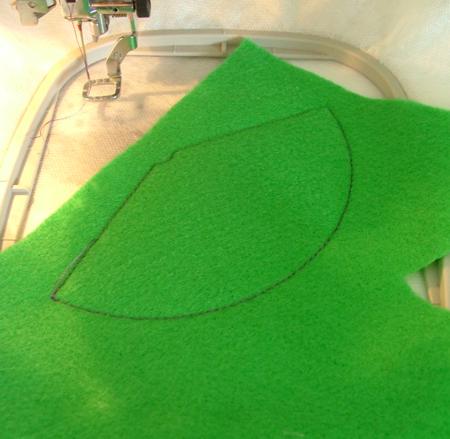
Step Three: Cover the outline with a piece of fabric and start the machine again. It will make the outline of the cone over the fabric.
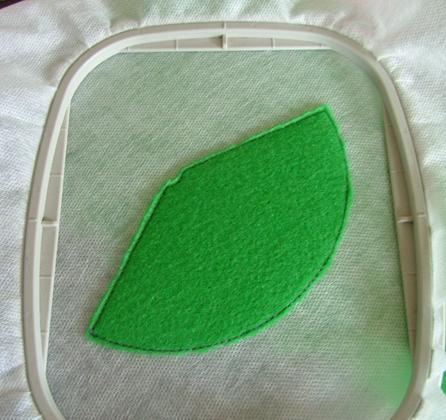
Step Four: Take the hoop from the machine and with a pair of scissors, cut away the excess fabric as close to the outline as possible.
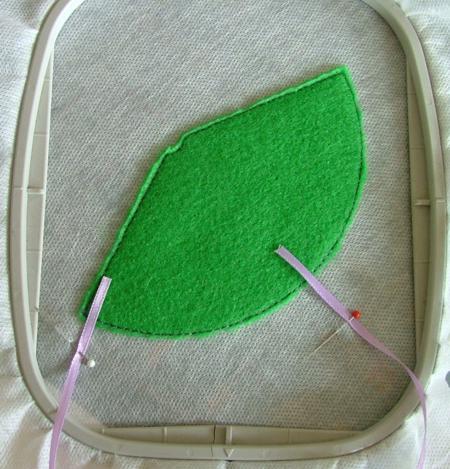
Step Five: At this stage you can have the hanging loops attached to the cone. For this, take a piece of ribbon about 12" long, fold the ribbon in a loop and place it over the fabric. Secure the ribbon with pins on the stabilizer as shown on the photo.
If you're making a bell or a tree, the loop should be attached to the top of the cone.
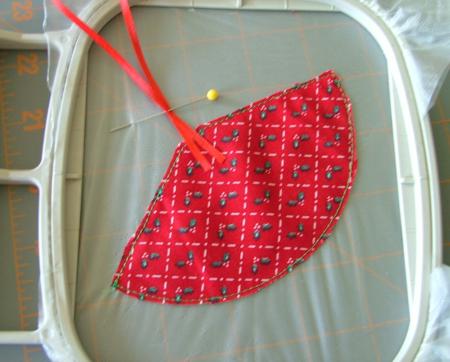
If you're making a basket, attach one end of the ribbon to the center and the other end of the ribbon to the edge of the cone.
Step Six: Return the hoop into the machine and embroider the third color. This will embroider stars all over the cone. If you wish, you can omit this step and move to the next step.
Step Seven: Embroider the final color, which is the satin-stitch outline.
Step Eight: Take the embroidery from the hoop, cut away the excess stabilizer and embellish the working piece as you like. Then, manually, stitch the seam closed. The result is a cone ornament.
We hope that you and your child liked our idea and will come up with many of your own.


