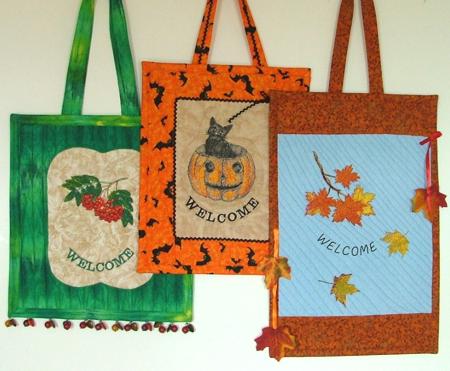
These small welcome signs are easy and fast to make. They can decorate your house or make a good gift for your friends and family.
The lettering was made using fonts built into the machine. |
Click to enlarge |
|
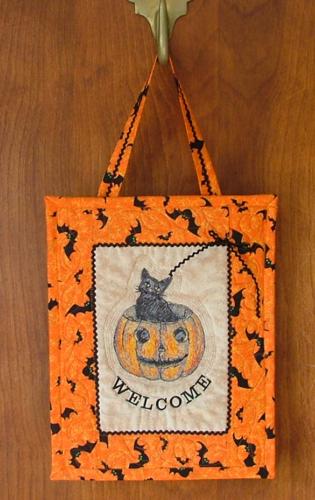
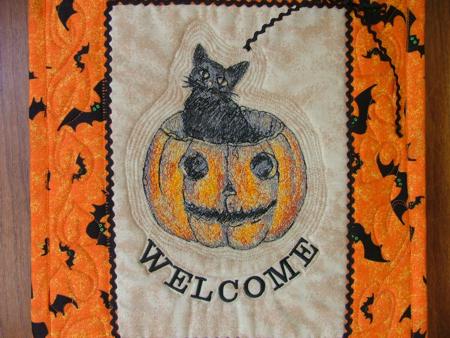
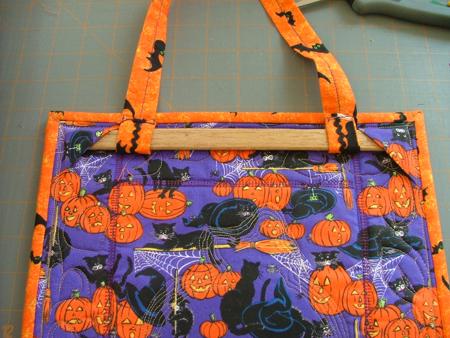
| This welcome sign is 11" x 14". It features the Cat in Jack-O-Lantern design. You will need a 7" x 9 1/2" piece of light beige fabric, 1/4 yard of patterned fabric for the borders and binding, fabric for the backing, a piece of polyester felt (it will work as batting and embroidery stabilizer), about 1 1/2 yard of black rick-rack (optional) and a flat wooden plank about 1/2" wide and 9 1/2" long. |
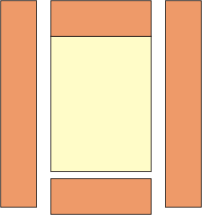
| Cut a piece measuring 7" x 9 1/2" for the central part. Cut two borders measuring 2 1/2" x 7" and two borders 2 1/2" x 13 1/2". Cut two strips of binding measuring 2 1/2" wide and the length of the fabric. Assemble as shown on the diagram. |
|
| Place the top on the felt batting. Hoop both layers. Make the embroidery. When it's finished, press with steam. |
| Place the working piece on the backing. Pin. Quilt all three layers. If you wish, attach rick-rack along the borders of the central part. Tie the ends of rick-rack into a bow. |
|
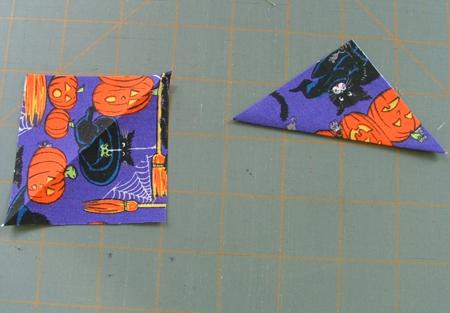
| After you finish quilting, press the working piece with steam. Square it. Out of the backing fabric, cut two squares measuring 3" x 3". Fold them in half along the diagonal and press.
|
|
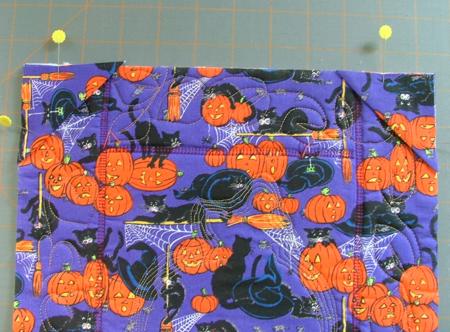
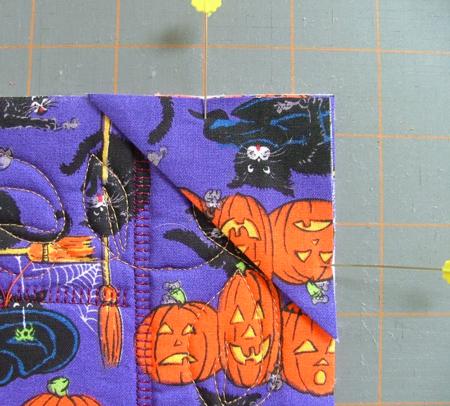
| Place both rectangles in the upper corners of your quilt from the back. Align the edges. Pin. |
|
| Here is a close-up. |
|
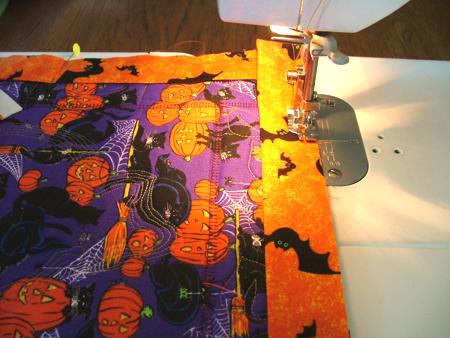
| When you attach binding, do it from the back of the quilt. Attach as usual. When stitching, you will also attach the corner triangles. Fold the binding onto the face of the quilt. Press from the back. Either manually or on your machine, stitch the binding in place.
|
|
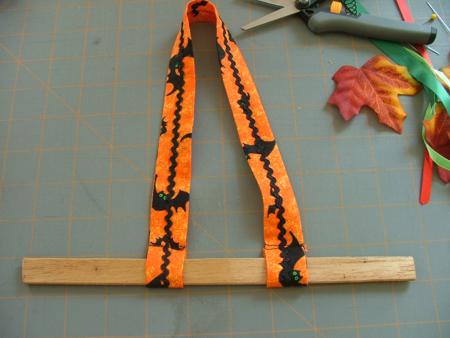
| Out of the leftovers of the binding strip, make the loop for hanging. For this, fold the strip face inwards, stitch 1/4" from the edge and turn it right side out. Press. Fold the ends back 1" and top-stitch them in place. Insert the wooden plank into the loops. |
|
| Insert the hanger into the "pockets" on the back. |
|
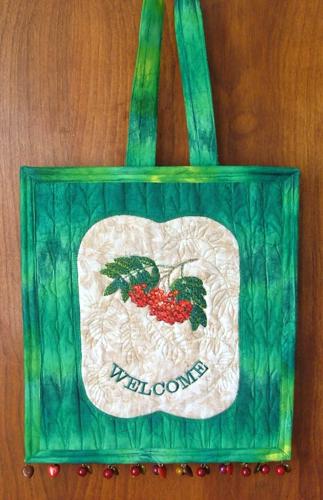
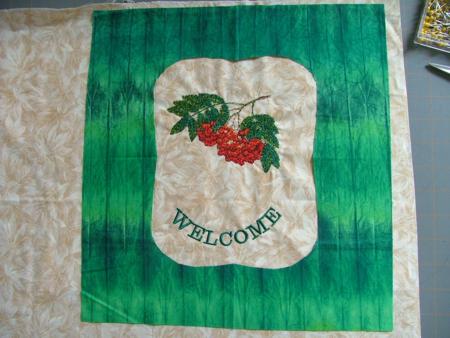
Our second sign features the Mountain Ash Berries design in the photo stitch technique. It measures 12" x 13". You will need: about 14" x14" piece of light fabric for the central part, a piece of green fabric of the same size (about 14" x 14") for the frame and 2 strips of binding 2 1/2" x 40" (width of the fabric). You will also need batting and backing of about 14" x 14".
|
|
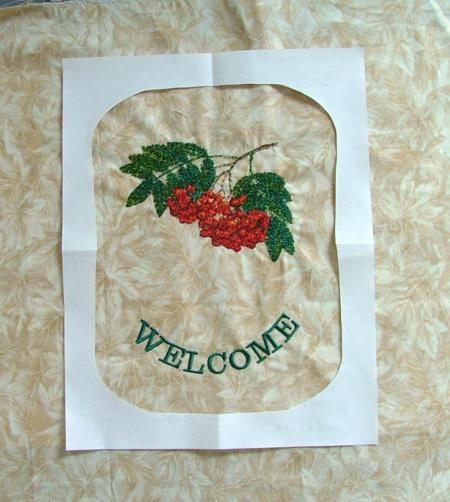
| Place the fabric for the central part of the sign onto the felt batting. Hoop both layers and make the embroidery. Press after finishing. To make a template for the frame, fold an A4 sheet of paper in four. Cut away the center, unfold the paper and place it over the embroidery to check what it looks like.
|
|
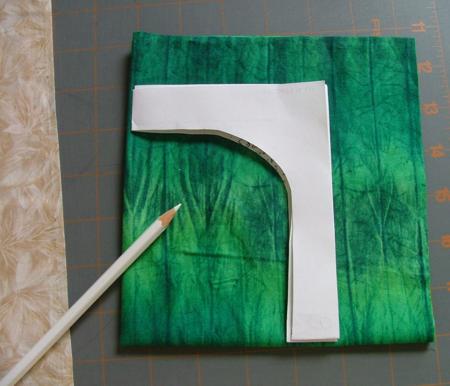
| When you are satisfied with the template, fold it back. Fold a piece of fabric for the frame into four. Place your template over it as shown. Trace the inner edge of the template. Cut along the traced line. |
|
| Place the frame over the embroidered piece. Tuck several pieces of Steam-a-Seam2 (or any other fusible webbing) under the frame and press to lightly attach the frame to the lower layer. |
|
| Add the backing. Pin all layers. Start quilting. Using any bridge stitch from your machine, attach the frame along the inner edge. Quilt the rest of the sign in free motion style. |
|
| Press with steam. Square. Make the corner triangle for the hanging as described above. Finish the raw edges with binding. |
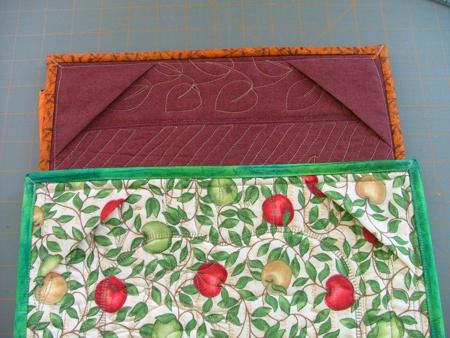
These are the backs of the signs |
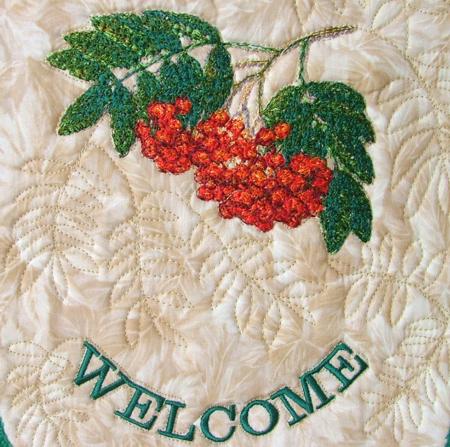
| We also embellished the sign with berry-like beads. |

|
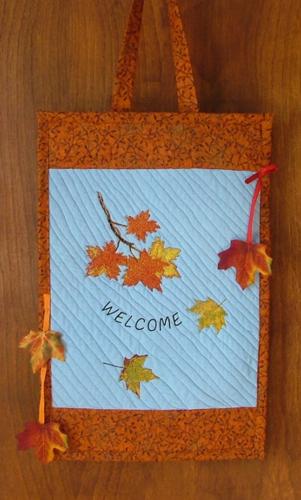
| The last sign features the designs of the Maple Branch and Maple Leaves. It measures 11 1/2" x 17 1/2". The central part with embroidery is a 11 12/" x 11 1/2" square. 3" borders were added to the top and on the bottom. There are no borders on the left and right, but binding of the same color as the upper and lower borders gives the impression of narrow borders. The sign is made in the same way as described above. It's futher decorated with Free-Standing Autumn Leaves. |
|
| We hope that you liked our idea and will come up with many of your own. |
|
Back to the Projects Page
|


