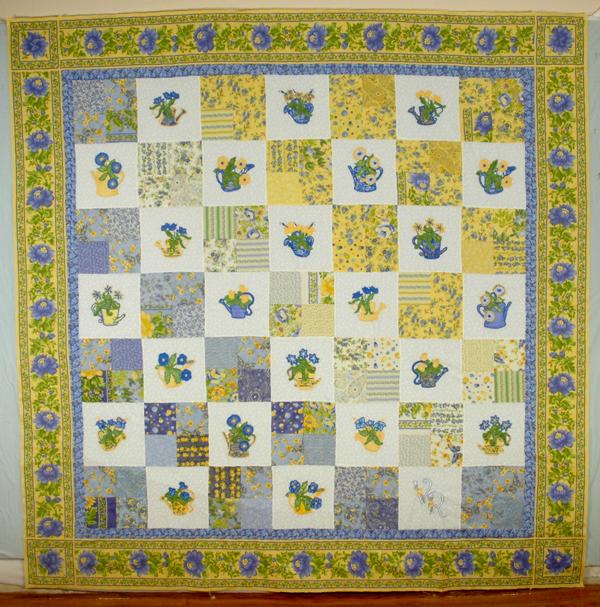
The finished size of the quilt is about 81" x 81". For the fabric, we used the "Sunshine" fabric line by April Cornell for Moda. For the embroidery, we used the Watering Cans Applique Set.

All measurements are based on 40" fabric and 1/4" seam allowance.
You will need 2 yards of white cotton fabric (for the white blocks); 3 charm packs of Sunshine 5" squares (for the multi-colored blocks), 1/2 yard of blue fabric for the inner border and 2 1/2 yards of Sunshine #35043 for the outer border. You will also need scraps of other fabrics for the applique.
Note: We bought Sunshine charm packs with 42 squares of assorted Sunshine fabrics in each. We discarded the green-colored squares from the Sunshine packs and used only the blue, yellow and cream squares. You will need 100 total squares for the blocks. The green squares from the Sunshine packs were used to make applique.
Cutting out:
Out of white fabric, cut 24 square neasuring 9 1/2" x 9 1/2" each.
Out of blue fabric for the first border, cut 8 strips 2" wide. Stitch them together in one long strip, then cut this into 2 strips 63" long and 2 strips 66" long.
Out of the fabric for the outer border, cut 4 strips 8" wide by 2 1/2 yards (the full length of your fabric). If you use Sunshine #35043, follow the pattern of the fabric when cutting.
Assembly:
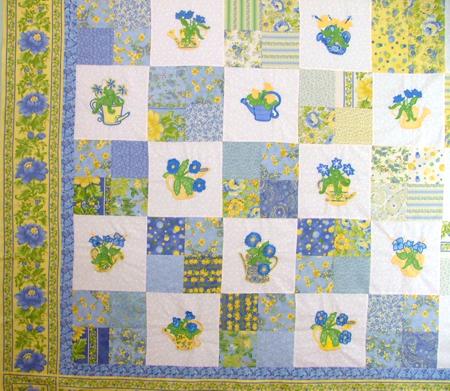
Step One: Sort the 5" squares by color. We had 44 blue squares, which we used to make 11 blue blocks; 24 cream squares, which we used to make 6 cream blocks, and 32 yellow squares, which we used to make 8 yellow blocks.

Step Two: There are 7 blocks in each row. Assemble the rows in the following order:
Row 1: blue block - white block - yellow block - white block - yellow block - white block - yellow block;

Row 2: white block - cream block - white block - yellow block - white block - yellow block - white block;

Row 3: blue block - white block - cream block - white block - yellow block - white block - yellow block;

Row 4: white block - blue block - white block - cream block - white block - yellow block - white block;

Row 5: blue block - white block - blue block - white block - cream block - white block - yellow block;

Row 6: white block - blue block - white block - blue block - white block - cream block - white block;

Row 7: blue block - white block -blue block - white block - blue block - white block - blue block.

Step Three: Join the rows.
Step Four: Add the first blue border. First, stitch the 63" long strips to the top and bottom edges of the workpiece. Then, stitch 66" long strips to the left and right edges.
Step Five: The outer wide border has mitered corners. Use your favorite method for making mitered corners. If you wish, you can make box corners. In this case, cut two border strips 66" long and attach them to the top and bottom edges. Cut two more strips 81" long and attach them to the left and right edges.
We think mitered corners look better on this project.
Embroidery:
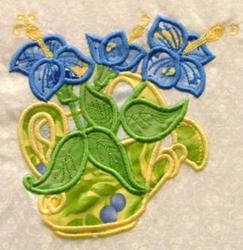
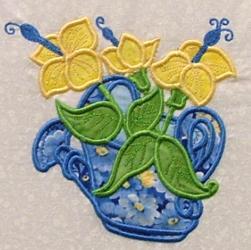
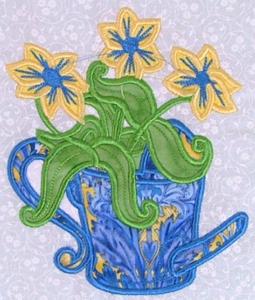
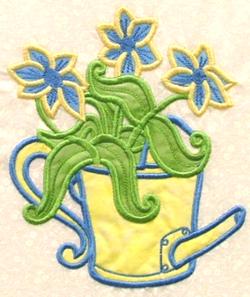
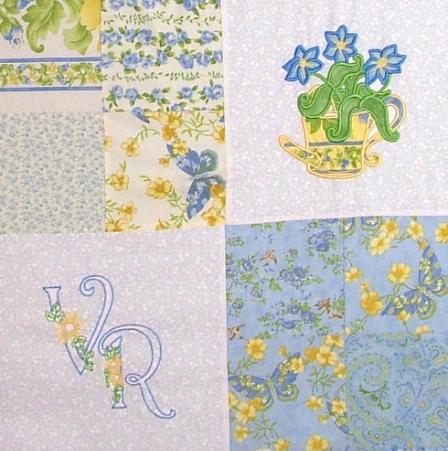
Now the top is ready for embroidering. We embroidered the Watering Can applique designs in the 24 white blocks.
Use light-weight cut-away stabilizer. Cut-away mesh is preferable but any stabilizer will work.
When embroidering on large pieces such as this one, make sure that the piece lies on the table and does not hang down. The weight of the fabric pulling on the carriage and the hoop of the machine will ruin your embroidery.
There are only 6 designs of watering cans in the set. You can compeletely alter the look of the same design by changing the color of the threads and fabrics. The pictures below show the exact same designs side by side, except embroidered in different colors.
 |
 |
 |
 |
In one of the white blocks we embroidered the initials of the giftee. We used the Daisy Alphabet.
We were planning to finish and publish the instructions about this quilt next spring, since watering cans are such a summery theme, but decided to publish now, while the Sunshine fabric line is still available in the stores.
We hope that you liked our idea and will come up with many of your own.


