This is a small, charming seasonal wall hanging that is very easy to make. You can hang it anywhere inside the home, or give it away as a unique gift.
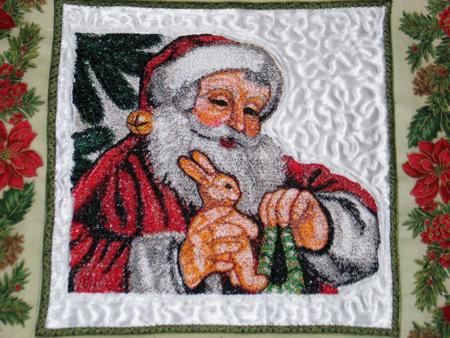
We used the embroidery design Santa with Gifts.
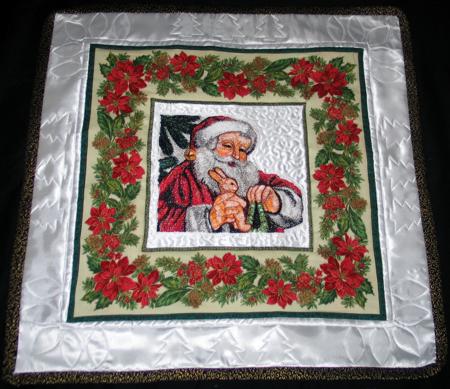
The finished size of this square quilt is about 23" x 23".
You will need 1/2 yard of light-colored fabric for the central part and the second border, 1 fat quarter of fabric for the 1st border, and fabric for the binding and backing. You'll also need a piece of batting.
Out of light-colored fabric, cut a square measuring 9 1/2" x 9 1/2", 2 strips measuring 3 1/2" x 17 1/2" and 2 strips measuring 3 1/2" x 23".
Out of Christmas patterned fabric, cut 2 strips measuring 4 1/2" x 9 1/2" and 2 strips measuring 4 1/2" x 17 1/2".
Assemble the top as shown on the picture below:
Stabilize the central light square with iron-on cut-away stabilizer. Make the embroidery. Cut away the excess stabilizer.
You can also use polyester craft felt instead of the stabilizer. In this case we recommend to baste the quilt top to the felt in the ditch along the first border. After the embroidery is finished, rip away the basting stitches and cut away the excess felt around the embroidery.
Now place the backing on a flat surface (table) face down. Cover with batting. Spread your working piece over it.
Pin all three layers together with 1" pins and start quilting. We quilted along the lines of the embroidery and made stippling around it. The first border was quilted in a free-motion style following the pattern of poinsettias. We quilted some fir trees on the second borders in a free-motion style.
For the backing we used red fabric.
After the quilting is finished, press the work with heavy steam and square the work -- all corners should be 90 degrees and opposite sides should be of the same length.
Finish the raw edges with the binding.
The quilt is ready. Enjoy! Happy Stitching!


