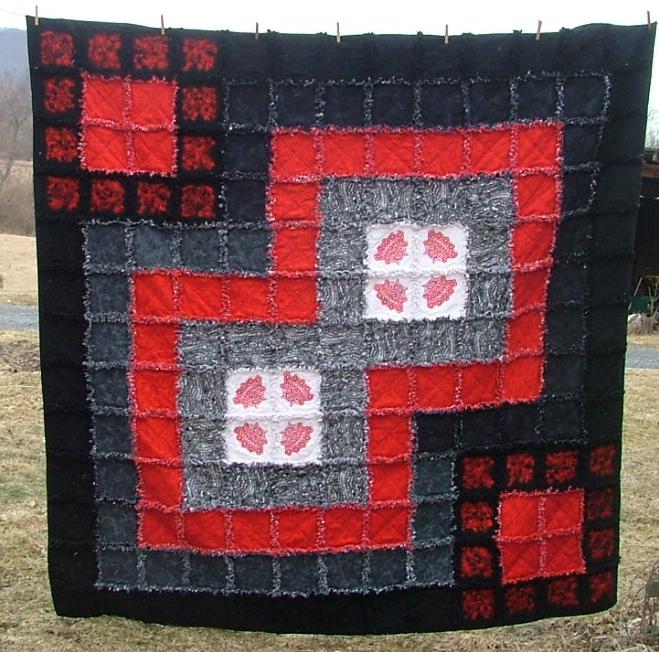
This color combination is good for modern style interior decor, especially for a young man's room, and the quilt itself is easy to make. To give this quilt a unique touch, we added embroidery. We used the designs Flower Border and the Butterflies and Flowers Quilt Block Set.
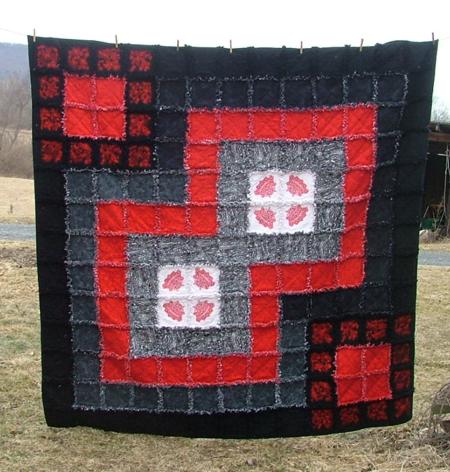
The finished size of the quilt is about 91" x 91".
Five differently patterned flannel fabrics were used.
You will need:
1. 1 yard of white flannel;
2. 3 yards of white flannel with a black pattern ;
3. 5 yards of red flannel;
4. 2 1/2 yards of medium grey flannel;
5. 2 1/2 yards of dark grey flannel;
6. 7 1/2 yards of black flannel.
Yardage is based on a 40"- 42" usable width of fabric.
You will also need low-loft cotton batting and cotton binding.
When cutting strips, please cut across the width of the fabric.
1. Out of white flannel, cut 4 strips 9" wide and sub-cut them into16 squares measuring 9" x 9".
2. Out of white flannel with a black pattern, cut 12 strips 9" wide and sub-cut them into 9" x 9" squares. You need 46 of them.
3. Out of red flannel, cut 20 strips 9" wide. Sub-cut the strips into 9" x 9" squares. You need 80 of them.
4. Out of medium grey flannel cut 10 strips 9" wide and sub-cut them into 9" x 9" squares. You need 40 of them.
5. Out of dark grey flannel cut 10 strips 9" wide and sub-cut them into 9" x 9" squares. You need 40 of them.
6. Out of black flannel cut 29 strips 9" wide and sub-cut them into 9" x 9" squares; you need 116 of them.
Out of batting, cut 338 squares measuring 6 3/4" x 6 3/4".
Step Two: Place a flannel square right side down. Cover it with a square of batting, matching the centers of the squares. Cover with the second piece of flannel right side up, aligning the edges with the first flannel square.
Step Three: This sandwich is ready for embroidery. Hoop and embroider any redwork or applique design. If you are not going to embroider the block, quilt it - sew diagonals across it to form an X. Use the same thread in the needle and in the bobbin of your machine.
Make 8 white sandwiches.
Make 23 white-and-black sandwiches.
Make 40 red sandwiches.
Make 20 medium grey sandwiches.
Make 20 dark grey sandwiches.
Make 58 black sandwiches.
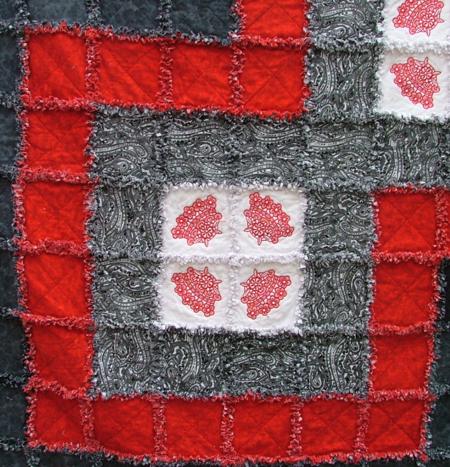
Embroider the Flower Border on all the white sandwiches.
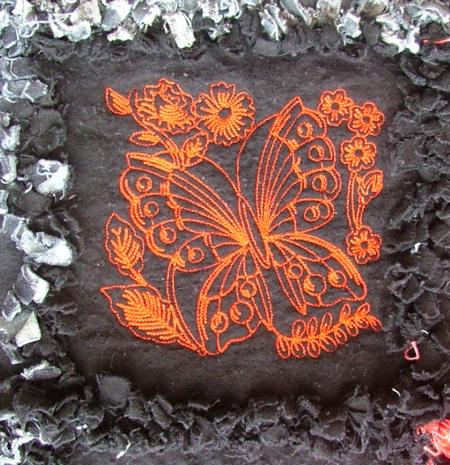
Embroider the Butterflies and Flowers Quilt Block Set on 24 black sadwiches. We used red threads both in the needle and bobbin to get 2-sided embroidery.
Quilt all the remaining sandwiches with an X.
When assembling the quilt, sew the blocks into rows first, then sew the rows together.
The opened seams should always be on the top! Follow the layout below (E indicates an embroidered block):
Finish the raw edges of the quilt with binding. It's also possible to finish the edges in the following way: topstitch around the outside edge 1" from the the edge. You will later fringe this edge.
Clip the 1" seam allowance on each seam and the edges of the quilt every 1/4" -1/2", to make a fringe. DO NOT clip through the seam.
Now the quilt is ready for washing and drying. There will be a lot of lint! We recommend to use a laundromat. Commercial washing and drying machines have powerful filters and lint traps. Washing at home may clog your washing machine and pipes.
We hope that you liked our idea and will come up with many of your own.


