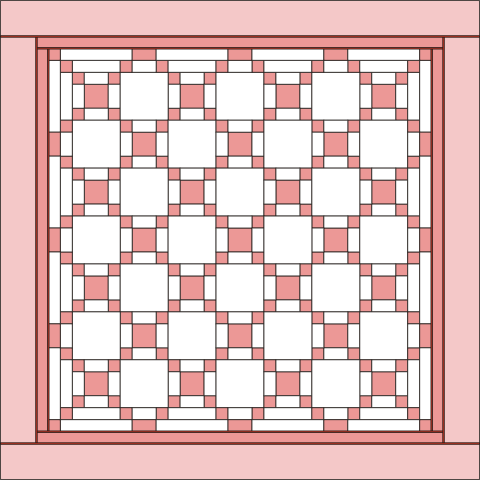
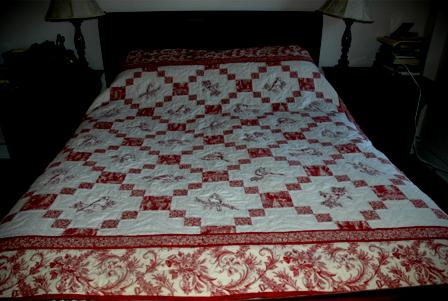
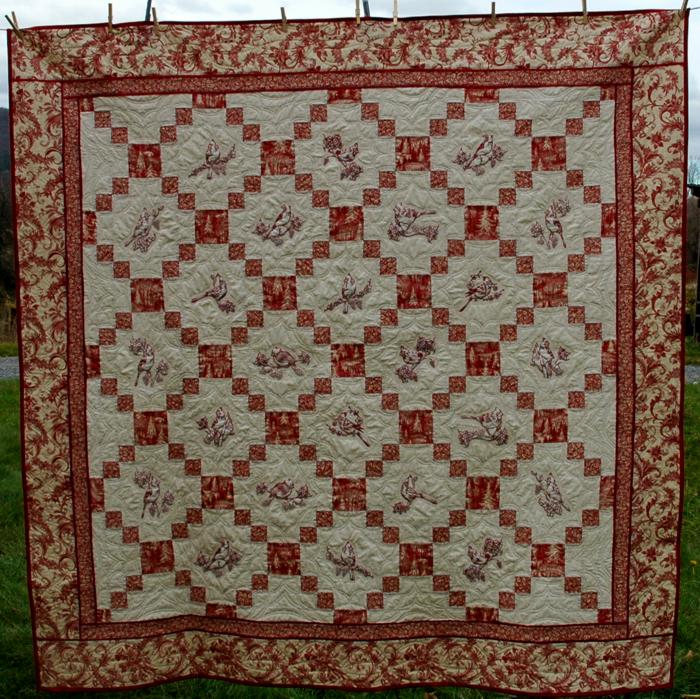
This festive 80" x 80" bed quilt is very appealing to the eye, and makes an excellent Christmas gift. It uses a very simple "uneven nine-patch block", and despite its large size, it's very easy to construct. We used Christmas fabrics from the Traditions line by Moda and Cardinal Redwork designs.
|

Click to enlarge |
| The Traditions line comes in several colors and a few different patterns. We chose red to fit the Christmas theme, but it's possible to make this quilt in any other color. We used the following patterns from the Traditions line: Wrapping (for the outer border), Holly, for the first border and blocks, and Trees, for the blocks. Of course, you can use any fabric that you like for this quilt.
|
|
For the quilt top, you will need:
3 yards of light cream fabric for the background;
1/2 yard of the "Trees" fabric for the blocks;
1 1/4 yard of the "Holly" fabric for the blocks and inner borders.
2 yards of "Wrapping" fabric for the outer border.
1 yard of red fabric for the trim and binding. |
|
Cutting:
|
| All measurements are based on fabric 42" wide and include 1/4" seam allowance. |
Out of the light cream (background) fabric:
1. Cut 6 strips 8 1/2" wide and the length of the width of the fabric. Subcut these strips into twenty four 8 1/2" x 8 1/2" squares;
2. Cut 20 strips 2 1/2" wide and the length of the width of the fabric. Subcut these strips into sixteen 2 1/2" x 8 1/2" strips, sixteen 2 1/2" x 12 1/2" strips and one hundred 2 1/2" x 4 1/2" strips. |
| Out of the "Trees" fabric (used for the centers of the blocks), cut 3 strips 4 1/2" wide and the length of the width of the fabric. Subcut these strips into twenty five 4 1/2" x 4 1/2" squares. |
Out of the "Holly" fabric (used for the blocks and the borders):
1. Cut strips 2 1/2" wide and the length of the width of the fabric. Subcut them into one hundred 2 1/2" x 2 1/2" squares for the blocks; thirty two 2 1/2" x 2 1/2" squares and twelve 2 1/2" x 4 1/2" strips.
2. Cut another 7 strips 2 1/2" wide and the length of the width of the fabric. Sew them together to get a long strip. Subcut this strip into 2 strips measuring 2 1/2" x 64 1/2" and 2 strips measuring 2 1/2" x 68 1/2". |
| Out of the "Wrapping" fabric (used for the outer border), cut 8 strips 6 1/2" wide and the length of the width of the fabric. Sew them together into a long strip. Subcut this strip into 2 strips measuring 6 1/2" x 68 1/2" and 2 strips measuring 6 1/2" x 80 1/2". |
Out of red fabric (used for trim and binding):
1. Cut 14 strips 1" wide and the length of the width of the fabric. Sew them together to get a very long strip. Subcut this strip into 2 strips measuring 2 1/2" x 64 1/2", 4 strips measuring 2 1/2" x 68 1/2" and 2 strips measuring 2 1/2" x 80 1/2".
2. For the binding, cut 8 strips 2 1/2" wide and the length of the width of the fabric. Sew them together into one long strip. |
|
Assembly:
|
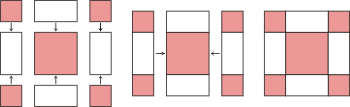
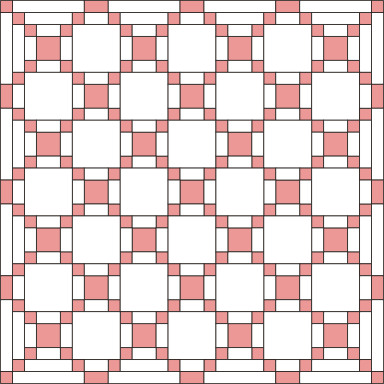
| The quilt top consists of 2 blocks - one is a plain square, and another is an uneven nine-patch. |
| To assemble the uneven nine-patch block for our quilt, use the 4 1/2" square, four 2 1/2" x 4 1/2" cream rectangles and four 2 1/2" x 2 1/2" squares. Assemble the elements as shown on the diagram below. |
|
| Make 25 such blocks. |
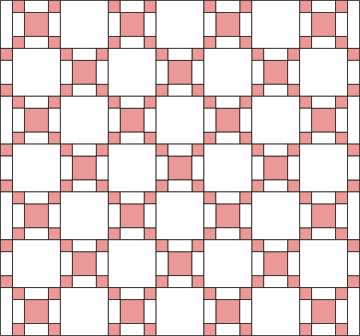
| Alterating plain squares with uneven nine patch clocks, assemble 7 rows. Make the uneven (1st, 3rd, 5th and 7th) rows start and end with the nine patch. |

|
| Make the even (2nd, 4th and 6th) rows start and end with the plain squares. |

|
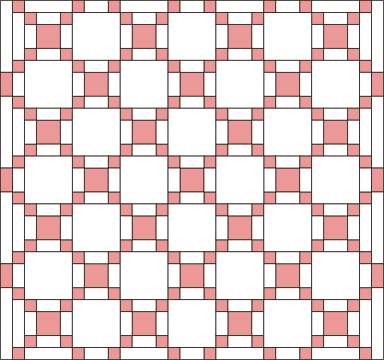
| Now connect the rows into one piece: |

|
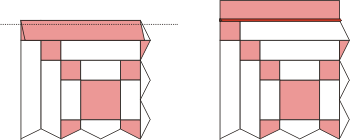
| To assemble the first border, use 2 1/2" "Holly" squares, and 2 1/2" x 4 1/2" and 2 1/2" x 8 1/2" cream strips. Assemble the the left and the right borders as shown: |

|
| Attach to the quilt top: |
|
| Assemble the top and the bottom borders as shown: |

|
| Attach to the quilt top: |

|
| For the second border, use the remaining Holly squares, twelve 2 1/2" x 4 1/2" Holly strips and the 2 1/2" x 12 1/2" cream strips. Assemble the left and right borders as shown: |

|
| Attach to the quilt top. |
|
| Assemble the top and bottom borders as shown: |

|
| Attach to the quilt top. |
|
| To make the third border, take the 2 1/2" x 64 1/2" and 2 1/2" x 68 1/2" strips made of the Holly fabric, two 1" x 64 1/2" and two 1" x 68 1/2" strips of red fabric. Fold the 1" wide strips in half lengthwise and press. |
| Place the folded red strips over one long edge of each "Holly" strip and pin. The raw edges of the red strip should lie along the raw edge of the "Holly" strip. |

|
| Place the 64 1/2" strips over the left and right edges of the quilt top, face down. The raw edge of the red strips should be aligned with the rawe edges of the quilt top. Pin in place, then stitch. Open the border and press the red trim over the quilt. |
|
| Repeat for the top and bottom edges of the quilt, using the 68 1/2" strips. |
| To make the outer border, take two 6 1/2" x 68 1/2" "Wrapping" strips and 2 red 1" x 68 1/2" strips. Fold the 1" wide strips in half lengthwise and press. Repeat the procedure explained above to attach the left and right borders to the quilt top. |
| Make the top and bottom borders in the same way. |
|
|
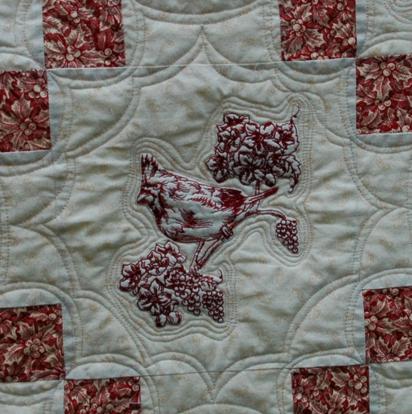
Embroidery
|
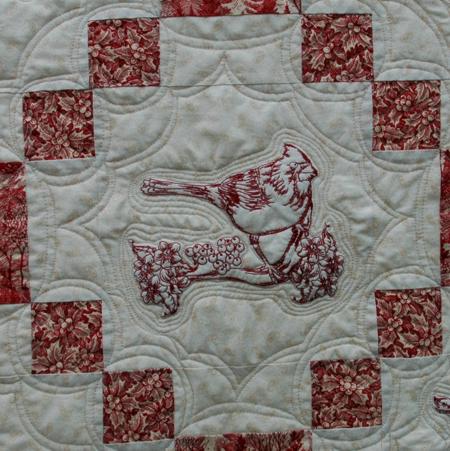
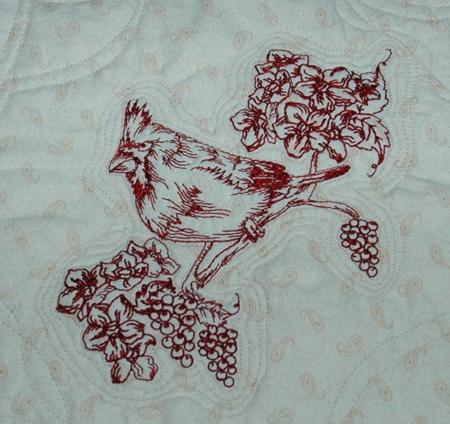
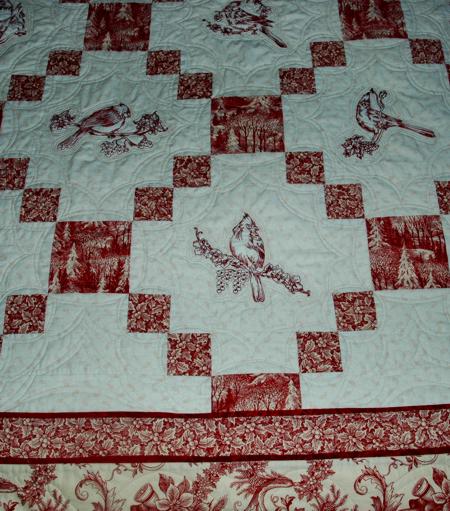
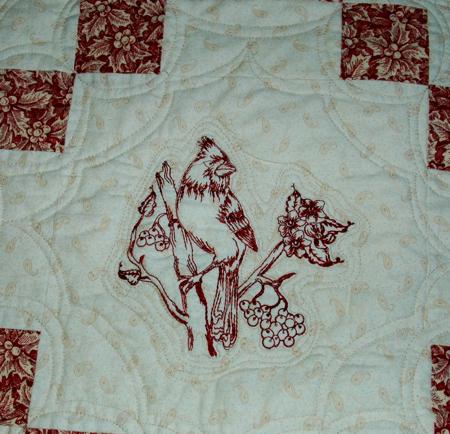
| The top is ready for embroidery. We chose redwork designs from the Cardinal Redwork Set for the large (5 x 7) hoop. The larger designs from this set will also fit and look good on the quilt. For embroidery on quilts, we like to use low-loft DreamPoly batting, instead of stabilizer. After each design is embroidered, we cut away the excess batting as close to the stitches as possible. This technique will make the embroidery puffy and you will get trapunto-like results. |
|
Quilting and Finishing
|
| Now place the backing on a flat surface (table) face down. Cover with batting. Spread your working piece over it. Pin all three layers together with 1" pins and start quilting. We quilted along the lines of the embroidery, and then quilted in a free-motion style.
For the backing we used red fabric.
After the quilting is finished, press the work with heavy steam and square the work -- all corners should be 90 degrees and opposite sides should be of the same length.
Finish the raw edges with the binding.
|
|
The quilt is done! Enjoy!
|
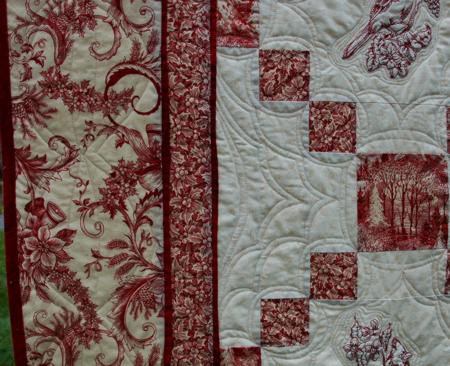
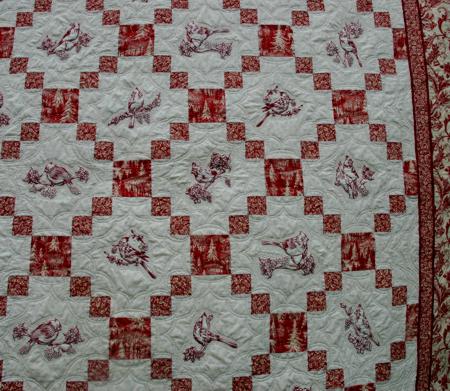
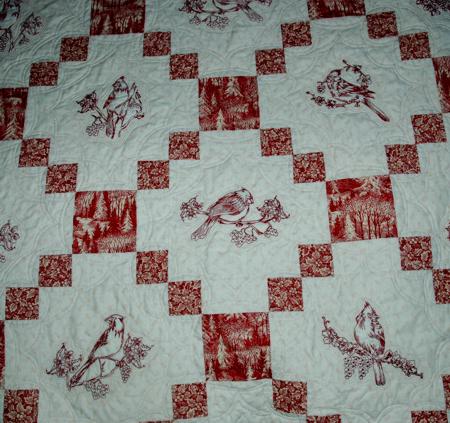
| Here are some close-ups of the quilt: |
|
|
|
|
|
|
|
|
|
Happy Embroidering!
|
|
Back to Cardinal Redwork Set
|
|
Back to the Projects Page
|


