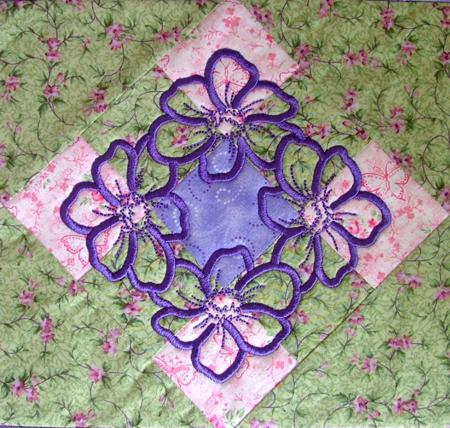
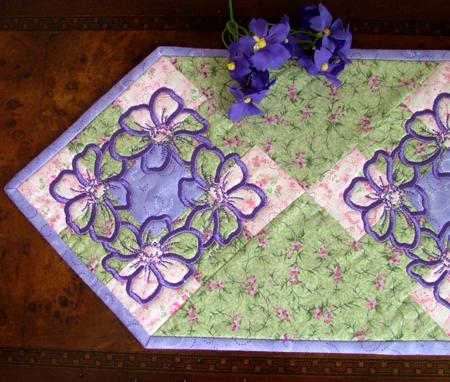
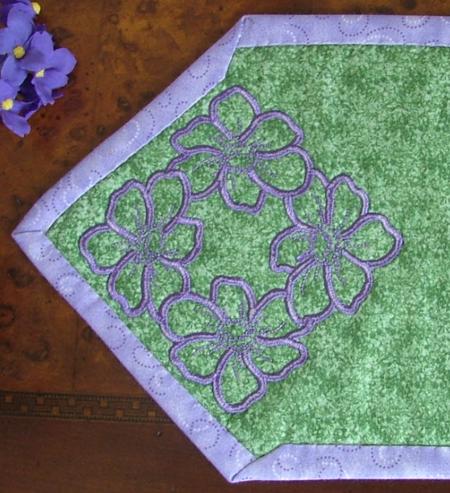
This small tablerunner with its spring colors and spring-themed embroidery is very easy to make. It looks great on a living room or magazine table. We used a combination of pink, light green and lilac fabrics with the embroidery in lilac. Other color combinations are also possible. The embroidery design used here is from the Flower Doily Set.
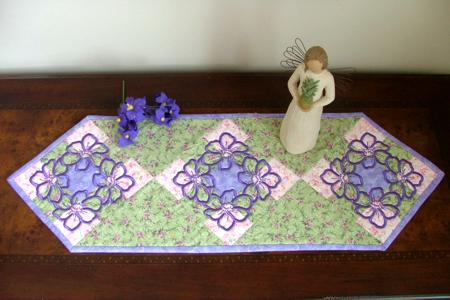
The finished size of the table runner is about 9" x 27".
You will need a fat quarter of light green fabric, 1/4 yard of lilac fabric and scraps of pink fabric. You will also need about 1/2 yard of fabric for the backing and a piece of low loft batting measuring about 12"x 30".
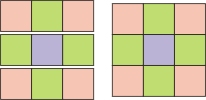
Out of pink fabric, cut 12 squares measuring 2 1/2" x 2 1/2".
Out of green fabric, cut four squares measuring 6 1/2" x 6 1/2" and 12 squares measuring 2 1/2" x 2 1/2";
Out of lilac fabric, cut 3 strips measuring 2 1/2" and the width of your fabric (40"-42"). From one of the strips cut 3 squares measuring 2 1/2" x 2 1/2" from one of the ends. Sew the strips into one long strip for the binding.
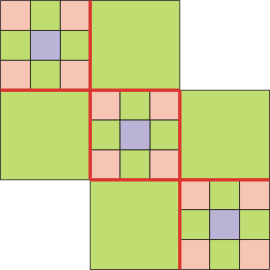
All seam allowances are 1/4". First assemble the nine-patch blocks according to the diagram below:
Now join the nine-patch blocks with the 6 1/2" x 6 1/2" green squares into rows, as shown in the diagram below.
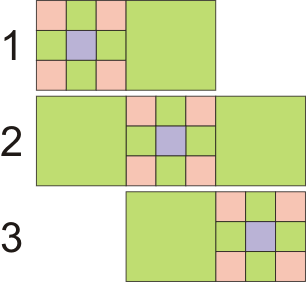
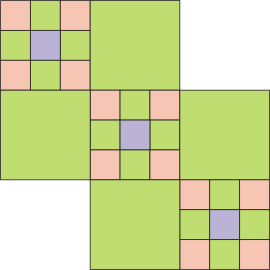
Join the rows:
Place the backing face down on a flat surface, spread the batting over it and cover with the working piece. Pin all three layers together on the large green squares.
Hoop the central nine-patch block and embroider the flower wreath from the Flower Doily Set through all three layers. You do not need any additional stabilizer! Use a 12/80 embroidery needle and 40-weight embroidery rayon or polyester thread.
After the first block is embroidered, take it out of the hoop and quilt in the ditch along the seams marked in red on the diagram.
Now you can take the pins out. Embroider the other two nine-patch blocks.
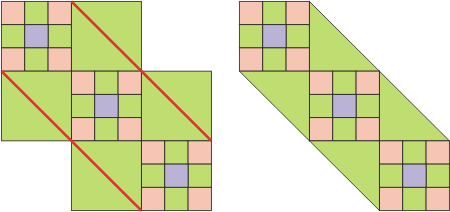
Press the working piece with steam. Place it on your cutting mat and trim along the diagonal lines of the green squares as shown on the diagram.
Finish the raw edges with the lilac binding.
This is what the back side of the table runner looks like:
We hope that you liked our idea and will come up with many of your own.


