The Oriental Impressions wall quilt participated in the Mancuso World Quilt Show XI in Manchester, New Hampshire in 2007.
It is embellished with the designs Blue Parasol (for mega hoop), Decorative Fan Set and Swallow Set.
If you do not have a mega hoop, you can use designs from the Geishas and Sakura Set or any other designs from our Oriental Section.

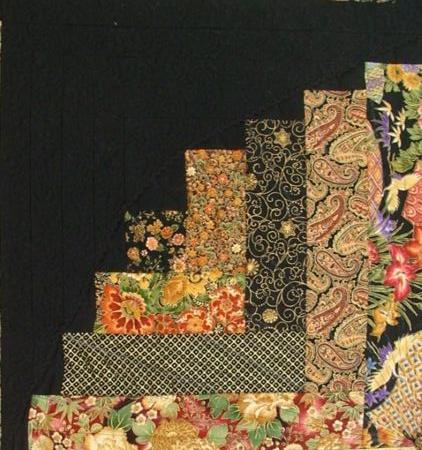
The finished size of the wall quilt is 56" x 56". The quilt consists of four "thick and thin" log cabin blocks measuring 14 "x 14" (finished) and five embroidered blocks measuring 14" x 14" (finished).
For the log cabin blocks, we used scraps of 8 different black fabrics with gold patterns and 2/3 yard of solid deep black fabric.
For the embroidered blocks, we used 2/3 yard golden cream fabric, and scraps of 2 black fabric with gold patterns for the frames. You will also need about 1 3/4 yard of oriental style patterned fabric for the borders and binding, batting and backing.
For the embroidery, you will need embroidery threads and polyester felt which will be used as a stabilizer.
For four blocks,
out of different black and gold fabrics cut :
4 squares 2 1/2" x 2 1/2" ( #1 on the diagram)
4 strips 2 1/2" x 4 1/2" ( #2 on the diagram)
4 strips 2 1/2" x 5 1/2" ( #5 on the diagram)
4 strips 2 1/2" x 7 1/2" ( #6 on the diagram)
4 strips 2 1/2" x 8 1/2" (#9 on the diagram)
4 strips 2 1/2" x 10 1/2" (#10 on the diagram)
4 strips 2 1/2" x 11 1/2" (#13 on the diagram)
4 strips 2 1/2" x 13 1/2" (#14 on the diagram)
out of solid black fabric cut:
4 squares 2 1/2" x 2 1/2" ("C" on the diagram)
4 strips 1 1/2" x 4 1/2" ( #3 on the diagram)
4 strips 1 1/2" x 5 1/2" ( #4 on the diagram)
4 strips 1 1/2" x 7 1/2" ( #7 on the diagram)
4 strips 1 1/2" x 8 1/2" (#8 on the diagram)
4 strips 1 1/2" x 10 1/2" (#11 on the diagram)
4 strips 1 1/2" x 11 1/2" (# 12 on the diagram)
4 strips 1 1/2" x 13 1/2" (#15 on the diagram)
4 strips 1 1/2" x 14 1/2" (#16 on the diagram)
Assemble the four blocks according to the diagram below. All seam allowances are 1/4". Do not forget to press a seam after you made it.
Out of golden cream fabric, cut 5 squares measuring 10 1/2" x 10 1/2".
For the first frame of the four corner blocks, out of black and gold fabric, cut 8 strips measuring 1 1/2" x 10 1/2" and 8 strips measuring 1 1/2" x 12 1/2".
For the second frame of the four corner blocks, out of a different black and gold fabric, cut 8 strips measuring 1 1/2" x 12 1/2" and 8 strips measuring 1 1/2" x 14 1/2".
For the central block, out of black patterned fabric cut 2 strips measuring 1 1/2" x 10 1/2" and 2 strips measuring 1 1/2"x 12 1/2". Out of solid black fabric, cut 2 strips measuring 1 1/2" x 12 1/2" and 2 strips measuring 1 1/2" x 14 1/2".
Assemble the blocks according to the diagram below:

Join the blocks according to the diagram below:
For the borders:
Out of golden cream fabric, cut 4 strips measuring 1" x 44".
Out of solid black fabric, cut 4 strips measuring 1" x 46".
Out of patterned fabric for the borders, cut 4 strips measuring 6 1/2" x 60".
Mark the center of each strip, align them and stitch them together in four sets as shown on the diagram.
Attach the borders to the quilt and make mitered corners.
If you want boxed corners, you will need golden cream strips 42" and 44'' long, solid black strips 44" and 46" long and wide patterned strips 46" and 52" long.
Now the top is ready for embroidery. Instead of the stabilizer we used white polyester felt. After a design was embroidered, we cut away the felt as close to the stitches as possible. This technique will make the embroidery puffy and after quilting you will get trapunto-like results.
Now place the backing on a flat surface (table) face down. Cover with batting. Spread the top over it.
Pin all three layers together with 1" pins and start quilting. We quilted along the lines of the applique to fix it in place, stitched in the ditch on the blocks and sashing and free-motioned the large free spaces.
After the quilting is finished, press the work with heavy steam and square the work -- all corners should be 90 degrees and opposite sides should be of the same length.
Finish the raw edges with binding using your favourite method.

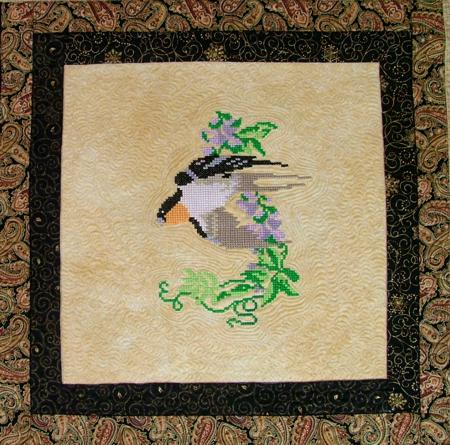
These are designs from the Swallow Set.
We hope that you liked our idea and will come up with many of your own.


