This first baby quilt features seven designs from the Musical Angel Set in the satin stitch technique and seven designs from the Musical Angel Redwork Set.
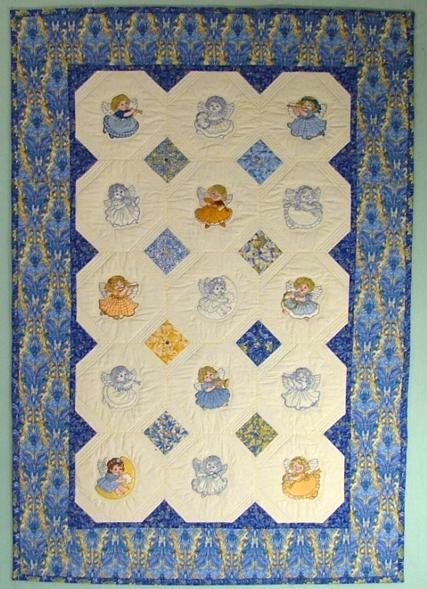
The finished size of the quilt is 50" x 34". We chose blue and yellow fabrics and made the embroidery in the same hues. You might try green and yellow, pink and white, or any other combination.
For our quilt, we used 1 yard of pale yellow fabric for the blocks with embroidery.
For the first dark blue border, the block corners and the binding, we used 1/2 yard of fabric.
The second border is 5" (cut 5 1/2") wide. Depending on the pattern of the fabric you might wish to cut it in different ways. We cut the left and right border lengthwise of our piece of fabric, and the upper and lower borders along the width, in order to preserve the pattern. As a result, we used 1 1/2" yard of fabric. If the pattern of your fabric permits and it's ok to make the side borders out of 2 parts, you'll need no more than 1 yard of it.
For the block corners scattered through the center of the quilt, you'll need eight 2" x 8" strips of different fabrics.
You will also need batting and fabric for the backing.
Out of pale yellow fabric, cut 15 squares measuring 8" x 8" each.
Out of each of the eight 2"x 8" strips of differently colored fabrics, cut 4 squares measuring 2" x 2". In the end, you should have 32 such squares.
Out of dark blue fabric, cut 28 squares measuring 2" x 2"; two strips measuring 1" x 25" for the upper and lower inner borders and two strips measuring 1" x 39 1/2" for the left and right inner borders. The rest of the fabric was used for the binding.
Out of the fabric for the outer border, cut 2 strips measuring 5 1/2" x 25" for the upper and lower borders and 2 strips measuring 5 1/2" x 50" for the left and right borders.
On your working table, or designer wall, lay out 5 rows with three 8" x 8" squares per row. The 8" x 8" squares should be face up. Pin the 2" x 2" dark blue squares to the outer corners of the outside blocks.
Then pin four 2"x 2" squares of the other colors to the adjacent corners of the blocks.
Take each of the quilt blocks in turn and sew across each corner along the diagonal, as shown in the diagram below. Cut, leaving 1/4" seam allowance. Unfold the corners and press.
Now lay the blocks out again, checking that corners of the same color go together.
Join the blocks in rows. Then, join the rows.

Attach the first border. Attach the left and right strips first, then attach the upper and lower strips.
Attach the second border. Attach the upper and lower strips first, then attach the left and right strips.
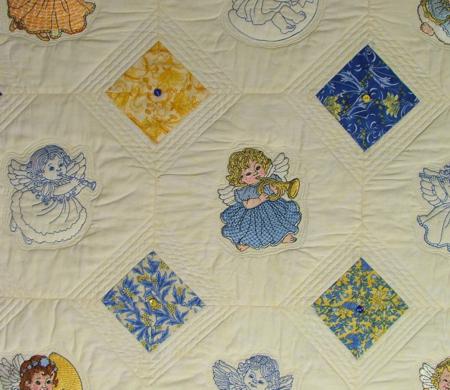
Now the quilt is ready for embroidery. We used the Musical Angel Set in the satin stitch technique and the Musical Angel Redwork Set.
We changed the colors of the embroidery to use blue and yellow hues. The one-color designs were embroidered in blue.
In all odd rows we embroidered 2 satin-stitch angels and a one-color angel in the center.
In all even rows we embroidered 2 one-color angels and one satin-stitch angel in the center.
You may have noticed that there are 7 angels in the Musical Angel Set, while you will need 8 of them. We embroidered the Angel with Flute twice, in the first and in the third rows. In the first row, the embroidery was made in blue and in the third row, it was done in yellow. As a result, the two stitch-outs look quite different.
 |
 |
We used DreamPoly batting instead of stabilizer. After each embroidery, we cut away the excess batting as close to the stitches as possible.
After embroidery, the top looked like this:
Now place the backing on a flat surface (table) face down. Cover with batting. Spread your working piece over it.
Pin all three layers together with 1" pins and start quilting. Start quilting from the center. We quilted along the lines of the embroidery and made several echo-quilting circles around the embroidery. Then we stitched in the ditch on the corners and made several echo-quilting squares around those. We quilted the borders with feathers, though it did not seem completely appropriate here, as the fabric is too busy.
For the backing, we used sky blue fabric.
After the quilting is finished, press the work with heavy steam and square it -- all corners should be 90 degrees and opposite sides should be of the same length.
Finish the raw edges with the binding. Press the finished quilt with heavy steam.
If it's a crib quilt, you are done. If it's a wall hanging, decorate the centers of the small squares with small buttons or bows.
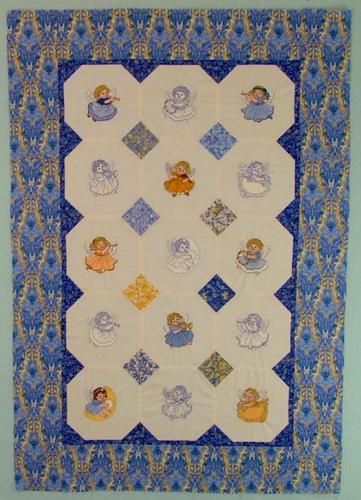
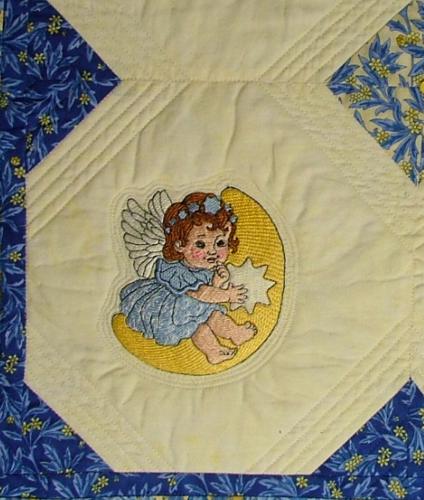
Here are more close-ups of the quilt.
We hope that you liked our idea and will come up with many of your own.


