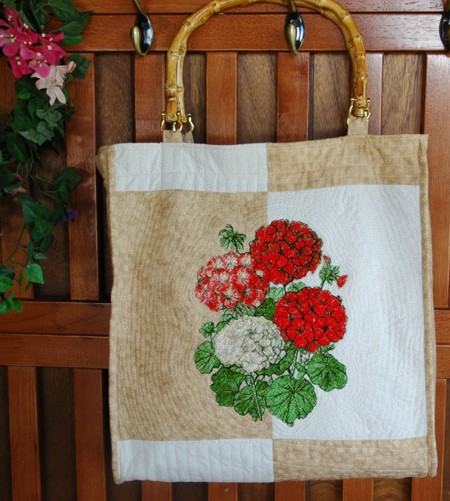
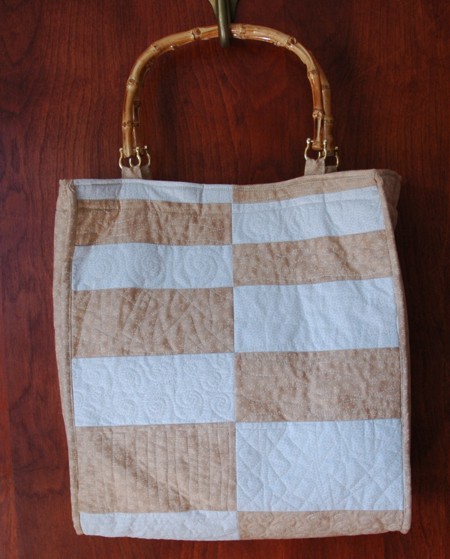
This summer tote-bag features the design Geranium for the commercial-sized hoop. However, you can use any smaller flower embroidery.
The bag is easy to make and is a great casual piece for the Summer season.
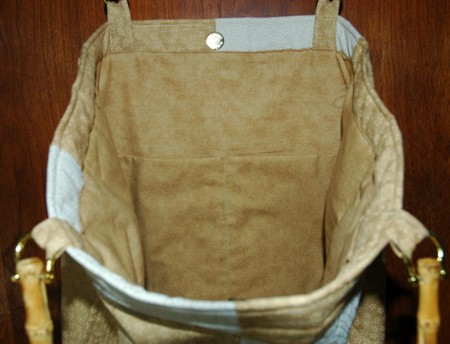
The finished size of the bag is about 16" high x 15" wide x 5" deep.
We used 2 fabrics: light cream (1/2 yard) and light beige (1 1/2 yard). We used the light beige both for the outer bag and for the lining. You can use a different fabric for the lining.
You will also need an 18" x 40" piece of low loft iron-on batting (the batting we used has one fusible side), and plastic or bamboo semi-circular handles (about 9" large) and a magnet closure (optional).
Out of light beige fabric, cut
1 strip 8" wide and the length of the width of the fabric (40");
4 strips measuring 5 1/2" x 16" (these are 2 side panels for the outer bag and 2 side panels for the lining);
1 strip measuring 15 1/2" x 34" (the lining)
1 strip measuring 15 1/2" x 20" (the inner pocket)
2 strips measuring 2" x 36"
1 strip measuring 3 1/2" x 24", subcut it into 4 strips 3 1/2" x 6".
Out of light cream fabric, cut
1 strip 8" wide and the length of the width of the fabric (40")
Stitch the two 8" wide strips together lengthwise. Press the seam to the darker fabric.

With your rotary cutter subcut the working piece into strips: measuring 4 1/2", 12" , 4 1/2", 3", 4 1/2", 3 1/2", 2 1/2" , 2 1/2", 3". Cut the strips exactly in this order and do not move them around, as this is will be the final layout of the bag.

Flip all the odd strips.
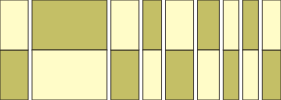
Sew all the strips together. The top should measure about 15 1/2" by 36".
Stabilize the largest (12") panel of the outer bag with iron-on cut-away stabilizer. Make the embroidery. Cut away the excess stabilizer.
You can also use polyester craft felt instead of the stabilizer. In this case we recommend to baste the top to the felt. After the embroidery is finished, rip the baste and cut away the excess felt around the embroidery.
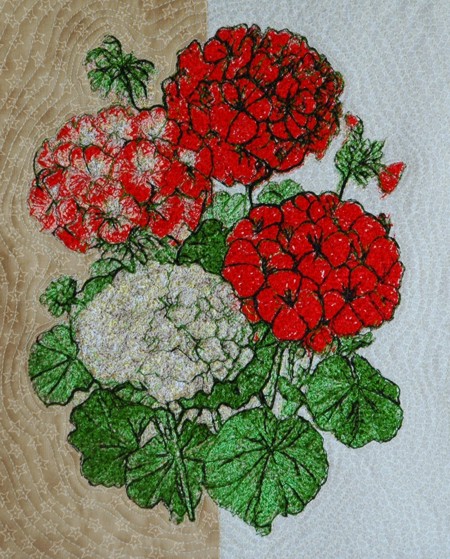
Now place the top on a piece of low-loft iron-on batting. Press to attach the top to the batting. Start quilting. We quilted along the lines of the embroidery and echo-quilted the part with embroidery. Then we quilted each strip in a free-motion style.
After the quilting is finished, press the work with heavy steam and square the work -- all corners should be 90 degrees and opposite sides should be of the same length.
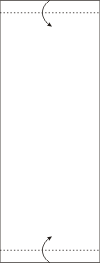
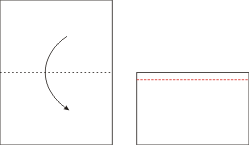
Fold the upper and lower edges 2" back. Press. Pin.
Fold the bag in half and mark the center line with pins.

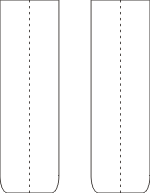
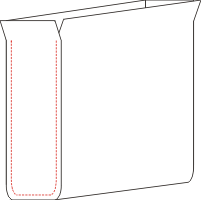
To make the side panels, take two strips measuring 5 1/2" x 16" and attach them to the low-loft iron-on batting. Cut away the excess batting.
Round the lower corners. Mark the center line of the panels with pins.
Align the pin on the side panel with the pin marking the center of the bottom of the bag. Starting from this point, pin the side panel and the bag together.
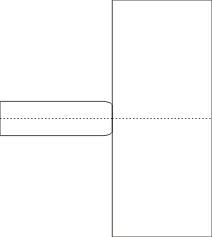
Sew (from the side of the panel) to attach the side panel to the bag. Leave 2" open at the top of the side panel. Note that the seam will be on the right side of the bag.
Repeat for the second panel.
Take the strips measuring 2" x 36" and use them to finish the raw edge of the seam between the main panel and the side panels. Leave 2" at the top open.
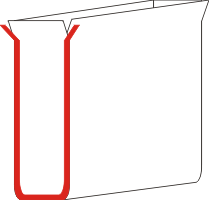
Turn the bag right side in. Tuck the ends of the tape between the side panel and the bag. Sew the seam closed.
Turn the bag right side out. Fold the upper edge 2" back and pin.
Take the strip measuring 15 1/2" x 20". Fold it lengthwise, face inwards. Sew along the long side.
Turn right side out. Press. This will be the pocket.
Take the 15 1/2" x 34" strip. Fold in half widthwise and press lightly to mark the bottom line.
Position the pocket about 3" from the bottom line. Pin. Top-stitch to the lining as shown.

Round the lower corners of the side panels (the 2 strips measuring 5 1/2" x 16" )
Fold the lining in half, face inwards. Attach the side panels in the same way as the side panels of the bag, except that the seams should be on the wrong side of the fabric.
Fold the upper edge of the lining 1" back. Press.
Insert the lining into the bag. Align all the side seams.
If you need a magnet closure, insert it now before the lining is sewn to the top.
Take the 3 1/2" x 6" strips. Fold them in half lengthwise. Press. Fold the raw edges inside to the fold and press again.
Topstitch 1/8" from the edges.
Fold in half and press.
Insert the ends between the top and the lining about 2" from the side seams. (Note that this distance will depend on the size of the handles. Our handles are 9".) Thread each loop through one end of a handle and pin in place.
Topstitch the the lining the the top, attaching the handles at the same time.
Topstitch 1/4" from the upper edge of the bag, reinforcing the handle loops.