This large quilt is very easy to sew even for beginners. The redwork embroidery made with a trapunto effect makes it remarkable. We used the Flower Fairy Redwork Set, Flower Fairy Redwork Set II, Flower Fairy Redwork Set III, and Flower Fairy Redwork Set IV.
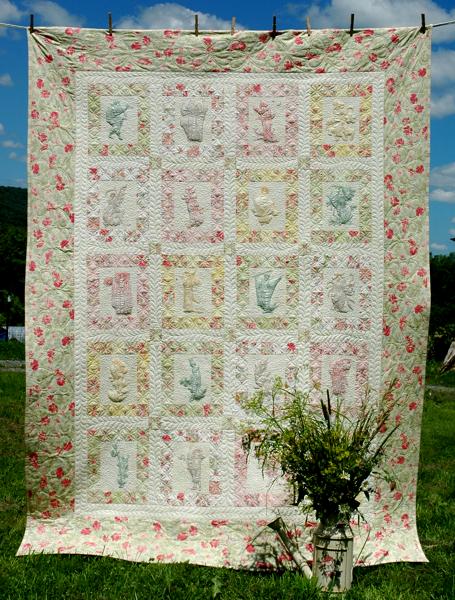
The finished size of the quilt is about 64" x 84".
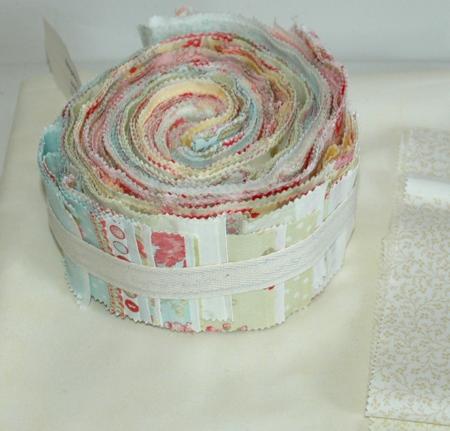
For the quilt we used 100% cotton fabrics from the "Simplicity" line, by 3 Sisters for Moda (www.modafabrics.com). We used very light cream for the blocks and sashing (2 yards), 1 pack of "jelly beans" for the blocks, and one of the fabrics from this series for the border and binding (about 2 1/2 yards).
You will also need backing and batting. For the embroidery, we also used red, dark green, light brown and dark yellow polyester felt (see the Embroidery section below).
Out of light cream fabric,
cut 4 strips 8 1/2" wide and the length of the width of the fabric. Subcut the strips into 20 rectangles measuring 6 1/2" x 8 1/2".
cut 15 strips 2 1/2" wide and the length of the width of the fabric. Subcut the strips into 16 strips measuring 2 1/2" x 10 1/2" and 15 strips measuring 2 1/2" x 12 1/2". Sew 6 of the strips together and subcut them into 2 strips measuring 2 1/2" x 50 1/2" and 2 strips measuring 2 1/2" x 68 1/2".
From the "jelly beans" pack we selected the white, green, yellow and pink strips. The strips are 2 1/2" wide.
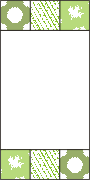
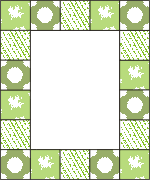
We made the borders out of green fabric with large flowers. Cut 8 strips 8 1/2" wide and the length of the width of the fabric. Also cut 8 strips 2 1/2" wide and the length of the width of the fabric for the binding.
Organize the "jelly beans" strips by color groups: white, pink, green and yellow. Sew together 3 strips from each color group.
Subcut each of the new strips into 10 strips 2 1/2" wide. You'll get 10 white, 10 green, 10 pink and 10 yellow strips measuring 2 1/2" x 6 1/2".
Sew the strips to the upper and lower edges of the light cream rectangles. You should get 5 pink-themed rectangles, 5-yellow-themed rectangles, etc.
Sew together 6 strips from each color group.
Subcut each of the new wide strips into 10 strips 2 1/2" wide. You'll get 10 white, 10 green, 10 pink and 10 yellow strips measuring 2 1/2" x 12 1/2".
Sew the strips to the left and right sides of the rectangles.
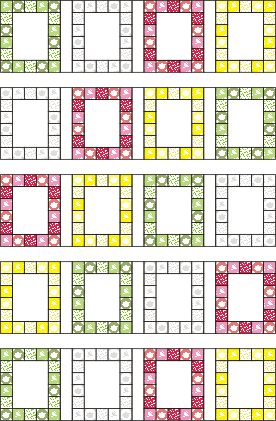
Organize the blocks into rows by colors. Our rows were laid out as follows:
1. green - white - pink - yellow;
2. white - pink - yellow - green;
3. pink - yellow - green - white;
4. yellow - green - white - pink;
5. green - white - pink - yellow.
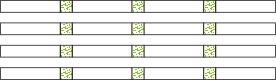
Add 2 1/2" x 12 1/2" sashing strips between the blocks and assemble them into rows as shown below:
To make the sashing rows, subcut one of the "jelly beans" strips into 12 squares measuring 2 1/2" x 2 1/2".
Using these squares and the 2 1/2" x 10 1/2" light creams strips, assemble 4 rows as shown below:
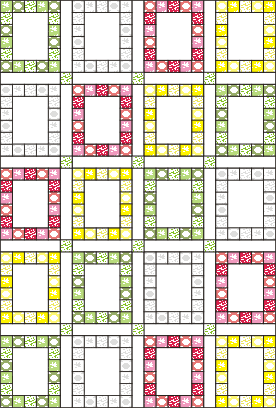
Stitch the rows and the sashing together as shown:
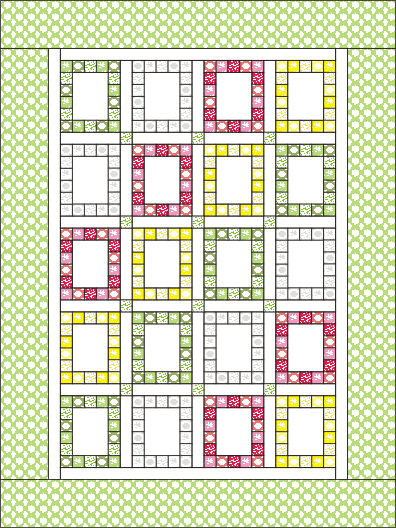
Add the first, light cream borders. First attach the upper and lower borders, then attach the left and right borders. Then, attach the second, green flower-patterned border. First attach the left and right borders, then attach the upper and lower borders.
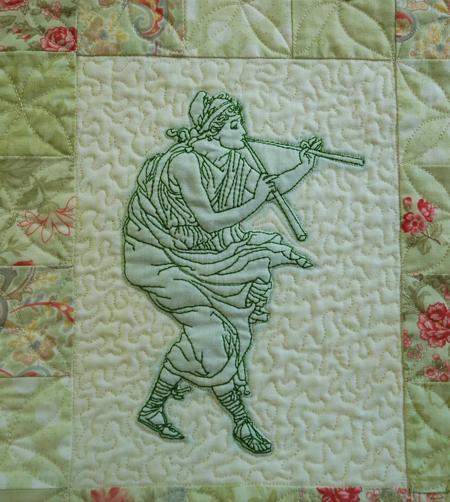
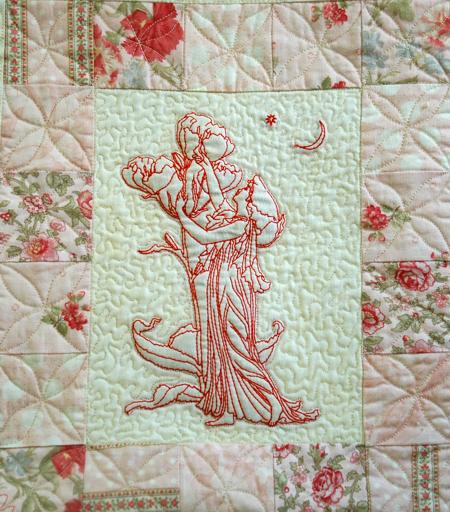
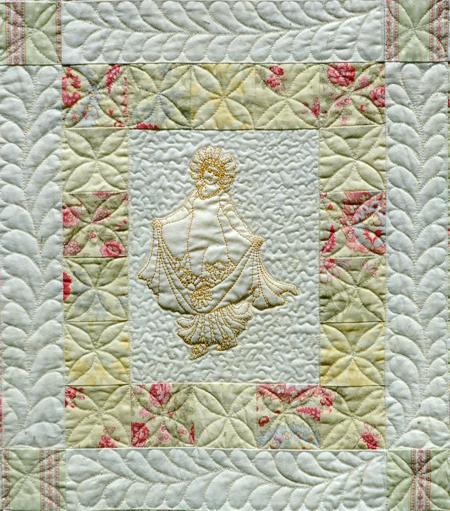
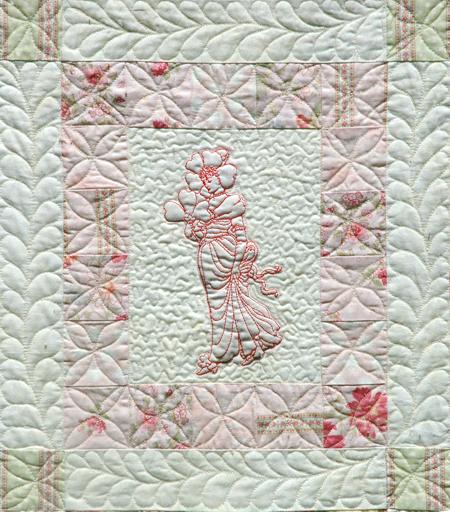
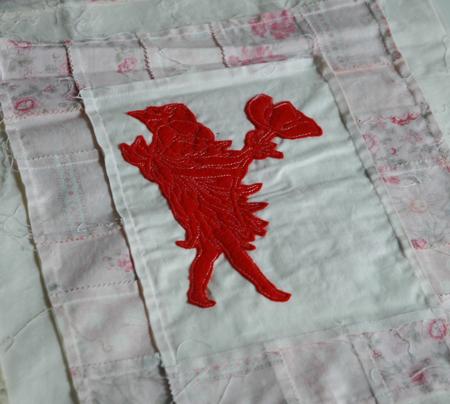
For the embroidery, we used red, dark green, light brown and dark yellow polyester felt, which is sold pre-cut in craft stores. The colored felt produces a "shadow trapunto" effect which further outlines the designs through the light cream fabric. You will need 5 sheets of each color. Place a piece of each color in a tub or bowl and cover with boiling water, to check that the colors do not run. Air dry your polyester.
Stabilize the central part of each block and baste the blocks to the felt in the ditch along the colored borders. Make the embroidery. After the embroidery is finished, rip the baste and cut away the excess felt around the embroidery.
We used the Fairies designs.
Now place the backing on a flat surface (table) face down. Cover with batting. Spread your working piece over it.
Pin all three layers together with 1" pins and start quilting. We quilted along the lines of the embroidery and made stippling all over the light part of the block. This will make the embroidery stand out.
After the quilting is finished, press the work with heavy steam and square the work -- all corners should be 90 degrees and opposite sides should be of the same length.
Finish the raw edges with the binding.
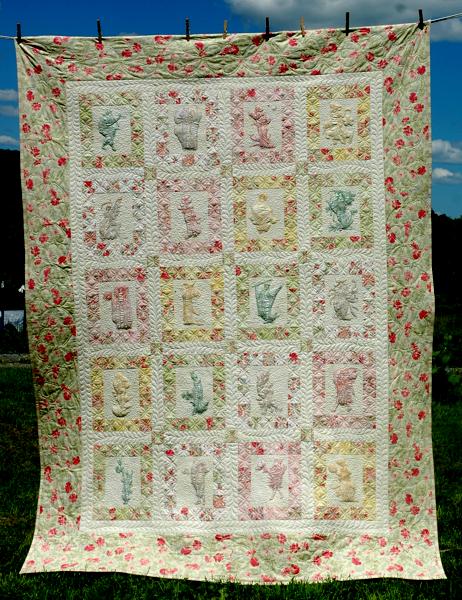
Here are some close-ups: