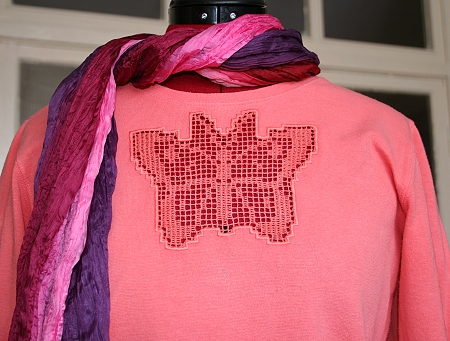
The insert design, the first one on the picture, we used to embellish a long-sleeved T-shirt.
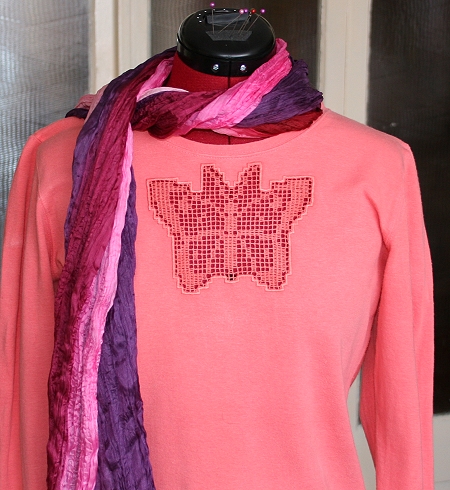
You will need a T-shirt, water-soluble Vilene stabilizer and 50- or 60-weight cotton embroidery threads. You can choose threads either matching the color of the T-shirt, or contrasting with it.
Important Note: Always make a test stitch-out of the design. To make this project, test it fully with a piece of knit fabric (use an old t-shirt). It's important because different threads behave differently after washing away the stabilizer. You might need to make several test stitch-outs before you will find the correct threads and machine settings for the job.
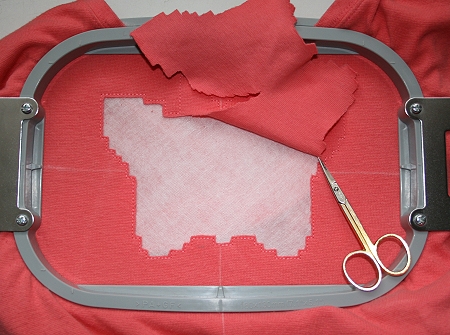
Step One: Pre-wash the T-shirt. Mark the place for the embroidery on the T-shirt and hoop it with one layer of water-soluble Vilene. Use the SAME thread for the needle and the bobbin.
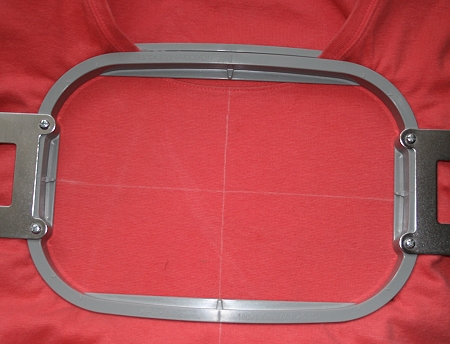
Step Two: Insert the hoop into the machine and start embroidering. The machine will embroider the outline and stop. Take the hoop out of the machine. DO NOT take the embroidery out of the hoop! With a pair of sharp scissors, cut away the fabric inside the outline.
Step Three: Insert the hoop into the machine and finish the embroidery.Dissolve the Vilene, rinsing the T-shirt several times. Spread flat to air dry. Press. The crochet insert is ready! You can make this lace insert not only on clothes, but also on table linen, curtains, etc.
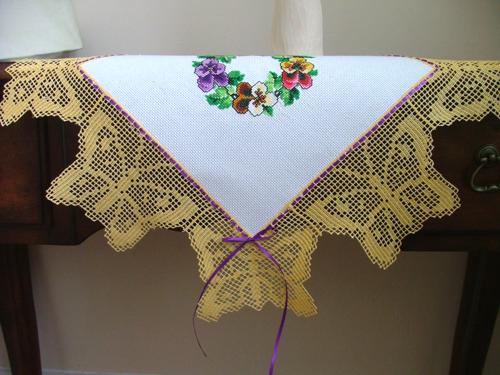
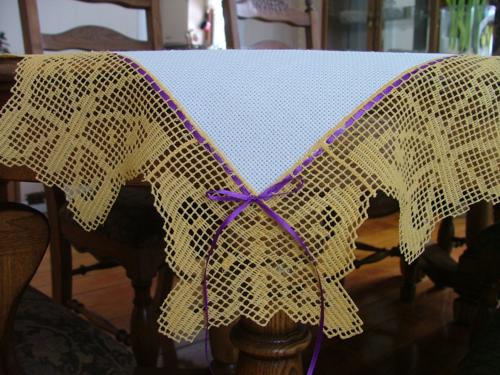
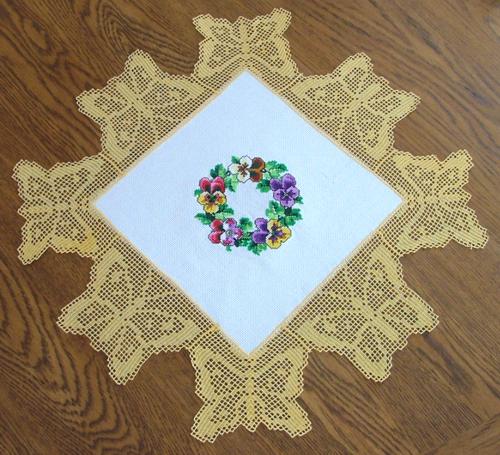
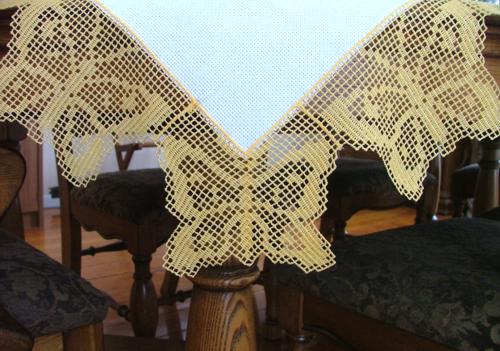
We used the edge butterfly designs to make this little doily.
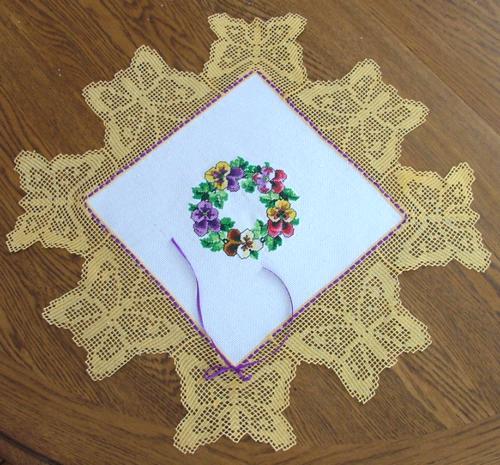
The finished size of the doily together with the lace is about 18" x 18". You will need a 12" x 12" piece of cotton or linen cloth (we used 14-count Aida), water-soluble Vilene stabilizer and 50-weight cotton embroidery threads.
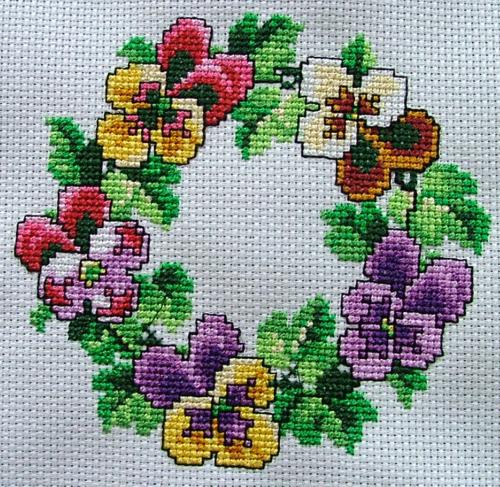
Step One: Pre-wash the fabric. Embroider the fabric insert first, then set it aside. For this embroidery, you can use any water-soluble stabilizer. For the embroidery, we used the Pansy Wreath cross-stitch design.
Step Two: Embroider the corner design four times (the second on the picture).
Embroider the edge design four times (the third on the picture).
To make a longer lace, embroider the edge design as many times as you need.
Trim the stabilizer, leaving at least 3/4" around each design. DO NOT dissolve the stabilizer at this point.
Please read the Step-by-Step Guide to Assembling crochet-style FSL Designs into a Project first.
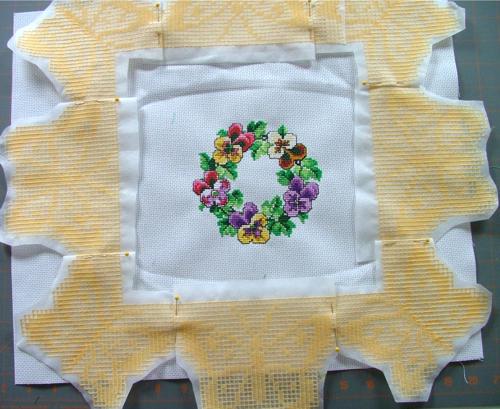
Step Three: Lay out the FSL patterns in accordance with the picture above and start stitching. Treat Vilene as fabric. Fold it and, using zigzag, stitch the FSL parts to each other. Use a dense zigzag stitch.

Step Four: Stitch the lace frame to the embroidered insert. Use a dense zigzag stitch. Trim the excess fabric under the lace.
Step Five: You can now go ahead and dissolve the water-soluble stabilizer. Place the doily into a bowl of warm water; change the water several times. So that the doily dries evenly, spread it on a flat surface and let it air dry. Then iron with steam.
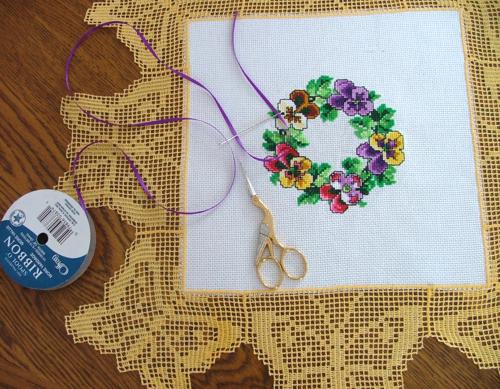
Thread the ribbon into the lace around the edge of the fabric.