The designs from our Purse and Belt FSL Set are embroidered as regular FSL. You can read about this in our General Guidelines.
To embroider this set we used 40-weight polyester embroidery threads; you can also use cotton embroidery threads. If you use cotton embroidery thread, we recommend to clean the machine after embroidering every part, because cotton threads, even ones specially made for embroidery machines, leave a lot of lint. Rayon embroidery threads are not strong enough for this project.
Some points to remember from the General Guidelines:
Use Vilene water soluble stabilizer;
Use the same thread for the upper and bobbin to get two-sided embroidery.
DO NOT embroider several designs in one hoop.
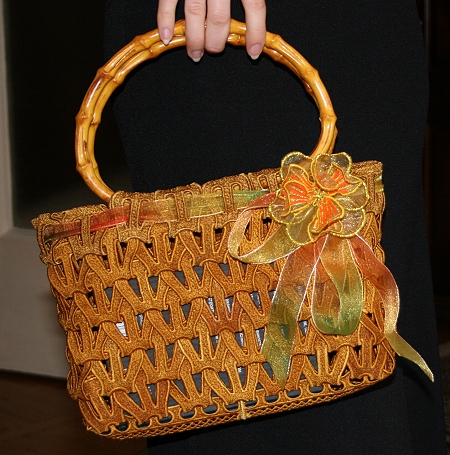
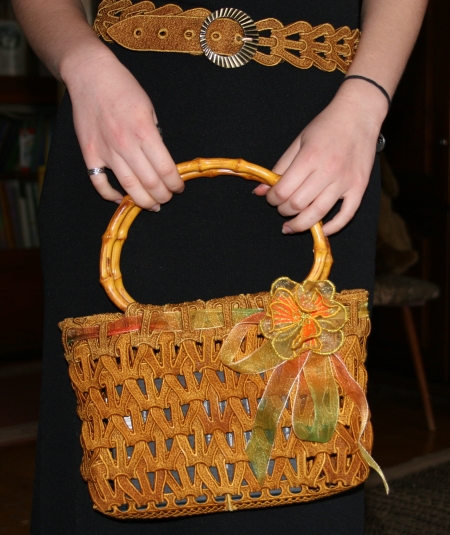
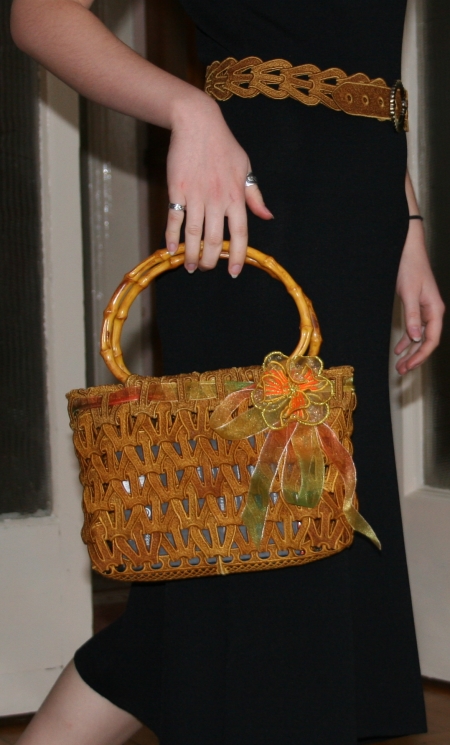
The finished size of our purse is about 14" wide x 9" tall. You can make it higher, if you wish. You will need: embroidery thread (about 8,000 yards of it), water-soluble Vilene and purse handles about 6" wide in the spot where they are attached to the bag.
Fabric for lining, organza for the flower and organza ribbon for decoration are optional.
Threads: We used embroidery polyester threads. The embroidery is two-sided, so the 8,000 yards include both the needle and bobbin thread.
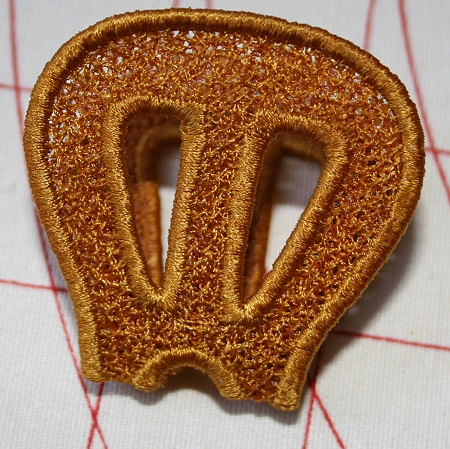
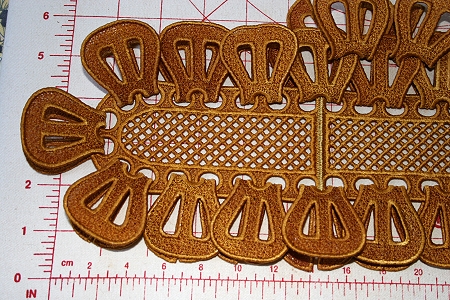
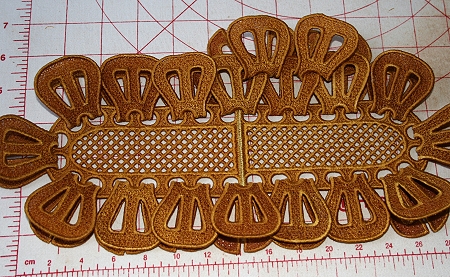
Step One: Embroider: part #1 - 80 times
part #2 - 2 times
part #5 - 16 times
Step Two: After you embroider the neccessary parts, rinse the stabilizer and leave to air dry. Press all parts with steam.
Step One: To make the bottom of the purse, using invisible thread, zigzag two parts #2 together.
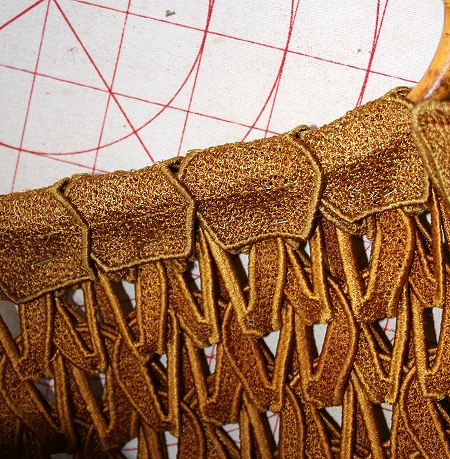
Step Two: Take one part #1 and fold it as shown on the photo:
Now insert the flaps of part #1 into two holes of the bottom. Attach 16 parts #1 to the bottom in this way. There is no need to sew or use any sort of adhesive.
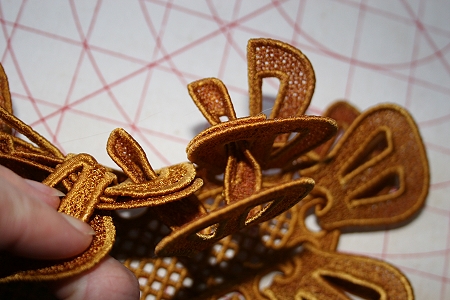
Step Three: Insert another 16 parts into the slots of the first row, connecting the neighboring parts of the first row.
Step Four: Attach the third, the forth and the fifth rows in the same way. Each row should consist of 16 parts.
Step Five: Take 16 pieces #5 and insert them into the last, fifth row as before.
Using invisible thread, machine-stitch the flaps to secure them. Part #5 has a tab on the end, and you should have 16 tabs sticking out along the top edge of the bag.
Step Six: Now fold the 8 tabs on both ends inwards. Leave the 8 tabs in the center open. Machine-stitch around the edge to secure the folded flaps in place.
Step Seven: Take a handle and fold four of remaining flaps over it. Secure with pins. Repeat with the second handle.
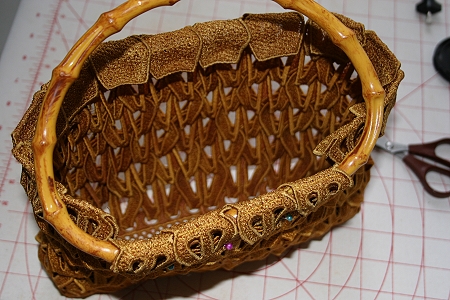
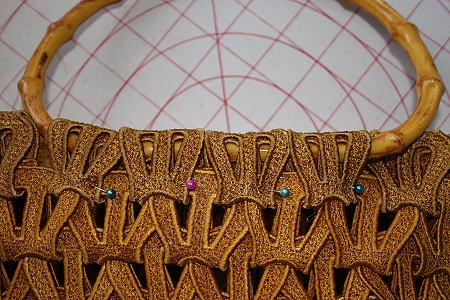
Step Eight: Machine-stitch to secure in place.
The purse is ready.
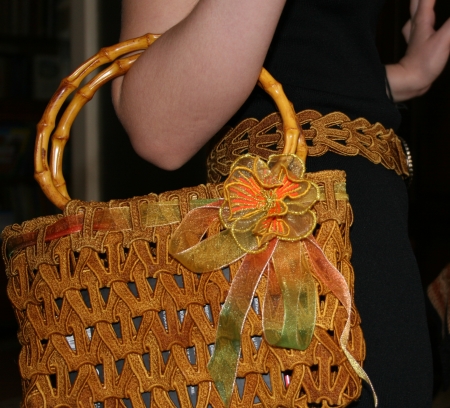
You can decorate the purse with beads, silk flowers, ribbons and so on. We decorated it with an organza ribbon and a FSL flower. The flower design is enclosed in the package.

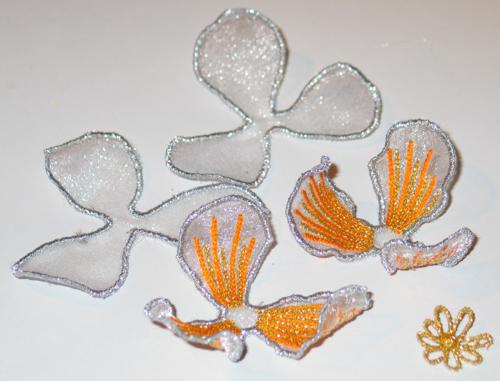
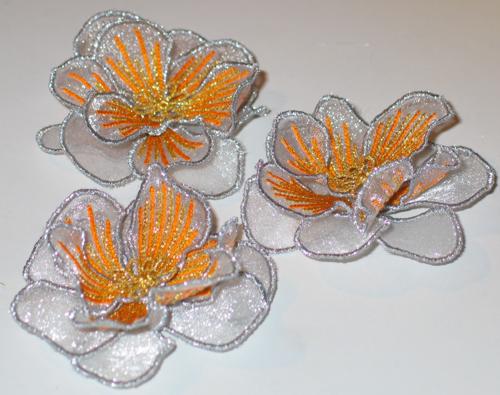
To make the flower, use a piece of organza sandwiched between two pieces of water-soluble Vilene. Embroider parts one and two twice. Embroider part 3 on Vilene only. Rinse the stabilizer and leave to air dry. Cut away the excess organza. Do not press.
Place all three parts over one another and stitch together. Sew onto the purse, or onto a ribbon and tie onto the purse.

To make the belt, you will need embroidery threads, water-soluble Vilene stabilizer and a buckle.
Step One: Embroider part #3 once, part #4 once, and part #1 as many times as needed. Each part #1 is about 2 inches long, so for a belt measuring 30", you will need 15-16 such parts.
Use 2 layers of water-soluble Vilene stabilizer. Rinse the stabilizer and leave to air dry. Before assembling, press with steam.
Start assembling with part #3. Insert the free flaps of one of the parts #1 into the slots of part #3. Fold. Insert the flaps of the second part #1 into the slots of the previous part #1, and fold. Repeat with all the remaining parts #1 until you get the length you need.
When you're satisfied with the length of the belt, insert the flaps of part #4 into the slots of the last part in the belt. Take the buckle, inserting the pin of the buckle into the small hole. Fold the flaps over the center of the buckle. Hand-stitch the flaps to secure them. The belt is ready!
We hope that you liked our set and the possibilities that it offers. Enjoy!
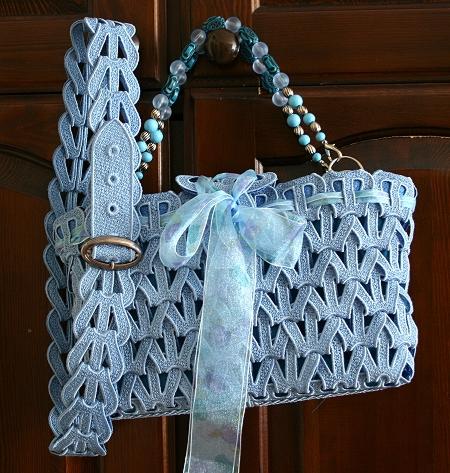
This is a blue version of the same purse. This work won The Grand Prize and Creativity Award at Embroidery Classic 2007.


