
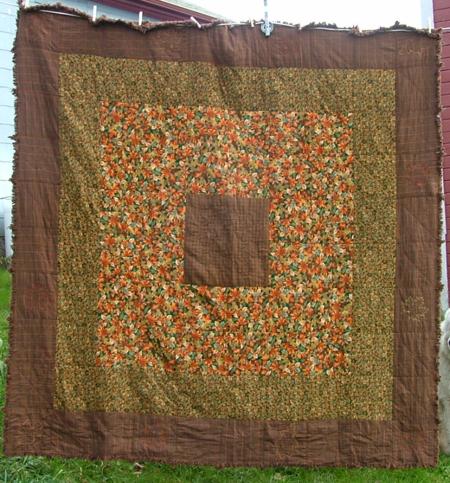
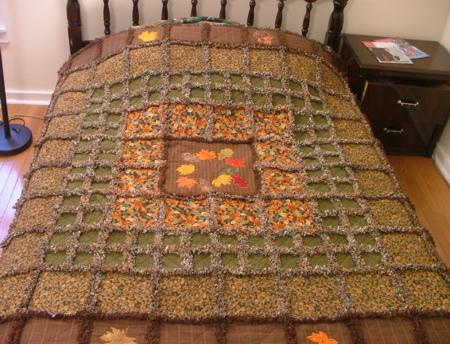
The finishes size of the quilt is 80" x 80". Five differently patterned flannel and home spun plaid fabrics were used.
You will need:
1. 3/4 yard of light brown flannel;
2. 4 1/2 yard of flannel with a large leaf pattern;
3. 2 1/2 yard of green flannel;
4. 4 yards of flannel with a small leaf pattern;
5. 5 1/4 yard of dark brown flannel.
Yardage is based on a 42" usable width of fabric.
You will also need low-loft cotton batting and scraps of autumn-colored 100% cotton fabrics for leave applique.
Cutting:
When cutting strips, please cut across the width of the fabric.
1. Out of light brown fabric cut two squares measuring 18" x 18".
2. Out of fabric with a large leaf pattern: cut 6 strips 10" wide and sub-cut them into 10" x 10" squares. You will need 24 of them. Cut 12 strips 6" wide and sub-cut them into 6" x 6" squares. You will need 80 of them.
3. Out of green flannel, cut 12 strips 6" wide. Sub-cut the strips into 6" x 6" squares. You will need 80 of them.
4. Out of fabric with a small leaf pattern cut 14 strips 10" wide and sub-cut them into 10" x 10" squares. You will need 56 of them.
5. Out of dark brown fabric cut 18 strips 10" wide and sub-cut them into 10" x 10" squares; you will need 72 of them.
Out of batting, cut one square measuring 15 3/4" x 15 3/4", 76 squares measuring 7 3/4" x 7 3/4" and 80 squares measuring 4 3/4" by 4 3/4".
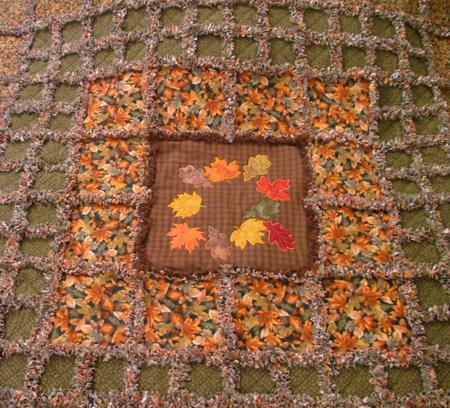
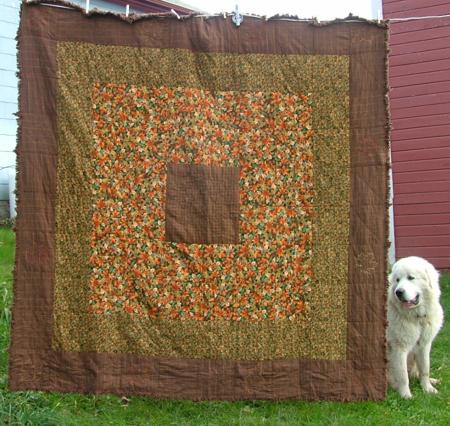
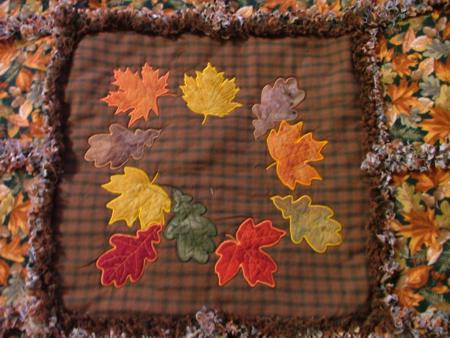
For the central part, place an 18" flannel square right side down and cover with a 15 3/4" square of batting, matching the centers. Cover with the second 18" flannel square right side up. This sandwich is ready for embroidery. We embroidered a wreath of autumn leaves, using designs for the small hoop (4" x 4") from the Autumn Leaves Applique Set.
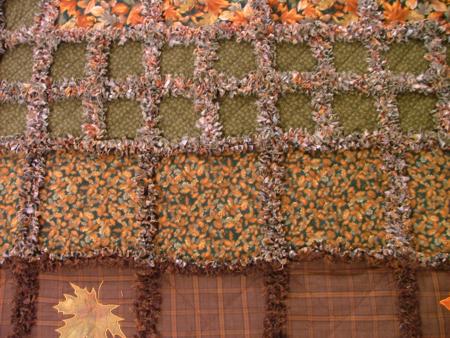
Out of the 24 10"x10" squares with a large leaf pattern, make 12 sandwiches. Quilt them with an X from one corner to the opposite one.
Out of the 80 green 6"x 6" squares and 80 6" x 6" leaf-patterned squares, make 80 sandwiches. The green part should go on the top and the patterned part should go on the back of the sandwich. Quilt them with an X.
Out of the 56 10"x10" squares with a small leaf pattern, make 28 sandwiches.uilt them with an X from one corner to the opposite one.
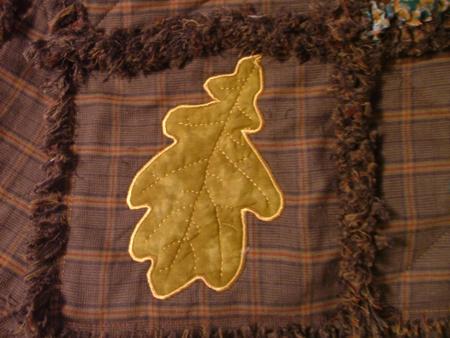
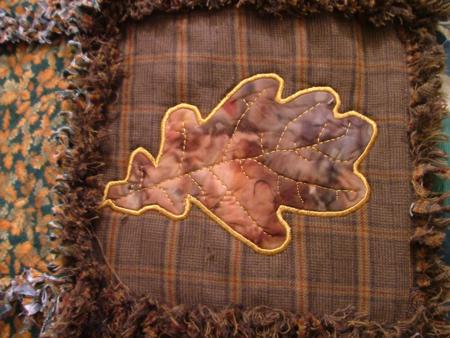
Out of the 72 10" x 10" dark brown squares make 36 sandwiches. Embroider 12 sandwiches with applique leaves. Quilt the remaining 24 sandwiches with an X.
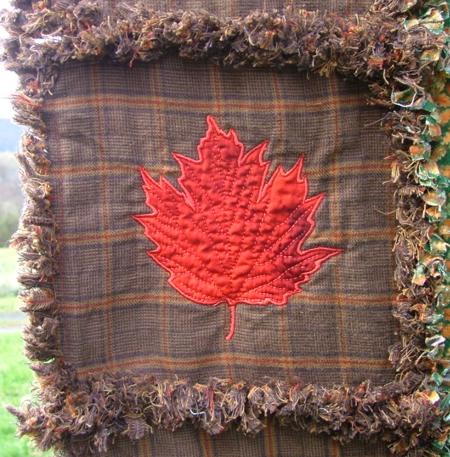
For the brown blocks we used designs for the large hoop (5" x 7") from the Autumn Leaves Applique Set.

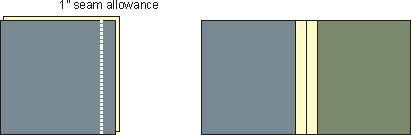
Pin two blocks back to back and stitch down one side, 1" from the edge. Press the seam allowances open. They will lie on the top side of the quilt.
Assemble every four 6" x 6" squares into 10"x10" squares (four-patch units).
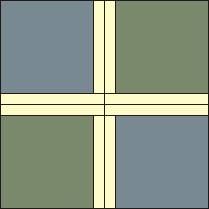
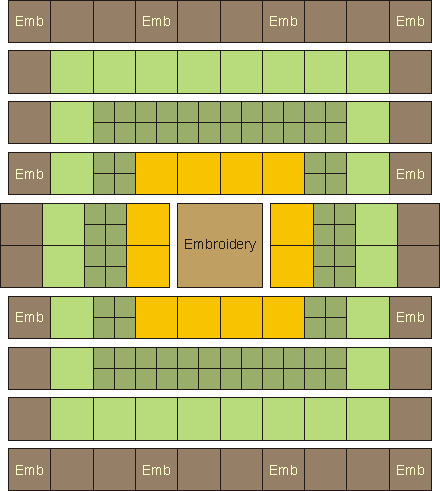
When assembling the quilt, sew the blocks into rows first, then sew the rows together. The opened seams should always be on the top! Follow the diagram layout below:
This is what the back of the quilt looks like. All seams are finished.
To finish the quilt edges, topstitch around the outside edge 1" from the the edge. It's also possible to finish the edges with the regular binding.
Clip the 1" seam allowance on each seam and the edges of the quilt every 1/4" -1/2", to make a fringe. DO NOT clip through the seam.
Washing and Drying
Now the quilt is ready for washing and drying. There will be a lot of lint! We recommend to use a laundromat. Commercial washing and drying machines have powerful filters and lint traps. Washing at home may clog your washing machine and pipes.
To: Pansy Throw for Mom.
To: Winter-Themed Quilt for a Boy


