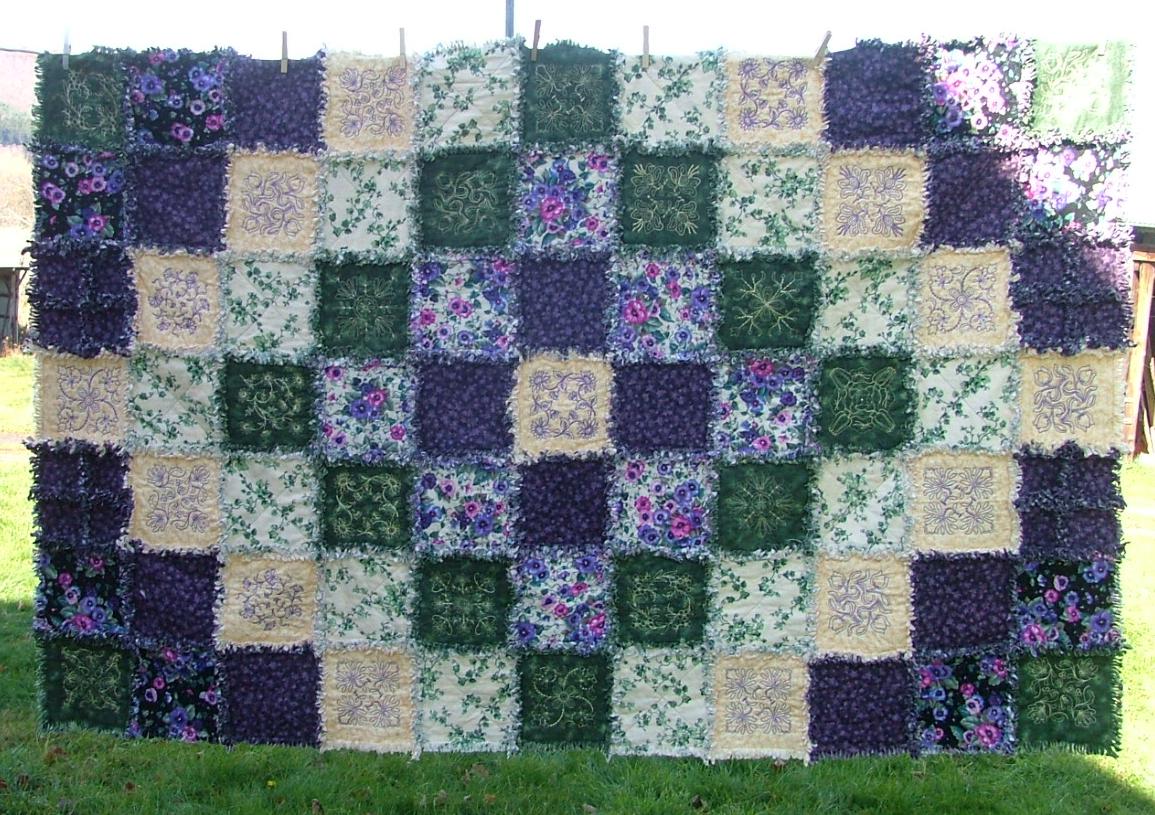
Of all large projects, frayed-edge or raggedy, flannel quilts are the easiest, most fun and quickest to make, while the warm, cozy and comfortable results make them great gifts! Here we show you three raggedy quilts embellished with embroidery and instructions on how to make one of them. The principles are the same for all frayed-edge quilts, so you can easily design your own.
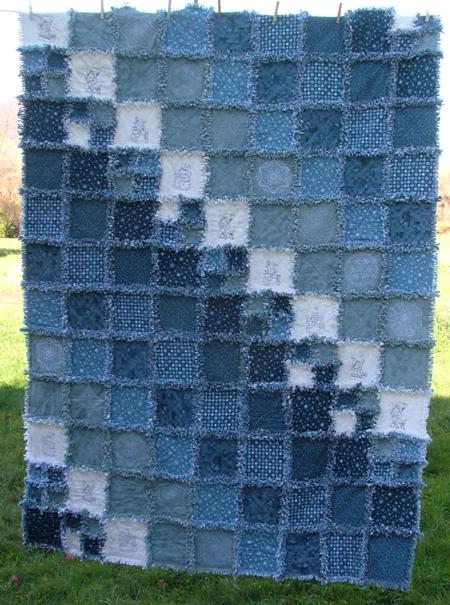

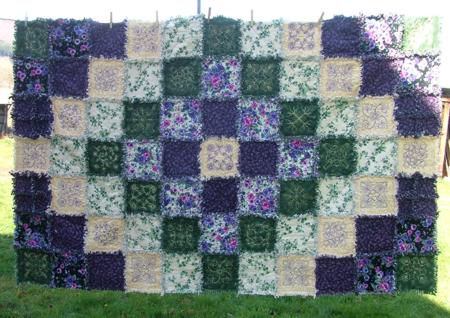
Pansy Throw for Mom. The finished size is 49" x 77". The quilt is decorated with embroidery - Quilt Block Set and Quilt Block Set II. To see more pictures and a short description of the quilt, click here.
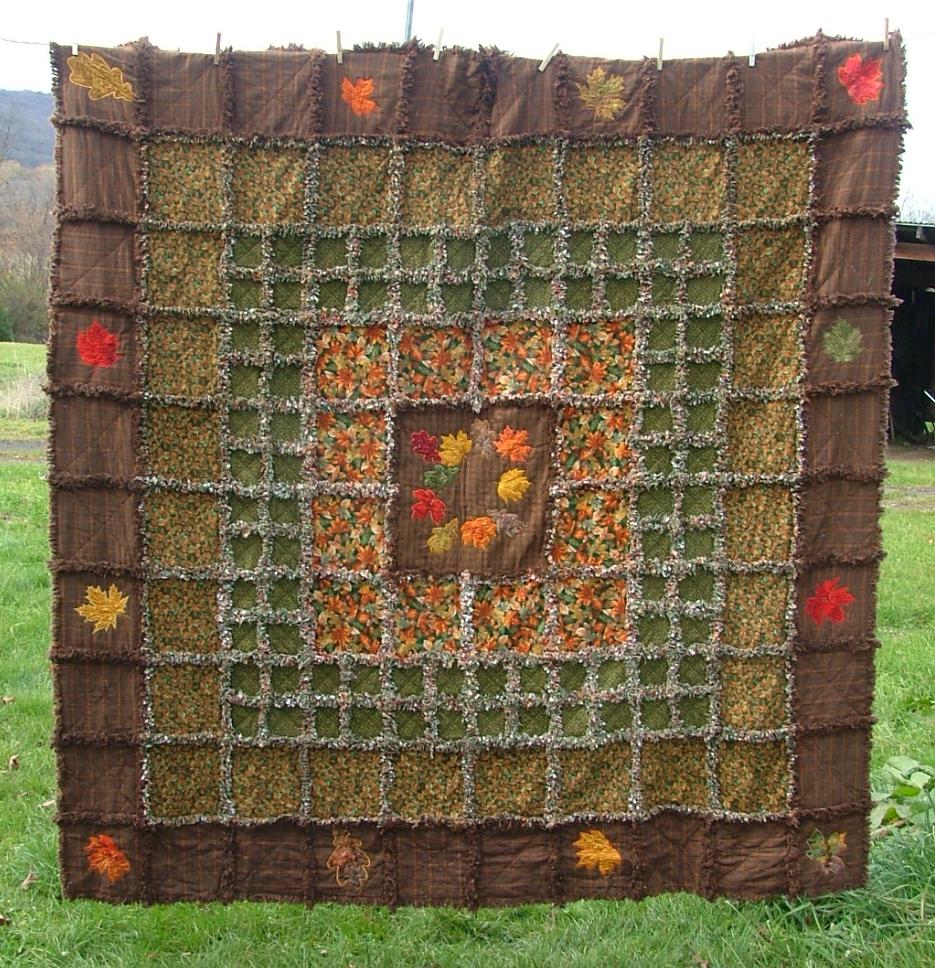
Autumn Leaves Quilt. The finished size of the quilt is 80" x 80". The quilt is decorated with Autumn Leaves Applique Set. The instructions for this quilt are enclosed.

DO NOT prewash the fabric, but remove the salvage edges.
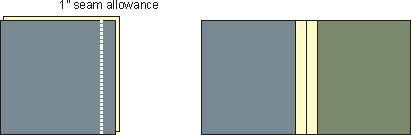
All seams allowances are 1".
All seam allowances are on the outside of the quilt and should be pressed open.
Use a walking foot for sewing.
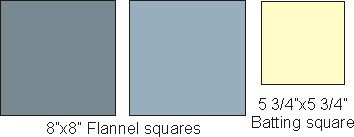
Step One: Out of flannel cut 2 squares of the required size, not forgetting to include 1" seam allowance on each side. Out of the batting, cut a square about 2 1/4" smaller than the flannel square. (For example, if the finished size of the block is 6" x 6", cut 2 flannel squares 8" x 8" and a batting square measuring 5 3/4").
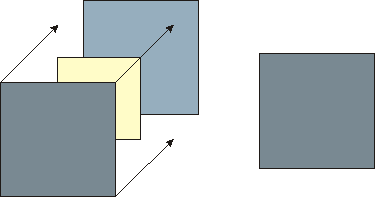
Step Two: Place a flannel square right side down. Cover it with a square of batting, matching the centers of the squares. Cover with the second piece of flannel right side up, aligning the edges with the first flannel square.
Step Three: This sandwich is ready for embroidering. Hoop and embroider any redwork or applique design. If you are not going to embroider the block, quilt it - sew an X from one corner to the opposite one. Use the same thread in the needle and in the bobbin of your machine.
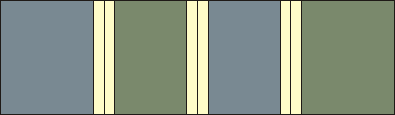
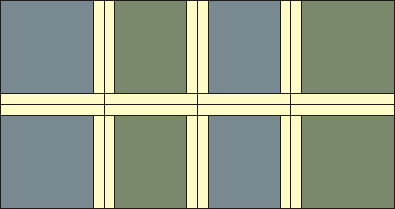
Sewing the blocks together.
Pin two blocks back to back and stitch down one side, 1" from the edge. Press the seam allowances open. They will lie on the top side of the quilt.
When assembling the quilt, sew the blocks into rows first, then sew the rows together. The opened seams should always be on the top!
To finish the quilt edges, topstitch around the outside edge, 1" from the the edge. It's also possible to finish the edges with regular binding.
Fringing the Quilt
Clip the 1" seam allowance on each seam and the edges of the quilt every 1/4" -1/2", to make a fringe. DO NOT clip through the seam.
Washing and Drying
Now the quilt is ready for washing and drying. There will be a lot of lint! We recommend to use a laundromat. Commercial washing and drying machines have powerful filters and lint traps. Washing at home may clog your washing machine and pipes.


