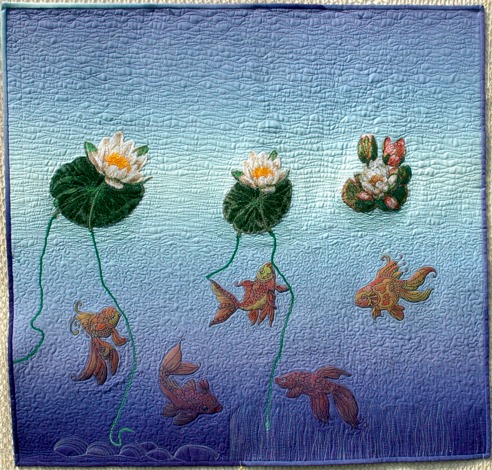
A goldfish pond is beautiful and relaxing to contemplate on a summer evening. On the other hand, you can enjoy this quilted pond all year around! This is a fun, whimsical quilt that's easy to put together and leaves you lots of room to express your own creativity.
We used one-color designs from the Goldfish One-Color Set for the large (5" x 7") hoop, and 2 designs in the photo-stitch technique, Water Lily and Water Lily for the large and mega hoops.
The finished size is about 33" x 35".
|
|
You will need
- embroidery threads,
- medium-weight cut-away stabilizer,
- water-soluble mesh stabilizer and organza,
- about 1 yard of blue fabric; we recommend
Kaufman Artisan Handpaints Ombre Stripe Nightfall (# 0404445) or
Essential Gradations Ombre Ultra Blue (# 0292338) or any other cotton fabric with similar color changes; alternatively you can piece the background out of strips of 5-7 different blue hues;
- Steam-a-Seam2 (or similar product) - a double-sided adhesive and fusible film, or fabric glue;
- backing and bating,
- fabric coloring pencils, markers, or dyes (optional).
|
Cutting:
|
| This is a wholecloth quilt. From the piece, cut 4 strips 2 1/2" wide and the length of the width of the fabric for the binding. Use the remaining fabric for the quilt. |
Embroidery:
|
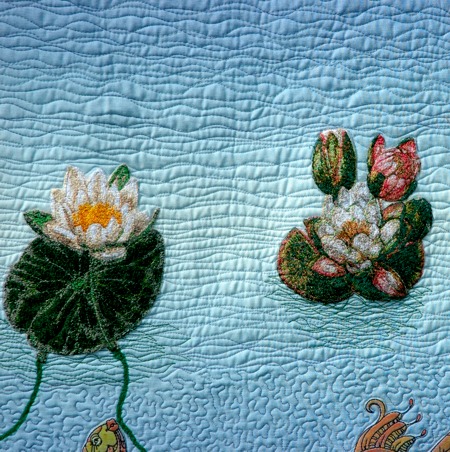
Upload the photo-stitch designs of water lilies into the machine. Print out the color-cards. Select and prepare threads.
Hoop organza with 2 layers of watersoluble mesh.
Embroider the designs.
Cut away the excess stabilizer. Place the stitch-outs in a bowl of lukewarm water to dissolve the remaining stabilizer.
Leave the stitch-outs to air dry. |
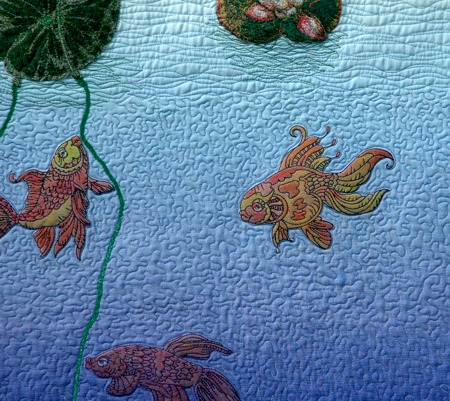
Print screenshots of the fish designs. Cut them out and with their help decide where you want to place each fish on the quilt..
|
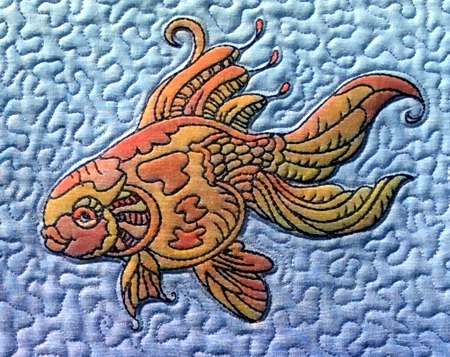
Embroider the fish one by one.
Below is one of the stitch-outs after applying some fabric dyes.
|
|
| Lay the water lily stitch-outs out above the fish on the quilt top. |
| Using either fabric glue 0or fusible film, attach the lilies to the fabric. |
|
| Quilting and Finishing: |
Now place the backing on a flat surface (table) face down. Cover with batting. Spread your working piece over it.
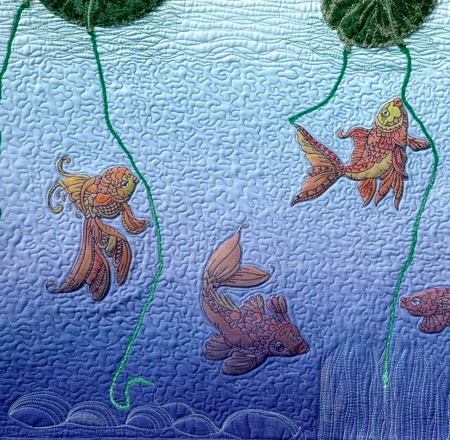
Pin all three layers together with 1" pins and start quilting. We quilted with a meandering pattern around the fish embroidery and all "underwater" parts of the quilt and in a freemotion style imitating waves on the upper part of the quilt. |
After the quilting is finished, press the work with heavy steam and square the work -- all corners should be 90 degrees and opposite sides should be of the same length.
Finish the raw edges with the binding.
|
| Using fabric dyes, add some color to the fish. |
|

|
|
Your wall quilt is done. Enjoy!
|
|
Back to Goldfish One-Color Set, Water Lily and Water Lily
|
Back to the Project Page
|


