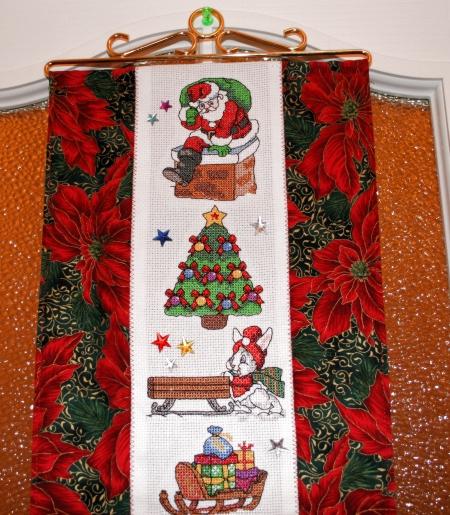
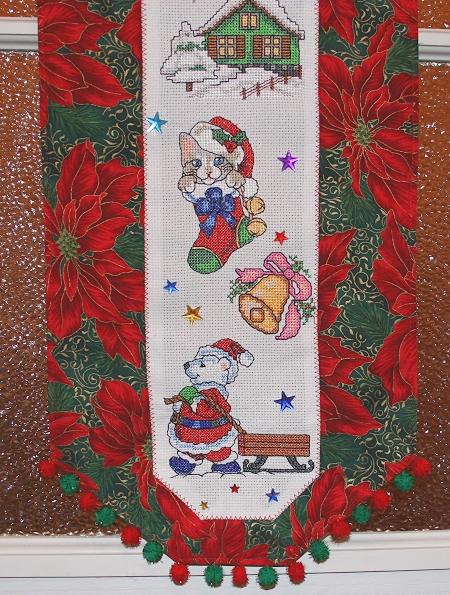
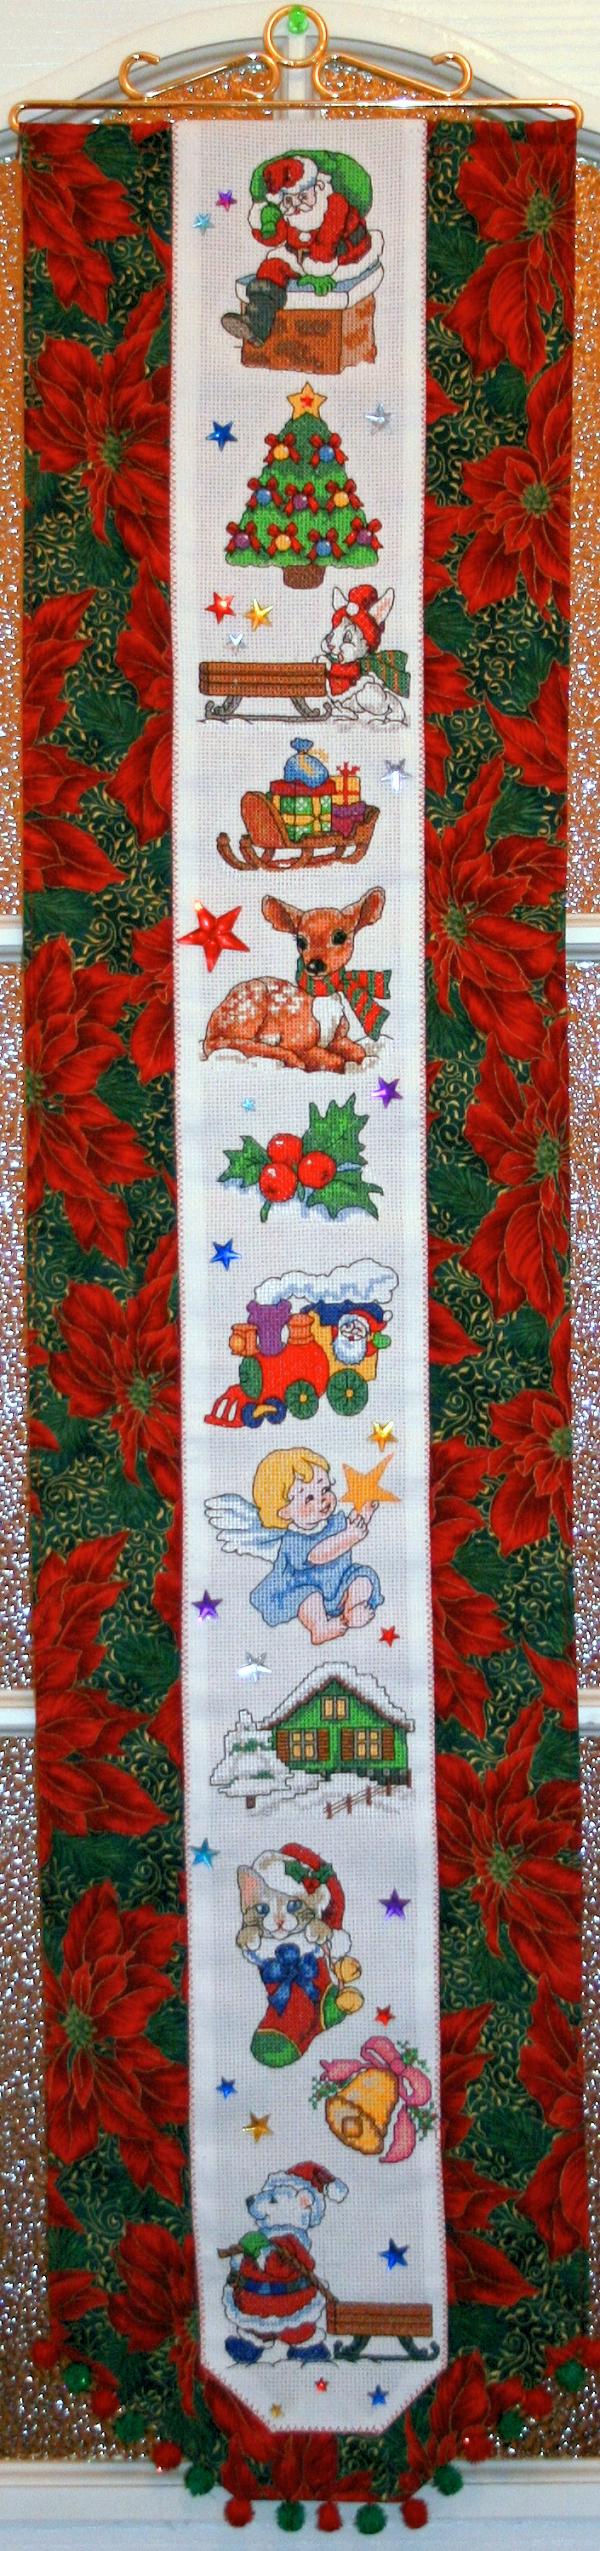
The finished size of this beautiful wall hanging is about 10" x 41". We hung it on a door, but you can use it to decorate any long and narrow space. The quilt can be made shorter or longer depending on what you prefer. We used the designs from the Christmas Miniature Set I and Christmas Miniature Set II.
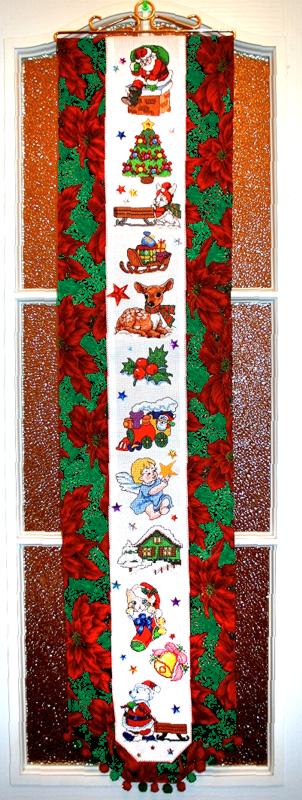
For the project, you will need a strip of 14-count cotton Aida and cotton fabric with a Christmas pattern. The Aida strip should be about 6" wide and 40"-41" long. You will need about 20" x 42" of fabric. We used fabric that was 42" wide. If you don't have that available, you can stitch two or more pieces together to make one.
You will also need a self-adhesive tear-away stabilizer.
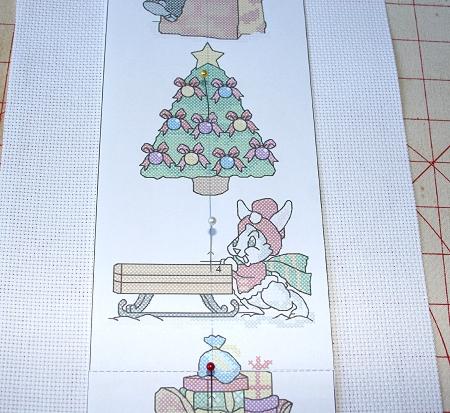
Step One: Choose the designs you want to embroider on your wall hanging. Print out screenshots of the embroidery files to help you decide where you want to place them. It helps if your software allows you print the designs out with their centers marked.
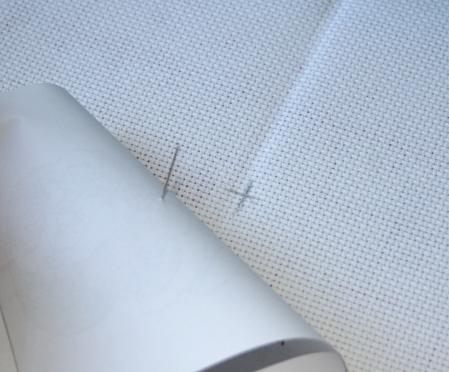
Step Two: Find the central axis on the piece of Aida. Fold it lengthwise and press lightly.
Pin the print-outs to the strip.
Step Three: Mark where the centers of the designs go, on the fabric.
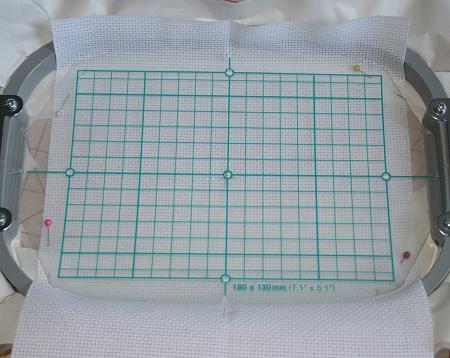
Step Four: Hoop the self-adhesive tear away stabilizer and peel away the protective backing inside the hoop.
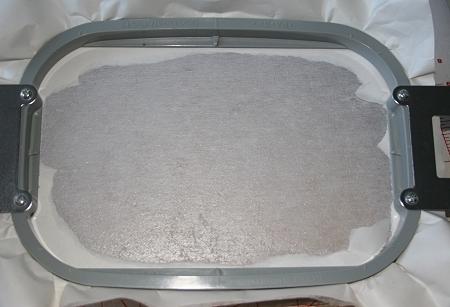
Step Five: Using the grid, mark the center of the hoop on the stabilizer. Matching the center of the first pattern with the center of the hoop, stick the fabric to the stabilizer. Embroider the first pattern.
Repeat step five for each of the patterns.
Step Six: When you are done embroidering, fold all raw edges back 1/2" and press.
Step Six: Out of fabric with a Christmas pattern cut two strips measuring 10" wide and 42" long. Place the strips face to face. Choose one short side that will be the bottom of the hanging.
Measure 3" out from the corner along the edges of the fabric.Mark the points and connect them with a line. Repeat for the second corner. Stitch along both sides of the working piece, along the marked lines and along the bottom, leaving 1/4" seam allowance. Cut the corners away along the marked lines. The top of the working piece should remain open. See the diagram below.
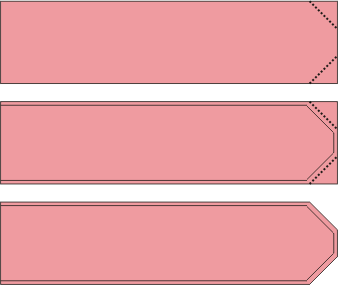
Step Seven: Turn the working piece right side out. Press. Turn the raw edges of the opening at the top 1/2" inside. Press and top stitch closed on your machine.
Top stitch 1/4" from the edges.
Step Eight: Place the embroidered strip over the fabric working piece. Align the central axes. Pin the layers together.
Using any decorative stitch from your machine, attach the embroidered strip to the fabric.
Step Nine: Fold the upper short edge of the wall hanging 1" back. Press. Slipstitch in place to form a sleeve.
Step Ten: Insert a decorative hanger into the sleeve.

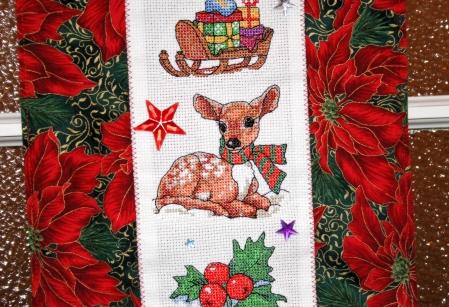
Here are some more close-ups:
We hope that you liked our idea and will come up with many of your own.


