Plastic mesh tote bags are great for the beach or as all-purpose summer bags.
Decorated with embroidery in matching colors, the totes look very stylish and original.
We made several plastic mesh tote bags with embroidery. They are all of different sizes, but are basically sewn in the same way. We were inspired by an old Mulberry beach bag we came across at a yard sale.

To make such tote bags, you will need soft plastic mesh. It's available in craft and quilt shops in a variety of colors. It also comes in different widths. We'll mention what mesh we used for each tote.
You will also need nylon webbing for the handles. Each handle is 1 yard long, so for one tote you'll need two yards of webbing.
You will also need cotton fabric, water soluble mesh stabilizer (Vilene), light-weight iron-on cut-away stabilizer/interfacing. The rick-rack trimmings, whimsical buttons and other embellishments are optional.
To embroider on plastic mesh, we recommend using #14 universal needles and 30- or 40-weight rayon or polyester embroidery threads
Choose simple designs in the satin-stitch or applique technique. Cross-stitch and redwork will not work on mesh. Photo-stitch designs are too complicated for the simple and casual appearance of plastic mesh and beach totes.
Hoop the plastic mesh with water soluble stabilizer under the mesh, just as you would do with fabric.
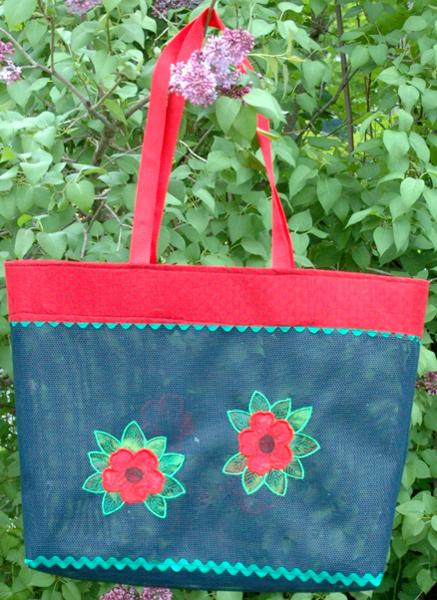
The finished size of the Poppy tote bag is about 16" high x 18" wide x 4" deep.
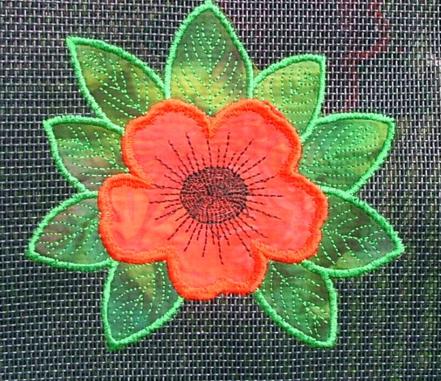
We used the Poppy Appliqué design.
We used black plastic mesh. It was 19" wide, and we used 48" of it. We also used 2 yards of red webbing, 1/4 yard of red cotton fabric, light-weight iron-on cut-away stabilizer, Vilene water soluble stabilizer, scraps of green and red fabric for the applique, and green rick-rack trimming.
Step One: Cut mesh into two panels measuring 19" x 24".
Step Two: Mark the position of the embroidery on the mesh. Hoop the mesh with water soluble stabilizer. Make the applique design following the included directions.
For the bobbin, we recommend using thread of the same color as the mesh.
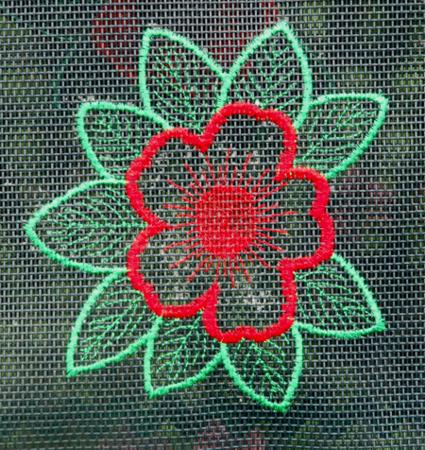
You can embroider the same design without fabric. In this case, we recommend to use the same thread for both the needle and the bobbin. You'll get a lacy see-through embroidery.
After the embroidery is finished, dissolve the stabilizer in warm water. Wipe the mesh dry with a towel.
Step Three: Out of red fabric, cut two strips measuring 5" x 24". Out of light-weight iron-on cut-away stabilizer, cut two strips measuring 4" x 24".
Iron the stabilizer strips onto the back of the fabric. Leave a 1/2" margin from each long edge of the fabric strips.
Fold the 1/2" edges to the back of the fabric and press.
Fold the strips in half lengthwise and press. You'll get double strips 2" wide.
Step Four: Unfold the fabric strips and pin onto the mesh panels 2" from the upper edge, so that the crease in the fabric strip is aligned with the top of the panel. Top-stitch the strip in place along its bottom edge.
Optional: If you wish, you can tuck a strip of wide rick-rack under the edge of the fabric and top-stitch them in place together. You can also top-stitch wide rick rack to the lower edge of the panel. Place and pin rick-rack about 2 1 /2" from the edge.

Step Five: Place both panels right side to right side. The fabric strip on the upper edge should be unfolded. Pin. Using a straight stitch, sew the sides and the bottom 1/2" from the edge (the stitch is marked yellow in the diagram below).

Step Six: Fold back the fabric strip. Unfold the side seams in the fabric area, press with fingers, match the seams and pin together.
Step Seven: For the handles, cut 2 pieces of webbing measuring 1 yard each. Measure 8" from each side seam, tuck 1" of the webbing's ends under the fabric. Pin. Repeat for the second panel. Note: the handle loops should be pointed towards the bottom of the tote.
Machine stitch 1/8" from the lower edge of the fabric strip to attach the handles and secure the fabric to the tote. Make the second stitch 1/4" from the same edge.
Fold the handles upwards. Pin. Machine-stitch 1/4" from the upper edge of the tote bag to secure the upper edge and the handles.
Step Eight: Make box corners at the bottom of the bag. For this, separate the front and back sides at the corners. Center the seams on each side of the corner on top of each other. Measure 2" along the seam from the corner and machine-stitch perpendicular to the seam across the corner. Do not trim the seam. Fold it onto the bottom and attach with several manual stitches. Repeat for the second corner.
Step Nine: Turn the tote-bag right side out. You're done!
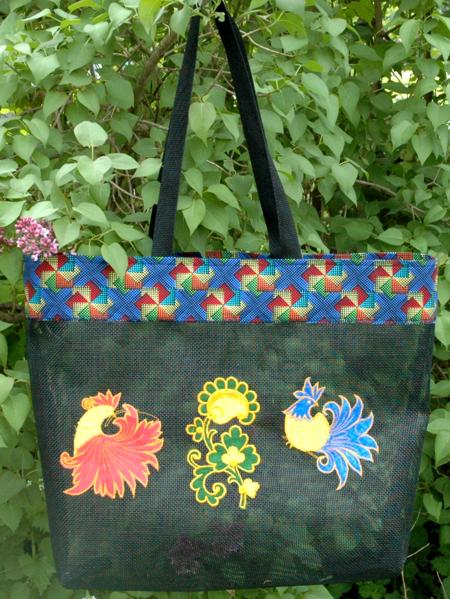
The Fairy-Tale tote-bag is similar to the Poppy one. We used designs from the Fairy-Tale Birds Appliqué Set and Fantasy Flower Appliqué Set
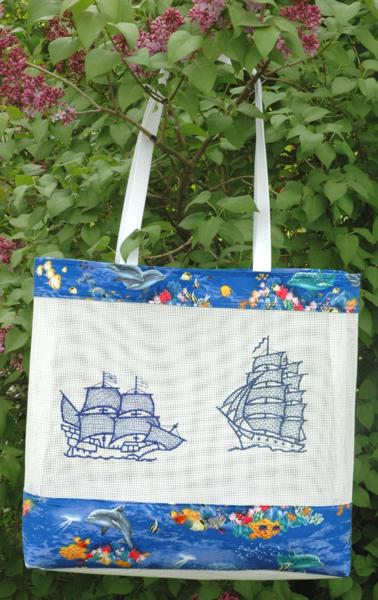
The following tote bags are made in a slightly different way. Our Nautical tote-bag features the designs Caravel and Schooner. You can read about how to make it in Plastic Mesh Tote Bags with Embroidery Part II
The other bags will be described in Part III next week.
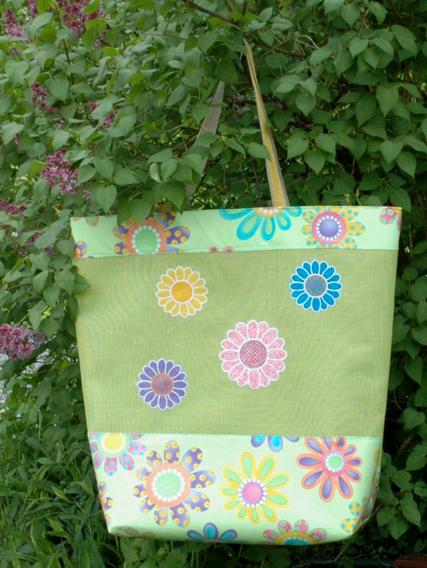
The Crazy Daisy tote features the Sunflower appliqué design. We used the designs for the small and large hoops and made the daisies in different colors to match the daisies of the fabric.
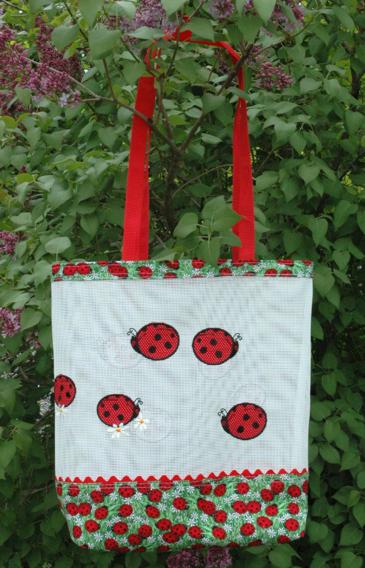
The Ladybug tote features the designs from the Ladybug Appliqué Set .
We hope that you liked our ideas and will come up with many of your own.


