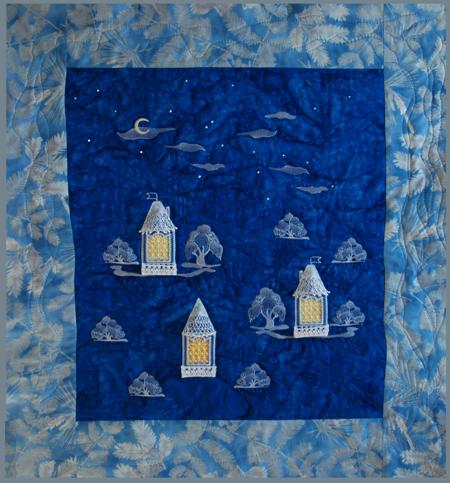
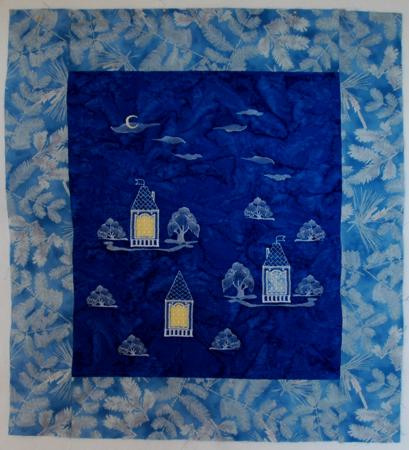
This quilt uses the 3D Country Cottage Set to create a wintry landscape scene. This is a great Christmas project.
You can read about how to embroider and assemble the cottages on the intructions page.
The finished size of the quilt is about 25" x 27". You will need a fat quarter of dark blue fabric for the central part, about 1/2 yard of fabric for the borders and binding, and 3"x 3" scraps of bright fabric for the windows. You will also need low-loft batting and fabric for the backing.
For embroidery, use watersoluble mesh and embroidery threads. You can use embroidery rayon or polyester. For the lace, you can use embroidery rayon, polyester, or cotton.
Out of the blue fat quarter, cut a piece measuring 18" x 20". Out of the fabric for the borders, cut 2 strips measuring 4 1/2" x 18" and 2 strips measuring 4 1/2" x 28".
Assemble the quilt top.

Print out the screen shots of the designs. Arrange them on the top. When you like the landscape you made, pin the templates in place and start embroidering the designs one by one.
After you finish the embroidery, neatly cut away all excess stabilizer. Place the quilt top in a bowl with lukewarm water. Change the water several times. Spread the quilt top on a towel and leave to air dry. Press with steam.
After the top is ready, spread the backing, cover it with batting and with the top. Neatly fold the part of the quilt back and place scraps of yellow fabric under the window openings. Fix them to the batting either with temporary fabric adhesive, fusible tape, or by basting.
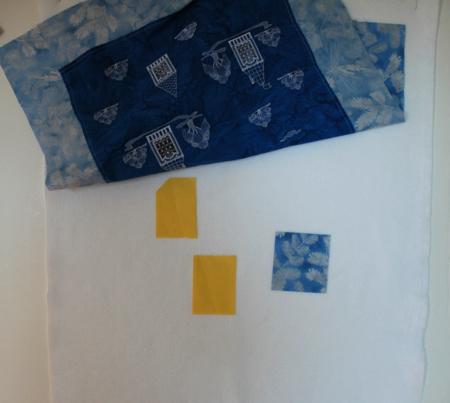
Unfold the top. Check that the windows are over the scraps.
Pin all three layers together and quilt.
Square the quilt and finish the raw edges with binding.
If you want any additional embellishments -- such as crystals, beads, etc -- attach them now.
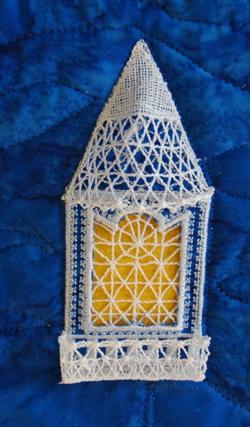
Attach the lace roofs and porches at the end.
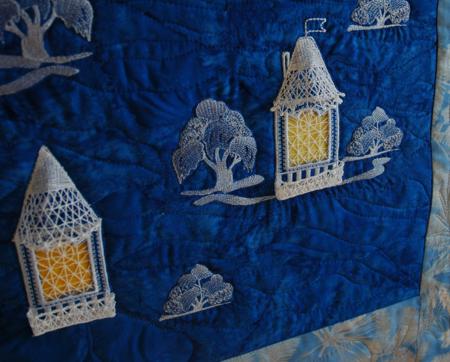
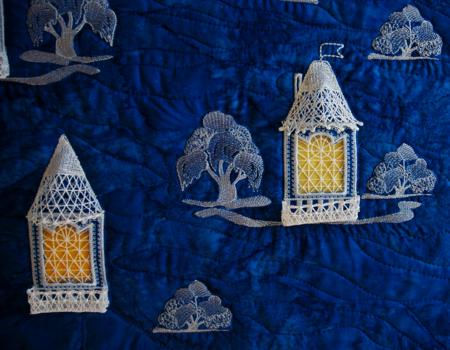
Here are some close-ups of the quilt: