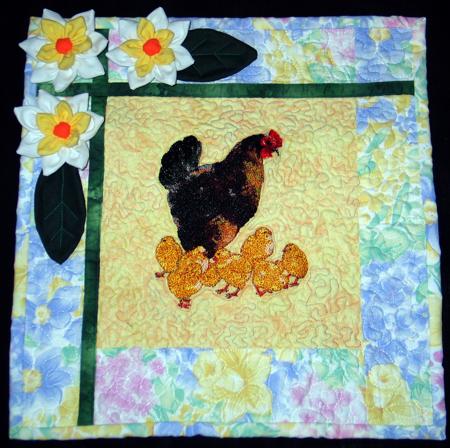
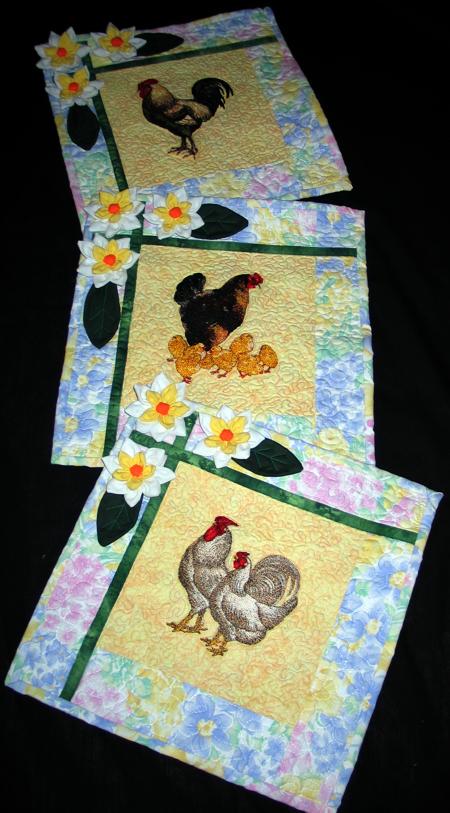
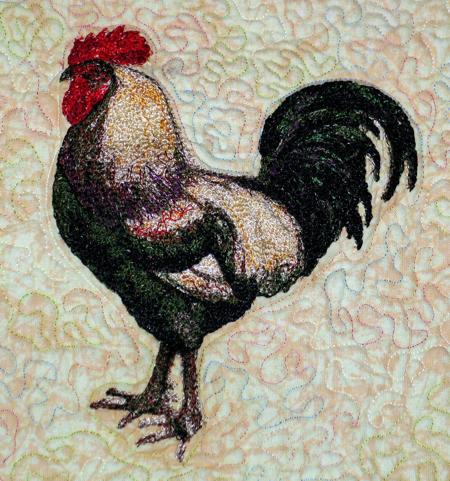
These small cheerful quilts feature chicken designs from the Hens, Roosters and Chicks Set for the large hoop. The quilts can be used as placemats, or wallhangings. They can be used to decorate your kitchen or dining room and make wonderful Easter gifts.
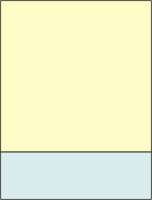
The finished size of each quilt is about 13 1/2" x 13 1/2".
For each quilt you will need 3 fabrics: light cream for the central part (8 1/2" x 8 1/2"), green for the first border (strips 1" wide), and 1/2 yard of patterned fabric for the second border and binding. You will also need backing and batting, each piece measuring about 15" x 15".
For the central part, out light cream fabric, cut a square measuring 8 1/2" x 8 1/2".
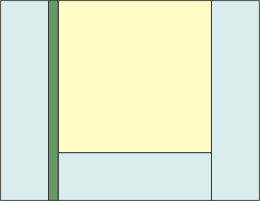
For the first border, out of green fabric, cut 3 strips measuring 1" x 11", 1" x 13 1/2" and 1" x 3".
For the second border, out of patterned fabric cut a strip measuring 3" x 8 1/2" , three strips measuring 3" x 11" and a square measuring 3" x 3".
Sew the 3" x 8 1/2" strip to the bottom of the central square.
Sew the green 1" x 11" strip to the left side of the working piece and then sew each of the patterned 3" x 11" strips to each side of the working piece.
Sew the green 1" x 13 1/2" strip to the upper edge of the working piece.
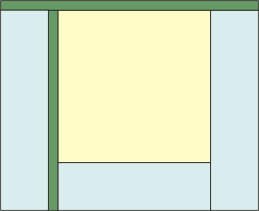
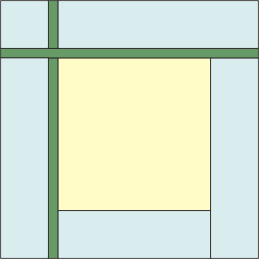
Assemble the last border out of the 3" x 3" square, 1" x 3" green strip and 3" x 11" patterned strip.
Sew the new strip to the upper edge of the working piece.
Stabilize the central part with iron-on cut-away stabilizer. Make the embroidery. Cut away the excess stabilizer.
You can also use polyester craft felt instead of the stabilizer. In this case we recommend to baste the quilt top to the felt in the ditch along the colored borders. After the embroidery is finished, rip the baste and cut away the excess felt around the embroidery.
Now place the backing on a flat surface (table) face down. Cover with batting. Spread your working piece over it.
Pin all three layers together with 1" pins and start quilting. We quilted along the lines of the embroidery and made stippling all over the quilt.
After the quilting is finished, press the work with heavy steam and square the work -- all corners should be 90 degrees and opposite sides should be of the same length.
Finish the raw edges with the binding.
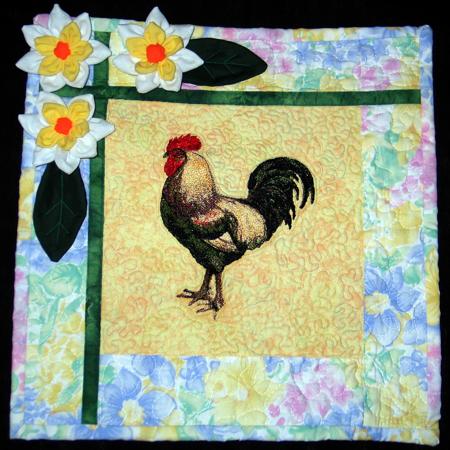
We further decorated the quilts with 3D flowers. We found the instructions for these in the web log of Laura Ingalls Wilder: https://sewritzytitzy.blogspot.com/2008/11/from-annas-gardenfabric-flower-tutorial.html
They are very helpful. Make sure, however, to make the upper petals smaller than the lower ones, by using a smaller circle.
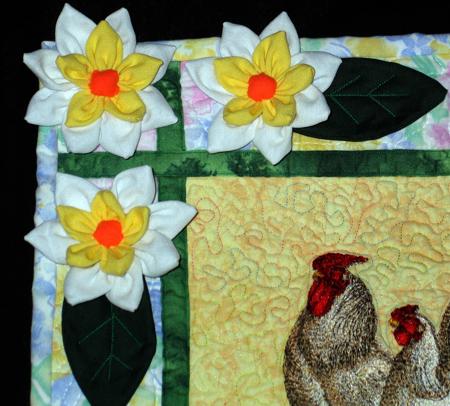
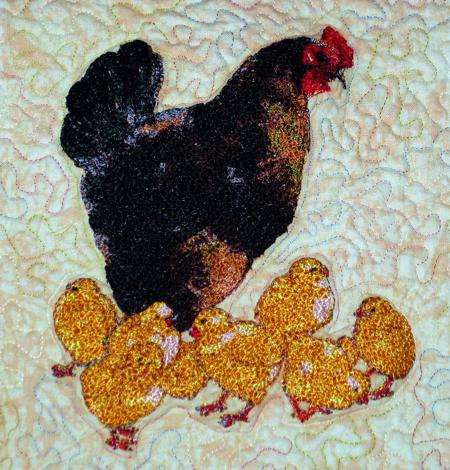
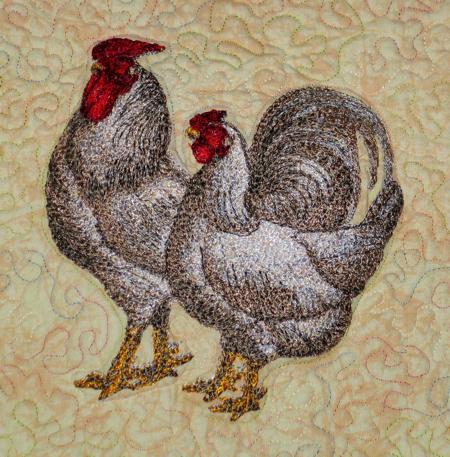
Here are some more close-ups: