Mobile Menu IconMenu
Advanced Embroidery Designs -- Online Center for Machine Embroidery Designs
Enter code ArborDay24 to get Crescent Moon Tree FREE with Any Order! Shop Now!

Embroidering and Assembling a Free Standing Lace Bowl

Our FSL Bowls are embroidered in the same way as ornaments. So please read the General Guidelines first.

Some points to remember from the General Guidelines:
Use Vilene water soluble stabilizer;
Use the same thread for the upper and bobbin to get two-sided embroidery.
DO NOT embroider several designs in one hoop.

Assembling a FSL Bowl

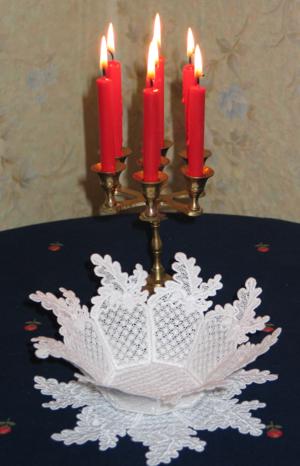
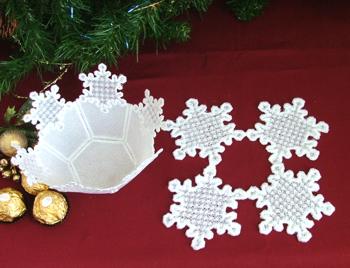
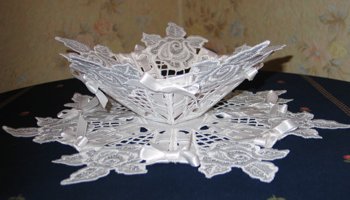
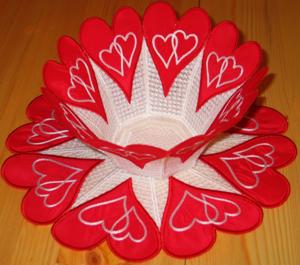
As an example, we used the Acorn Bowl.

Embroidering and Assembling a Free Standing Lace Bowl image 1

Embroidering and Assembling a Free Standing Lace Bowl image 2
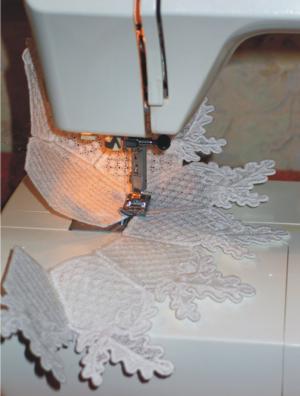
Step One: Hoop two layers of water soluble Vilene stabilizer. Embroider the designs one by one. To get two-sided embroidery, use the same thread for the upper thread and the bobbin thread. Dissolve the stabilizer, and leave to air dry.
Embroidering and Assembling a Free Standing Lace Bowl image 3
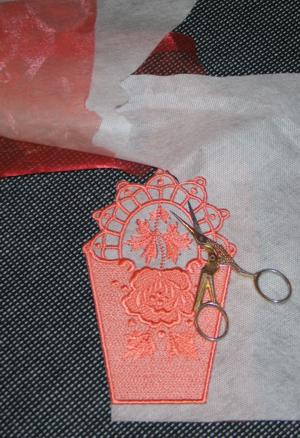
If you work with organza bowls, such as our Organza Bowl and Doily Set, hoop one layer of organza and 2 layers of water soluble Vilene stabilizer. Embroider the designs one by one. Cut away the excess organza and stabilizer. Dissolve the stabilizer and leave to air dry.
Embroidering and Assembling a Free Standing Lace Bowl image 4
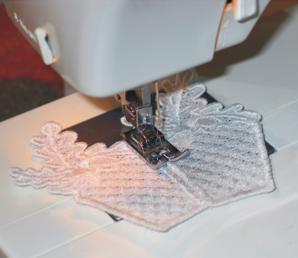
Step Two: Start assembling the bowl. Take two panels and press them with steam. Align the side edges and zigzag them together. Use monofilament invisible thread.
Embroidering and Assembling a Free Standing Lace Bowl image 5
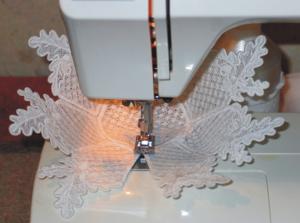
Step Three: Take the third panel, press it with steam and zigzag it to the first two panels. Connect all 8 panels in this way. Do not stitch the last seam to connect the first and the eighth panels.
Embroidering and Assembling a Free Standing Lace Bowl image 6
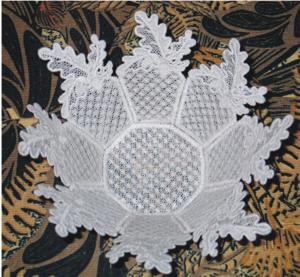
Step Four: Take the pattern of the bottom, press with steam and zigzag to the bottom edge of each panel.
Embroidering and Assembling a Free Standing Lace Bowl image 7
Step Five: Now zigzag the last seam from the inside.

Embroidering and Assembling a Free Standing Lace Bowl image 8

The bowl is ready. Enjoy!

You can try this freestanding Snowflake Bowl and Doily.

Embroidering and Assembling a Free Standing Lace Bowl image 9

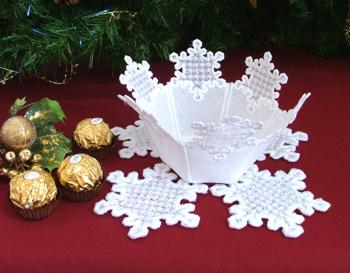
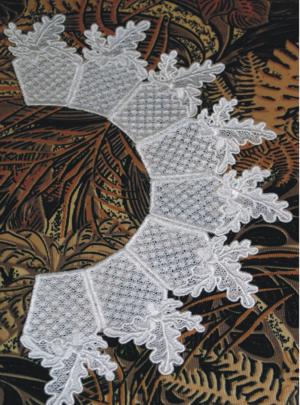
For doily you need to embroider 4 snowflakes and zig-zag them together.

Embroidering and Assembling a Free Standing Lace Bowl image 10

Click to download a zip file containing the corresponding format:


ART
DST
EXP
HUS
JEF
JEF+
PES
VIP
VP3
XXX

If you'd like to know how to take care of free-standing doilies and bowls, please read the Step-by-Step Guide to Washing Free-Standing Lace Items.

If you like our bowl you can find more in the Freestanding Lace section of our Catalog.

Embroidering and Assembling a Free Standing Lace Bowl image 11
Rose Lace Bowl and Doily Set
Embroidering and Assembling a Free Standing Lace Bowl image 12
Organza Bowl and Doily Set
Embroidering and Assembling a Free Standing Lace Bowl image 13
Grape and Vine Bowl and Doily Set
Embroidering and Assembling a Free Standing Lace Bowl image 14
Valentine Heart Bowl

Mailing List
Enter your e-mail for news, discounts and exclusive special offers.


Find us on Twitter

Special Offers
Bonus design on all orders over $25
Coffee Coasters In-the-Hoop

Shop Now!

Announcement
Best Project Contest
The results are in!
Featured Project
Check out our latest project Birds and Blooms Quilted Tablerunner
Tutorials
Never heard of photo stitch? - Check out our What is Photo Stitch? page
Most Popular Designs
|| Home || Shop || Free Designs || New Designs ||
|| Projects || Tutorials || Links || About Us || Contact Us ||
|| Store Policy || Licensing || Accessibility ||

Social Media:

Copyright © Advanced Embroidery Designs. All Rights Reserved.