|
An appreciable part of our designs are in the photo stitch technique, and our customers often ask us about it. We prepared several lessons and invite you to browse through them. See also Lesson I , Lesson II and Lesson III.
|
| Our fourth lesson is devoted to embroidering large designs with more than 50 thousand stitches. The main difficulty in embroidering such designs is that they demand much time and a lot of patience. |
Many embroidering machines have a limitation on the number of stitches they can read, so designers have to split the patterns into several files. Such files should be embroidered in alphabetical, first file A, then file B, and so on. The files are embroidered on the same embroidery field, without re-hooping. The order of colors is as shown in the color card.
If your machine does not have a limitation on the number of stitches, you can combine both files in your machine and embroider them as one. |
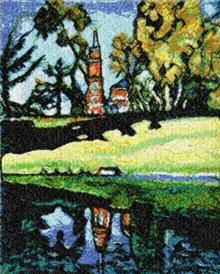
| Today we're going to embroider a landscape called Morning in the Mountains, which is split into 2 embroidery files. |
| Step One: Download the design of the landscape. The embroidery files, together with the color card are compressed into a ZIP file. Unzip the files to a folder on your computer using WinZip or a similar program. After unzipping you'll have two embroidery files (file A and file B) and a color card. |
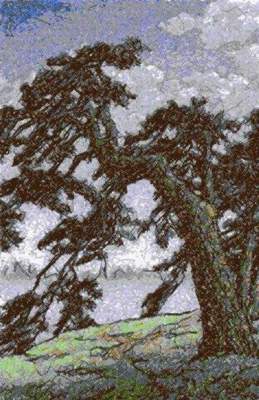
Size: 108.6 x 167 mm (4.27" x 6.57"),
Part I: Stitches: 40305; Colors: 6
Part II: Stitches: 53353; Colors: 6 Click to download a zip file containing the corresponding format:
|
| Large designs with dense stitching should be embroidered on medium- or heavy-weight fabrics. We use linen-like synthetic, medium-weight, evenly-woven fabric, and medium-weight, iron-on, tear-away stabilizer. |
| Regular or embroidery #80/12 needles are okay for this sort of project. |
| The bobbin thread can be #50-70. Just remember that the thinner the bobbin thread, the thinner your final embroidery will be. On the other hand, thick bobbin thread will make your embroidery thicker, and the picture will have a three-dimensional look. |
| Step Two: Print out the color card and select the threads in accordance with it. |

|
| Step Three: Hoop the fabric with the stabilizer, stretching them in the hoop tightly. There should not be any folds or areas where the fabric has puckered. |
| Step Four: Transfer the embroidery file A to your machine. Start embroidering part I. |
|
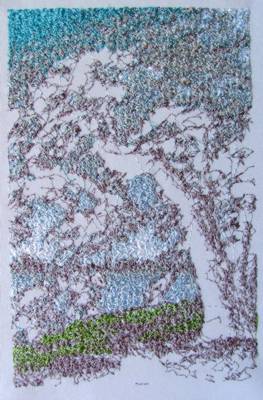
| When you finish embroidering file A, you will have something like what is shown on the photo. Do not take it out of the hoop! |
| There are 40 thousand stitches in the first part of the design, so it will take you about 2 hours to embroider it if your machine works at 600 SPM and even longer if you work at a lower speed. If you do not have the time, you will have to pause during the work. Read our tips on how to stop embroidering safely in the middle of the work in Lesson 3. |
| Another thing which deserves attention is that you'll have to change the bobbin several times during the work. Usually a sensor stops the machine when it runs out of bobbin thread, but between the moment the sensor "feels" the end of the thread and the moment it stops the machine, the machine can make several stitches. So after changing the bobbin, return 10-20 stitches and then go on embroidering. It's especially important when you work with cross stitch designs, and though we're talking about photo stitch here, it's best to keep this in mind. |
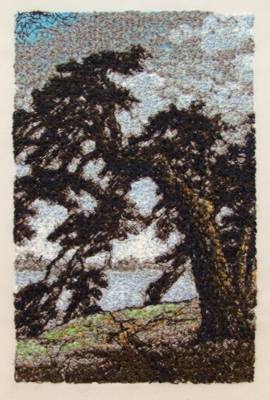
| Step Five: Transfer the embroidery file B to your machine. Install the hoop with part I into the carriage and start embroidering part II over part I. After you finish the embroidery should look something like the photo below. |
|
| The Morning in the the Mountains is finished. You can frame it now. Read on for some of the problems you can encounter during your work. |
| If the tension of the upper thread is too high it will tangle underneath. Obviously you must reduce its tension, before continuing, but if the upper thread has tangled underneath the work, and made a "beard", it might also move the carriage, so that the following embroidery will be stitched out of place. This carriage displacement is so small that you will not notice it, until it will be too late. Needless to say the design will be ruined. |
If the thread has tangled do the following:
1. Take the hoop out of the machine. 2. Write down the color you are on and how many stitches the machine has done. Remember or write down the tension of the upper thread.
3. Switch the machine off.
4. Cut off the tangle.
5. In a couple of minutes switch it on. Find your pattern (from the memory of the machine, or from the floppy or card). Find the place you stopped your embroidery. Be sure that the number of stitches on the screen is 10-20 stitches less. (For example, you stopped embroidering after 9,257 stitches. Go to stitch number 9,237.)
6. Adjust the tension of the upper thread. Make it more than before.
7. Attach the hoop with embroidery and go on stitching. Watch the needle for some time. Maybe you will have to change the tension of the upper thread a little more.
|
| For homework, we offer you to embroider a portrait of Pope Francis, which has 6 colors. The colors that we suggest in the color card are from white to black, which gives the effect of a black and white photo. If you like to experiment, you can try other hues, for example sepia. When making your own color chart use the same principle - go from the lightest to the darkest color. |
Note: There is a mistake in the color card for Madeira Rayon. The 5th color is 1164, not 1184 as typed.
When in doubt, please consult the first colomn with the color boxes. If the color of the thread contradicts the color of the box, please contact us. We are sorry for the inconvenience. |
Pope Francis
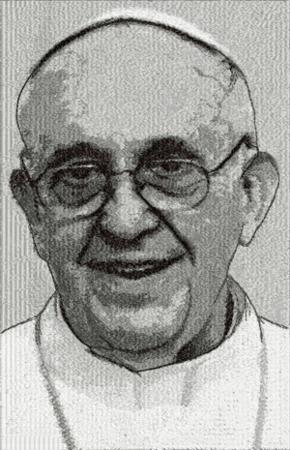
Machine Embroidery Design
available in 3 sizes:
Large Hoop:
116mm x 179 mm (4.8" x 7")
Stitches: 46552+30235
Colors: 6
|
|
Click to download a zip file in the corresponding format:
|
Mega Hoop:
149mm x 232mm (6" x 9.8")
Stitches: 120805
Colors: 6
Click to download a zip file in the corresponding format:
|
Commercial Hoop:
172mm x 267mm (7.5" x 10.5")
Stitches: 139690
Colors: 6
Click to download a zip file in the corresponding format:
|
|
|
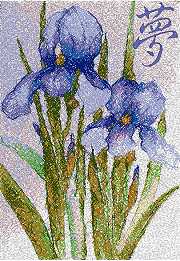
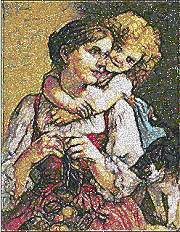
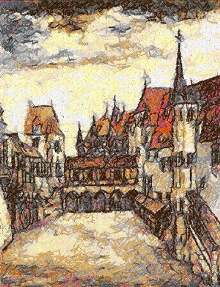
| We have many designs that are divided into two or more parts by the number of stitches and do not require fabric re-hooping, in our catalog. Here are some of them: |
|
|
|
|
|
|
|
This was our last lesson on photo stitch embroidering. Please do not hesitate to ask your questions, they will help us to improve this tutorial.
|
|
Other Lessons: Lesson I, Lesson II, Lesson III
|
|
|