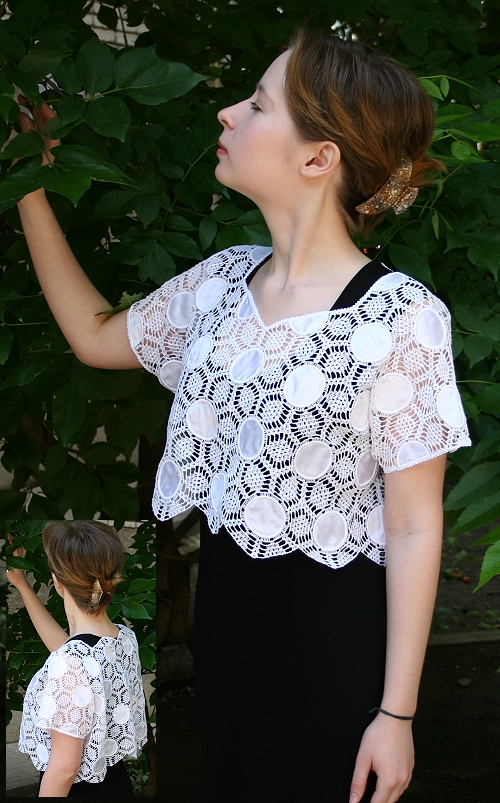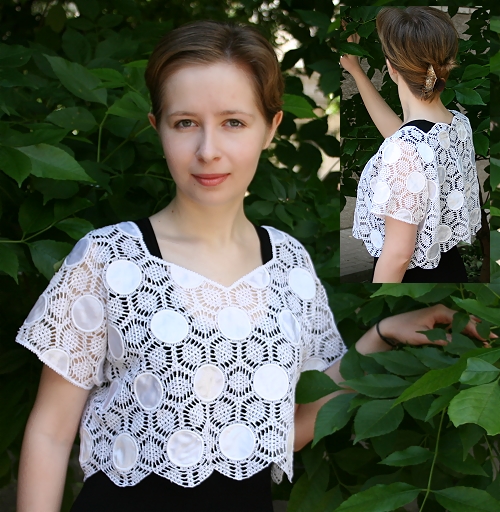
We wanted the blouse to be out of fine polyester satin. We used 2 layers of it. Cotton batiks will also look good. You'll need about 1/2 yard of fabric if you make a 1 layer applique, and about 1 yard if you make two layers in the applique. You will also need about 4 yards of a narrow trim, water-soluble Vilene stabilizer and 50- or 60-weight cotton embroidery threads. For this project we used Signature machine quilting thread.
We show the blouse for a size which will fit a 35"-36" bust. If you need a blouse of another size you'll have to re-calculate the number of parts you'll need.
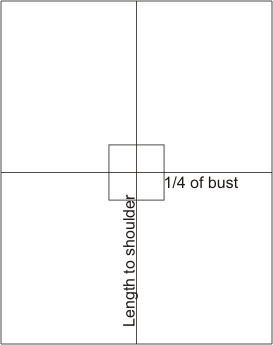
Making a paper layout for this blouse is very easy.
Measure around the bust.
Measure the desired length from the shoulder.
On a large sheet of paper, draw a straight line through the center of the paper. Mark the center of the line, and draw a perpendicular line through that point.
On this perpendicular line, measure one fourth of your bust measurement starting from the center point, in each direction, and mark two points. Draw two lines parallel to the very first line, through these points.
On the very first line, measure the length of the blouse in both directions from the center, and mark two points. Draw lines through the points perpendicular to the very first line
.
From the central point, measure 4 inches in all four directions and draw lines through these points to form a square. This will be the opening for the head.
The layout is ready. Put it aside for the time being.
Now we are going to make a test stitch-out of the parts. Before we start, please read our General Guidelines and Step-by-Step Guide to Embroidering our Crochet-Style FSL designs, this might be helpful.
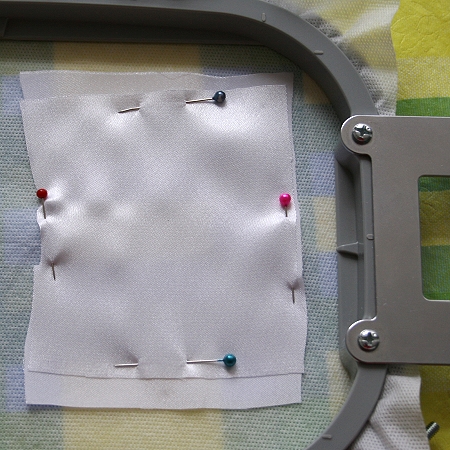
Step One: To embroider one part, cut 2 pieces of fabric measuring about 3"x3". Hoop the stabilizer. Place the fabric pieces wrong side to wrong side and then pin them to the stabilizer in the center of the hoop.
Note: If you work with batik, or any other dense cotton, one piece is enough.
Step Two: Start embroidering. The machine will stitch a circle and stop.
Note: when embroidering the second part, the machine will stitch a semi-circle and stop.
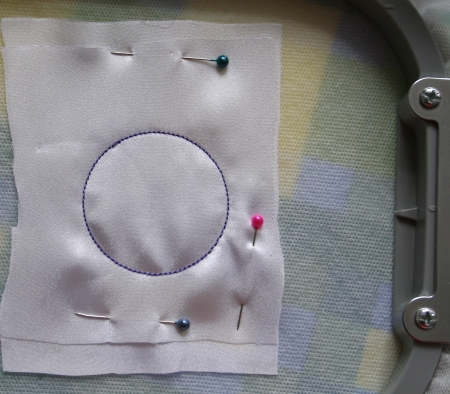
WITHOUT taking the working piece out of the hoop, cut away the excess fabric as close to the stitch as possible. Be careful not to cut the stabilizer.
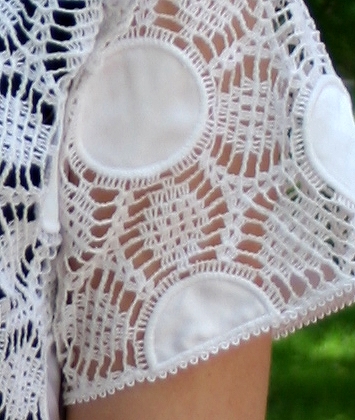
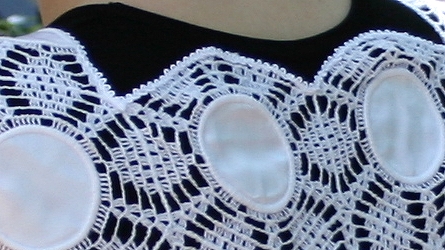
Return the hoop to the machine and finish the embroidery. It should look like this:
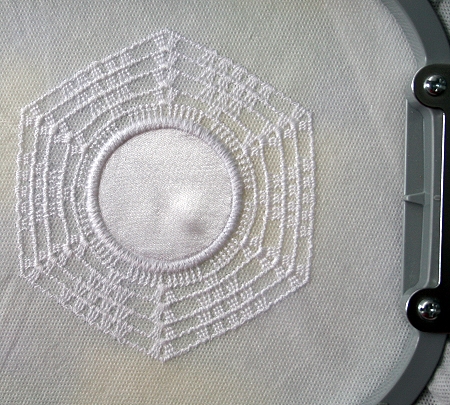
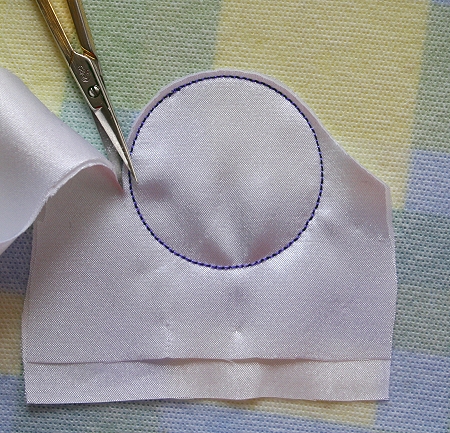
Step Three: Cut away the excess stabilizer, rinse the stabilizer from the embroidered pieces. For this, place them in a bowl with warm water for about an hour. Change the water several times. Spread evenly to air dry. Pin the points of the hexagon so that they are not distorted when they dry.
Note: Do not rinse the stabilizer with hot water! The hotter the water, the faster the stabilizer dissolves, BUT hot water may result in unwanted side effects such as shrinkage of the fabric and cotton threads, or running of the dyes, etc.
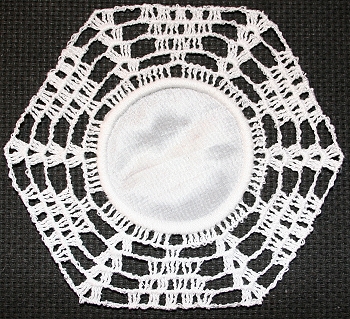
Step Four: Spread evenly on a cloth to air dry. Pin the points of the hexagon so that they are not distorted when they dry.
Step Five: Check over the test stitch-out - if you are satisfied with it, you can proceed with your work, if you are not satisfied, you might need to change any of the following: the choice of threads, needles, fabric or the settings of the machine. Do not proceed with your work until you are satisfied with the stitch-out.
Note: the test stitch-out should be washed away; until the stabilizer is washed away you cannot see whether it is sewn correctly.
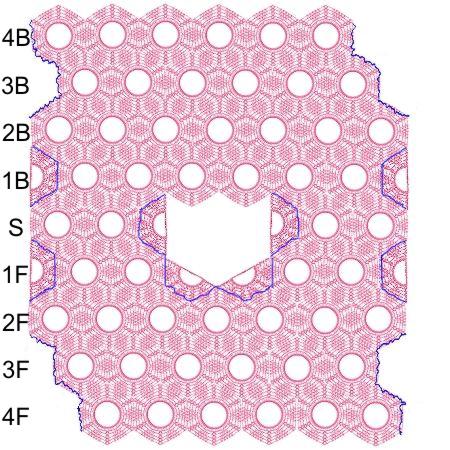
For the 34" - 36" bust you'll need 52 hexagons and 8 half-hexagons. When you finish all needed parts, cut away the excess stabilizer as close to the embroidery as possible. Do not rinse the stabilizer away yet.
When all the parts are ready, lay them out on your paper layout in the following way. Pin the parts to the paper.
Start from the opening for the head and lay four half hexagons in a semi-circle as shown on the picture, in blue.
Both shoulder rows (S) have one half hexagon and two hexagons each.
The first front row (1F) has two half hexagons in the center, four hexagons (two on each side of the center) and two half hexagons to finish the row.
The second front row (2F) has seven hexagons.
The third and fourth front rows (3F and 4F) have six hexagons each. Note their placement.
The first back row (1B) has six hexagons and two half hexagons which finish the row on each side.
The second back row (2B) has seven hexagons.
The third and the forth rows (3B and 4B) have six hexagons each. Please note their placement.
Thread your machine with the threads you made the embroidery (both the needle and the bobbin), choose a narrow and not very dense zig-zag. First stitch the parts in the rows, then stitch the rows together. All the time return to your layout to check that you're sewing correctly. Those who like, can do all the work manually.
Now you can wash away the stabilizer. Change the water several times. Then spread the workpiece evenly on a flat surface. Pin the points of the edge hexagons so that they do not deform, and leave to air dry.
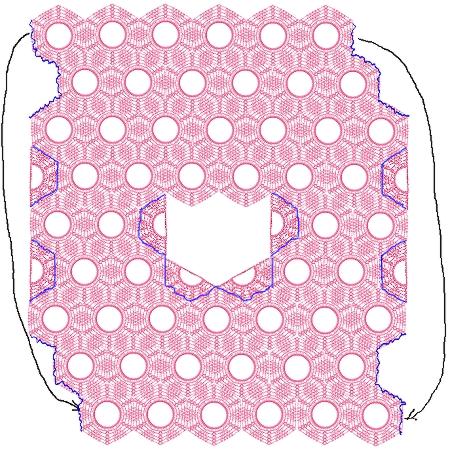
When the lace is dry, fold the workpiece along the shoulder row. Stitch the side hexagons in the third and fourth rows on each side.
Finish the raw edges with a narrow trim.