You will need a T-shirt, water-soluble Vilene stabilizer and 60-weight cotton embroidery threads. You can choose threads either matching the color of the T-shirt, or contrasting with it.
The designs from our Round Rose Crochet Border Set are embroidered like all our crochet lace designs. You can read about this in our General Guidelines and Step-by-Step Guide to Embroidering our Crochet-Style FSL designs.
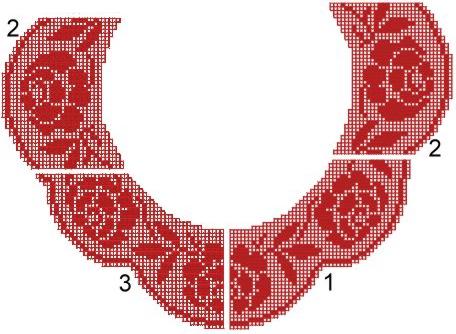
Step One: To make the lace insert, embroider part 1 once, part 3 once, and part 2 twice. Trim the stabilizer, leaving at least 3/4" around each design. DO NOT dissolve the stabilizer just yet.
Please read the Step-by-Step Guide to Assembling crochet-style FSL Designs into a Project first.
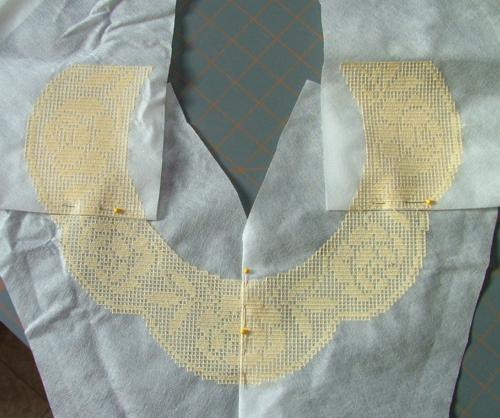
Step Two: Treat Vilene as fabric. Fold it and, using zigzag, stitch the FSL parts to each other. Use the same thread as you used for the embroidery!
Step Three: You can now go ahead and dissolve the water-soluble stabilizer. Place the lace into a bowl of warm water; change the water several times until the lace is soft and no residue is left. So that the lace dries evenly, spread it on a flat surface and let it air dry. Then press carefully with steam.
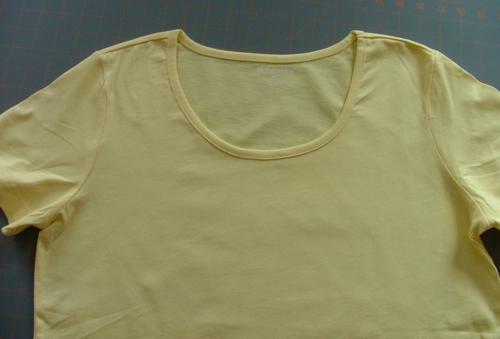
Step Four: Take a T-shirt and very carefully undo the bias on the neck-line and undo the shoulder seams. Do not discard the bias, you will need it later.
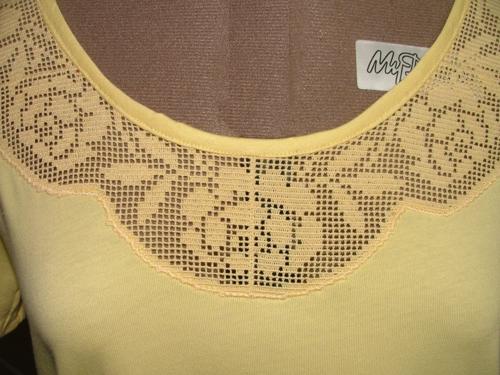
Step Five: Mark the middle of the front on the T-shirt. Place the lace on the T-shirt aligning the side edges of the lace with the shoulder lines and the central seam of the lace with the T-shirt center. Pin and then baste in place.
Step Six: Using the same thread which you used for the embroidery, stitch across the lace's lower edge with a short zigzag stitch. For more accurate stitches, place a piece of perforated tear-away stabilizer under the knit fabric. After you finish stitching, tear it away.
Step Seven: Using sharp scissors, cut away the T-shirt under the lace as close to the zigzag stitching line as possible.
Step Eight: Stitch the shoulder seams together - you will have a lace edge on the front and a fabric edge on the back: stitch them together. Use tear-away stabilizer, if needed.
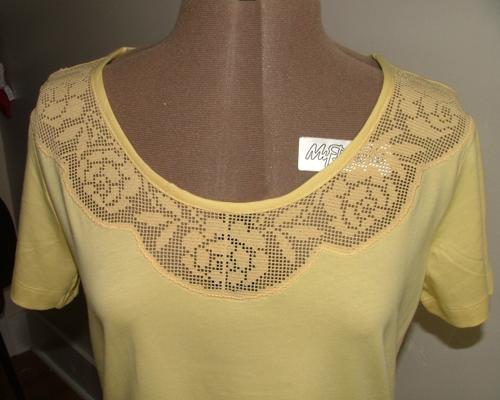
Step Nine: Finish the neckline with the bias. If the old bias is too short, use the fabric left over after cutting away the material under the lace.
Press.