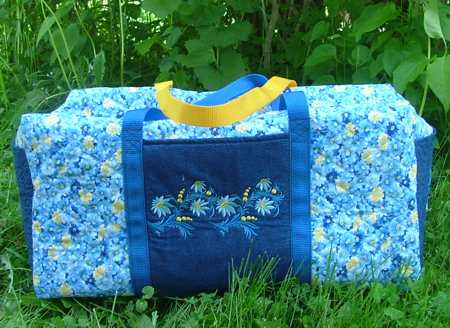
This spacious duffle bag has 3 outer pockets and 2 inside pockets. The spacious interior has room for all your craft projects to take with you on the road. Of course, it can easily be used as a unique and dressy overnight bag.
The finished size of the bag is about 19" long, 9" high and 10" deep.
The embroidery designs used to embellish the outer pockets are from the Folk Style Decorative Motif Set.
We used about 1 yard of pre-quilted fabric (ours is blue-and-yellow), about 1 yard of matching solid fabric (ours is blue), a 22"-24" long zipper of a matching color, 3 yards of 1" wide webbing for the handles (we used 1 1/2 yard of blue webbing and 1 1/2" yard of yellow webbing just for fun). Heavy-weight interfacing, such as Pellon Peltex 71 (or similar) interfacing.
For embroidery, we used embroidery threads and medium weight iron-on stabilizer.
For embroidery we used 12/80 embroidery needle.
For sewing we used a 12/80 all-purpose needle and 14/90 jeans needle.
Cutting:
Out of the pre-quilted fabric cut
For the embroidery, select threads which coordinate with your fabric. Our fabric is blue-and-yellow, so we selected threads to match those colors.
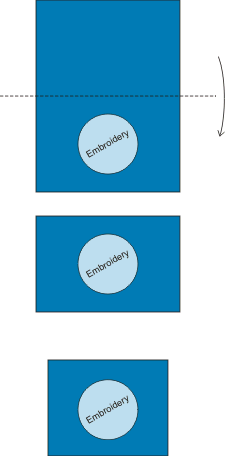
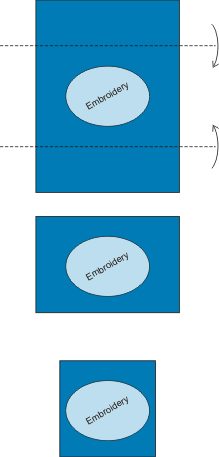
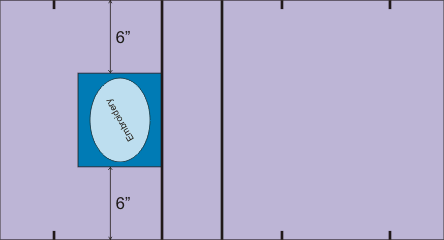
Stabilize the rectangles for the outer pockets (12" x 16") with medium-weight iron-on stabilizer. For the end pockets we chose the round and square designs. Make the embroidery in the bottom half of the rectangles.


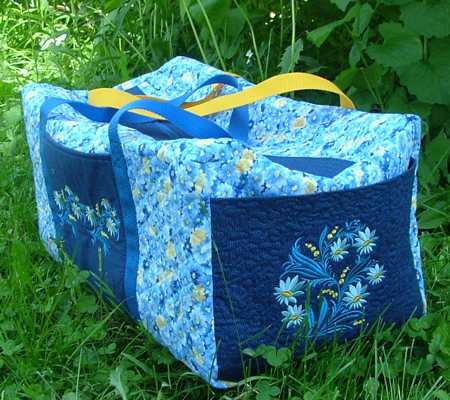
For the side pocket we chose the longer design. Make the embroidery closer to the middle of the rectangle.

Sewing the Pockets:
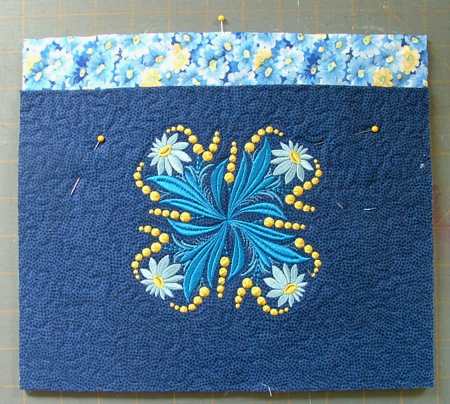
The end pockets:
Fold the upper edge of the rectangle back so there is about 1" left over the embroidery. Press the line. Topstitch along the upper edge. Quilt in a free-motion style around the embroidery.
Trim to 10" wide x 8" high.
Repeat to make the second end pocket.
The side pocket:
Fold the upper and the lower edges back to make them meet on the back. Press the lines. Topstitch the lines. Quilt in a free-motion style around the embroidery and all over the pocket. Trim to 8" wide.
The inside pockets:
Fold the solid blue rectangles measuring 8 1/2" x 16" widthwise, face inwards. Stitch the sides together, leaving the upper side open.
Turn the pocket right side out. Press. Tuck the raw edges 1/2" inside. Press. Topstitch.
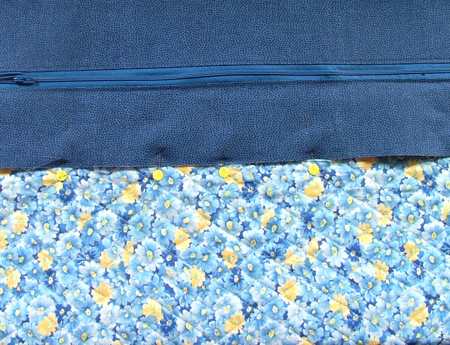
Sewing the Zipper
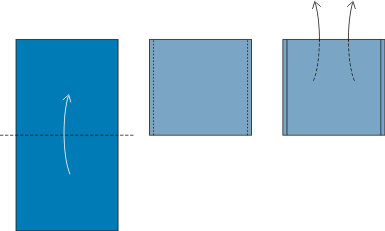
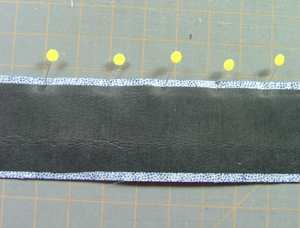
Stabilize the 4 fabric strips, which measure 3" x 21" with the 2 1/2" x 21" strips of iron-on stabilizer, leaving margins of about 1/4".
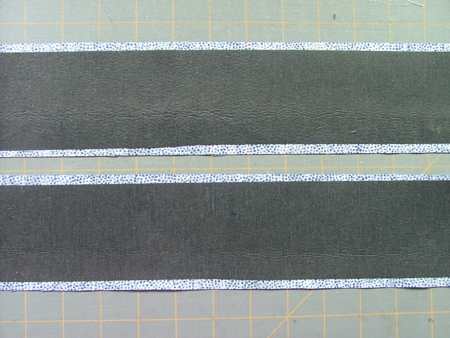
Place one of the strips, face up, on the working table. Place the zipper over the strip along it's upper edge.
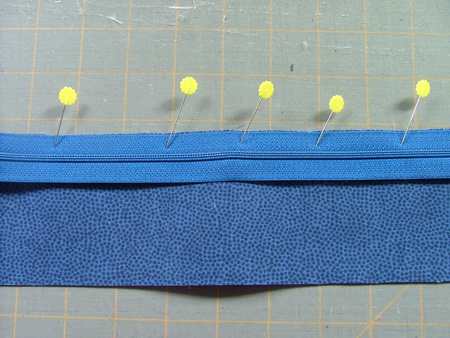
Cover with the second strip, face down. Align the long edges of all 3 layers. Pin together.
Stitch them together 1/4" from the edge.
Unfold the strips and press. Topstitch 1/8" from the folded fabric's edge.
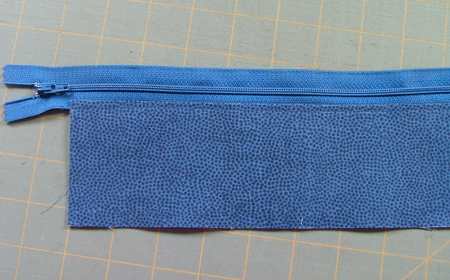
Repeat for the second side of the zipper.
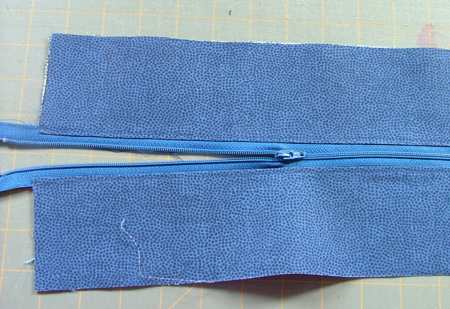
Measure 20" along the zipper and place pins.
Sewing the Body of the Bag
Fold the 20" x 37" rectangle widthwise in half. Align all edges. Slightly press the folded line to mark the central line of the bottom. Place pins on both sides to mark the line.

Measure 5" from the bottom line along the edges, first to the right, then to the left. Place 4 pins on both edges. Thus we mark the bottom of the bag.
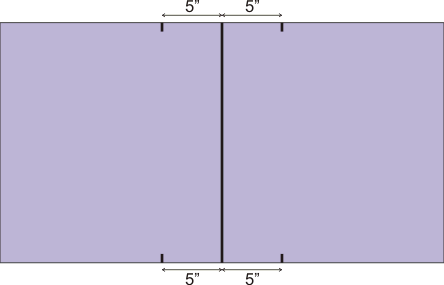
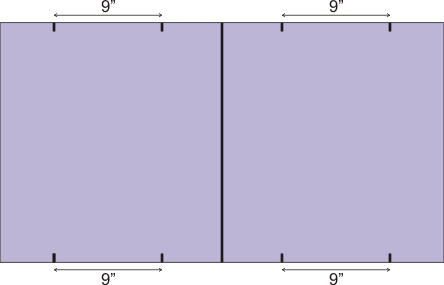
Measure 9" along the edges from the second set of pins. Place pins. These will be the long sides of the bag.
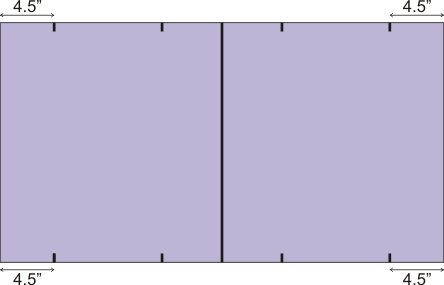
Check that there is 4 1/2" from the third set of pins to the upper edge of the folded piece on all sides. This will be the upper part of the bag.
Spread the working piece with the wrong side facing upwards.
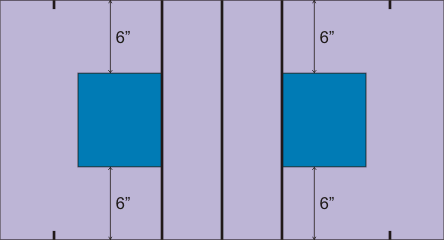
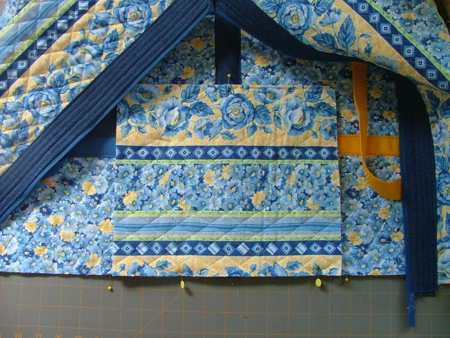
Place a ruler so it connects the second set of pins on one side. Position the first inner pocket along the ruler 6" from each end. Pin the pocket in place.
Turn the work and repeat for the second inner pocket.
Topstitch the pockets in place.
Turn the working piece over. Using a ruler, align and topstitch the side pocket in the same way as you did the inner pockets.
Attaching the Handles:
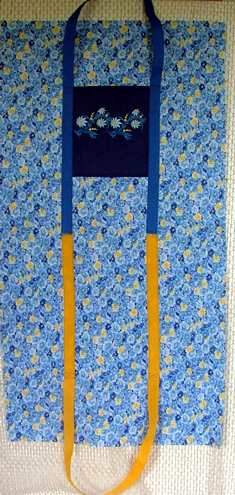
Starting from the central bottom line, pin the first 1 1/2 yard strap 5 1/2" from the side edges. The strap will overlap the pocket sides 1/2".
With the ruler connect the last side pin (which are 4 1/2" from the upper edge). Mark the line on the strap.
Topstitch the strap to the bag along the outer edges of the strap.
Start stitching from the bottom along the inner edge of the strap and finish 1/8"-1/4" before the mark. Turn the work, stitch across the strap 3 times, turn the work and stitch along the outer edge of the strap to the bottom. Turn the work and stitch across the strap. Repeat with the other half of the strap.
Attach the second handle in the same way.
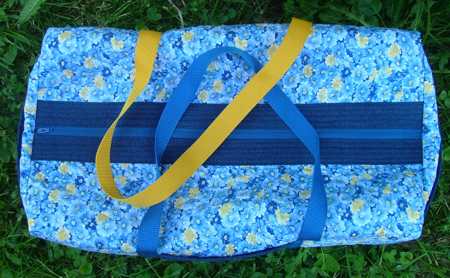
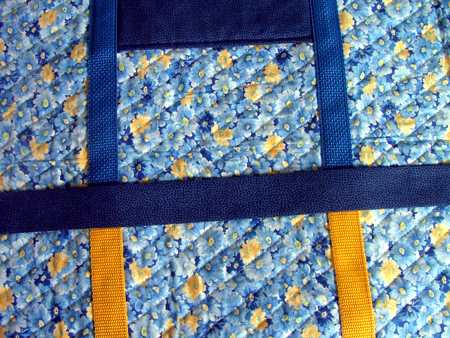
This is what the bottom will look like:

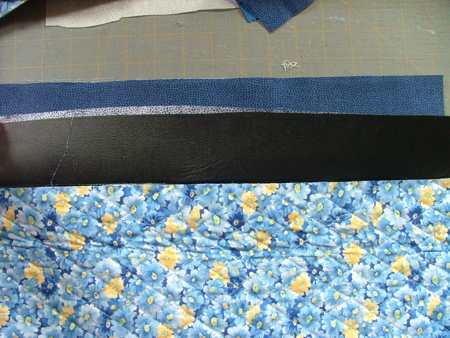
Take the 2" x 20" blue strip and the 1" x 20" strip of medium-weight iron-on stabilizer. Place the stabilizer along the central line of the fabric strip. Press to adhere the fabric to the stabilizer. Fold the long edges of the fabric strip 1/2" to the wrong side. Press.
Position the strip along the central bottom line. Pin.
Topstitch in place 1/8", 1/4" and 1/2" from the edges.
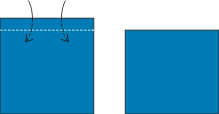
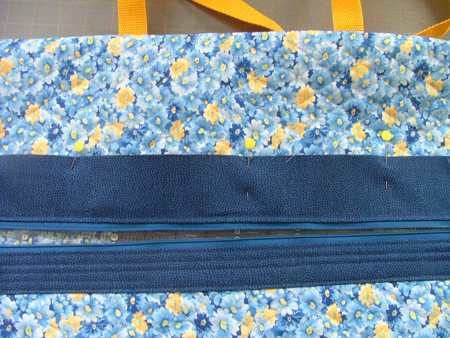
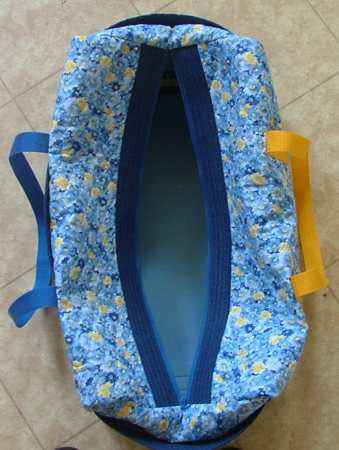
Attaching the Zipper
With the zipper closed, open the fabric strips on one side of the zipper.

Position one of the upper edges of the bag between the strips and between the pins which mark the 20" length.
Align the upper edge of the bag with the seam on the zipper part.
Pin. Topstitch in place 1/4" from the zipper seam through all layers.
Turn the raw edges of the zipper part (both on the right and on the wrong sides 1/2" inside. Press. Topstitch 1/8" from the edge.
Then topstitch several times 1/4" apart.

In the same way as described above, sew the second top edge of the bag. You will have a tube.
Attaching End Panels.
Take the 2 rectangles out of main pre-quilted fabric measuring 9" x 10". Place them on your table, right side facing. Cover with end pockets.
Align the side and bottom lines. Pin together. Stitch together 1/4" from the edge.
Open the zipper and turn the bag wrong side out. Place on the table. Place the end panel on the bottom, right side down.
Align the central line of the bottom with the center of the panel. Align the edges and pin together.
Topstitch in place, beginning and finishing 1/4" from the side edges.
Now pin and then stitch one of the side edges of the panel. Then attach the second side edge in the same way. Lastly sew the upper edge of the panel.
In the same way attach the second end panel.
Cut away the protruding ends of the zipper part. Finish the raw edges with the binding. Turn the work right side out.
Inside Bottom Panel of the Bag
Take the fabric piece measuring 20 1/2" x 38 1/2" and fold it widthwise, right side inwards. Stitch two sides closed. Turn the piece right side out.
Insert the 10" x 19" piece of heavy-weight interfacing. Tuck the raw edges inside and stitch them closed. If your interfacing has an iron-on fusible layer, press the panel with hot iron.
Place the panel on the bottom of the bag to reinforce the bottom.
The duffle bag is ready!