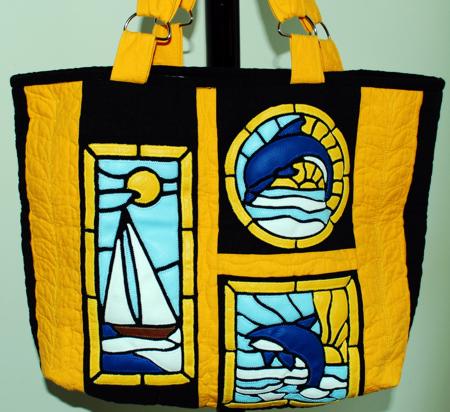
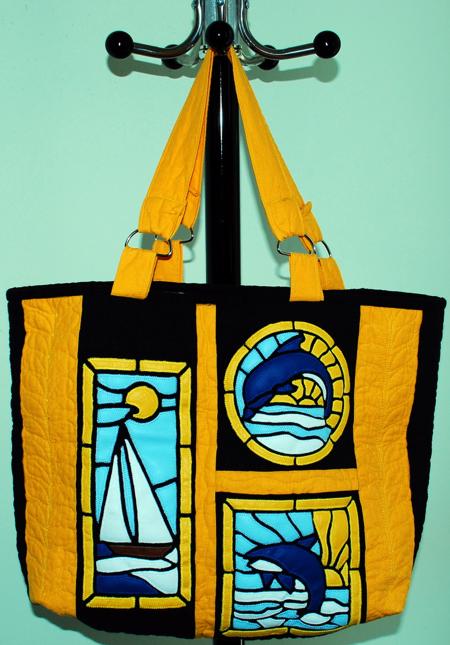
For this exuberant, nautical-themed tote bag, we used the designs from the Stained Glass Applique Sea Set.
We used the designs for the mega hoop (6 " x 10" or 150 x 250 mm).
The finished size of the bag is about 19" wide x 15" high x 3" deep.
Besides embroidery thread (either polyester or rayon), you will need
Embroidery
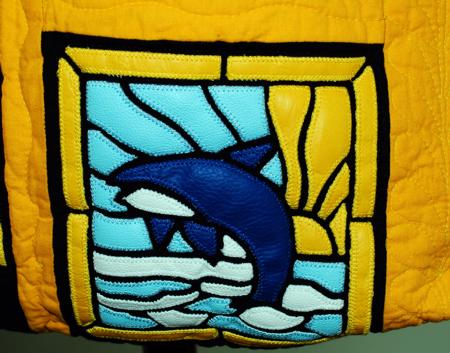
Embroider the designs from the Stained Glass Applique Sea Set as described in the instructions. You will need 2 stitch-outs of every design.
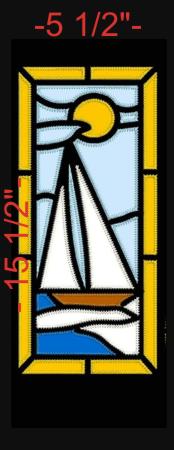
After the embroidery is finished, using a ruler and a rotary cutter, trim the stitch-outs. The panels with the rectangle design should measure 5 1/2" x 15 1/2".
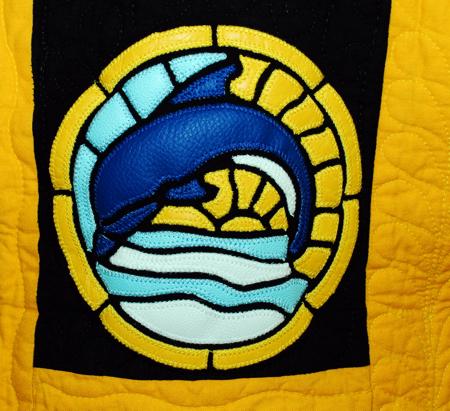
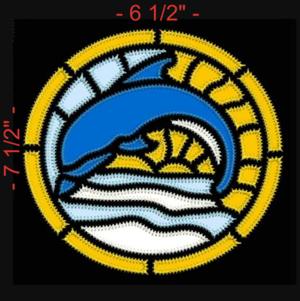
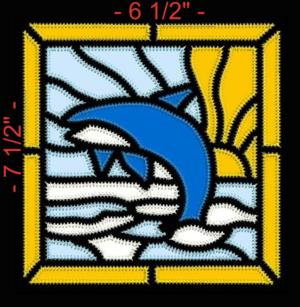
The panels with the square and round designs should measure 6 1/2" x 7 1/2".
Cut away the excess stabilizer around the embroidery. Do not remove the stabilizer under the embroidery.
Cutting:
Out of black fabric, cut
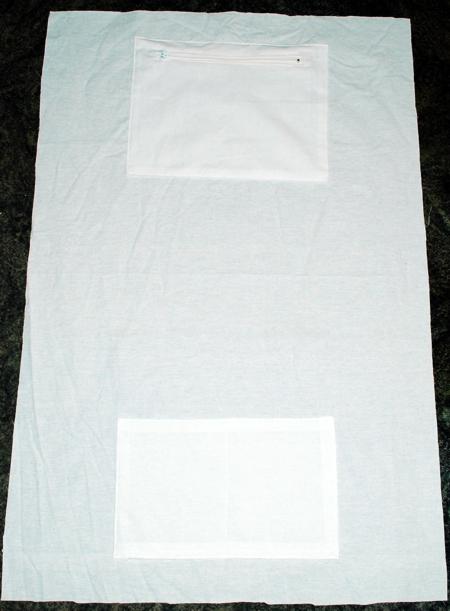
Lining with Pockets:
To sew a zippered pocket, you will need the strip measuring 2" x 7" and the square measuring 7" x 7" that were cut out of the fabric for the lining, and the strip measuring 1 1/2" x 6 1/2" and the square measuring 6 1/2" x 6 1/2" that were cut out of the iron-on interfacing.
Place the 1 1/2" x 6 1/2" interfacing strip with the fusible side down onto the wrong side of the 2" x 7" strip. Leave 1/4" margins. Press the interfacing to the fabric strip to fuse it. Fold over the margins and press again.

Place the 6 1/2" x 6 1/2" interfacing square with the fusible side down onto the wrong side of the 7" x 7" fabric square. Leave 1/4" margins. Press the interfacing to the fabric strip. Fold over the margins and press again.
Pin the 6 1/2" strip to the zipper. Topstich the strip to the zipper. Pin the 6 1/2" x 6 1/2" square to the other side of the zipper. Topstitch the square to the zipper.
To sew the second pocket, fold the 6 1/2" x 10 1/2" lining strip in half widthwise, face inwards. Stitch 2 sides. Turn the piece right side out. Press. Tuck the raw edges 1/2" inside. Press. Topstitch.
Sew both pockets to the right side of the lining piece, approximately 2" from the upper edges.
Fold the lining widthwise in half, face (and pockets) inside. Align the edges. Stitch the sides closed.
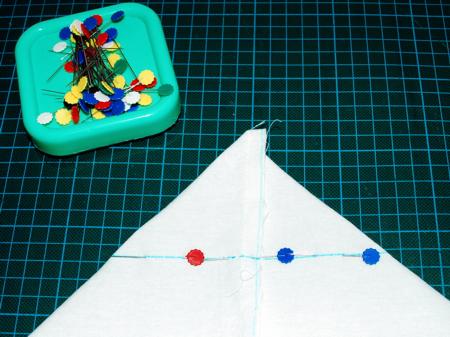
Make box corners at the bottom of the lining. For this, separate the front and back sides at the corners. Center the side seam with the center of the bottom. Measure
1 1/2" along the seam from the corner.
Draw a line perpendicular to the seam across the corner. Topstitch along the line. Repeat for the second corner.
Handles:
Fold the 3" x 20" and 3" x 5" yellow strips lengthwise, wrong side to wrong side, and press heavily.
Fold the long edges 1/2" inside and press again.
Place iron-on sewing interfacing (strips 1" wide) into each piece and press again.
Topstitch along all the edges 1/8" from the edge.
Assembly of the Outside of the Bag:
You need to assemble 2 similar panels. Sew the 1 1/2" x 6 1/2" yellow strips between the round and square panels.

Sew the 1 1/2" x 15 1/2"yellow strips to the left edge of the working piece.

Sew the rectangular panels to the right edge of the working piece.

Sew the yellow 2 1/2" x 15 1/2" strips to the left and right edges, then sew the black 2" x 15 1/2" strips to the left and right edges.

Sew the yellow 3 1/2" x 20 1/2" strip between 2 panels.

Quilting:
Now place the backing on a flat surface (table) face down. Cover with batting. Spread your working piece over it.
Pin all three layers together with 1" pins and start quilting. We quilted in a free motion style all over the bag.
Assembly of the bag:
When quilting is done, press the work with heavy steam and trim all edges.
Fold the working piece widthwise, face inside. Stitch the sides.
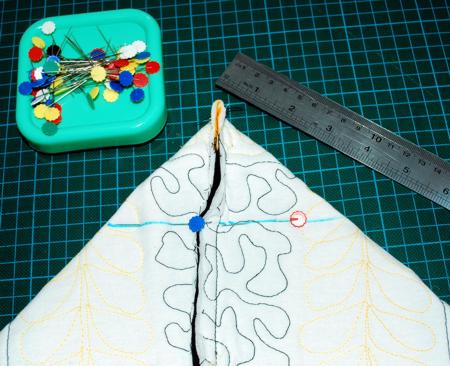
Make box corners at the bottom of the bag in the same way as for the lining: separate the front and back sides at the corners. Center the side seam with the center of the bottom. Measure 1 1/2" along the seam from the corner.
Draw a line perpendicular to the seam across the corner. Topstitch along the line. Repeat for the second corner.
Turn the bag right side out. Mark the position of the handles on the upper edge.
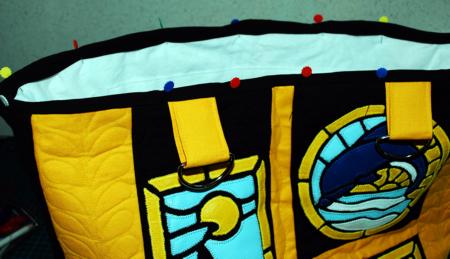
Insert the 5" strips in rings, fold in half, pin to the upper edge approxinately 5" from the side seams.

Topstitch the strips with rings to the upper edge.
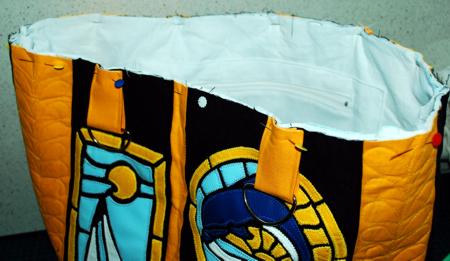
Finish the upper edge with the black binding.
Insert the ends of the 20" handles into the rings, fold the ends 1" back and topstitch in place.
The bag is ready. Enjoy!