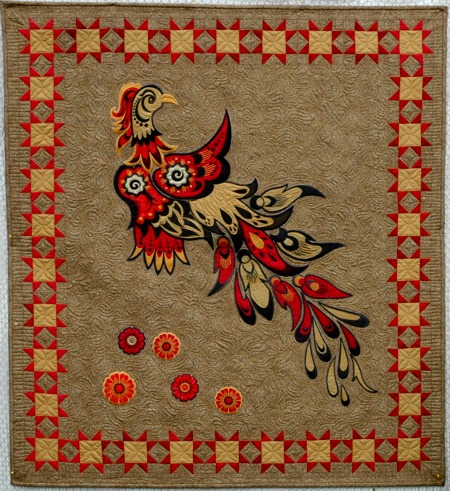
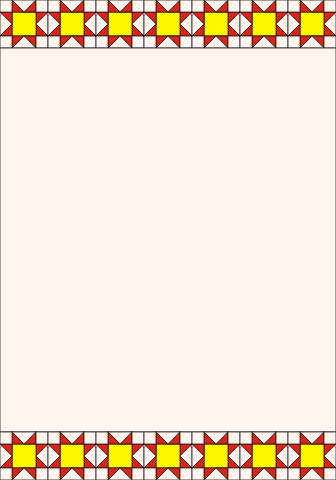
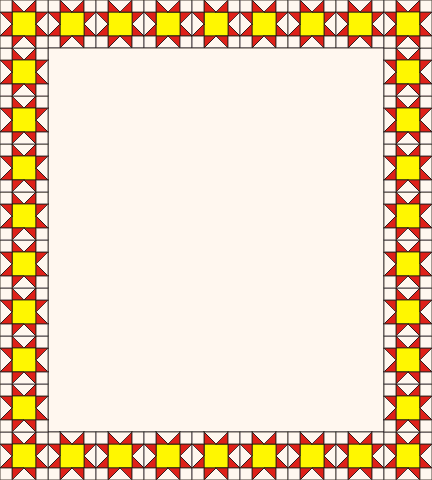
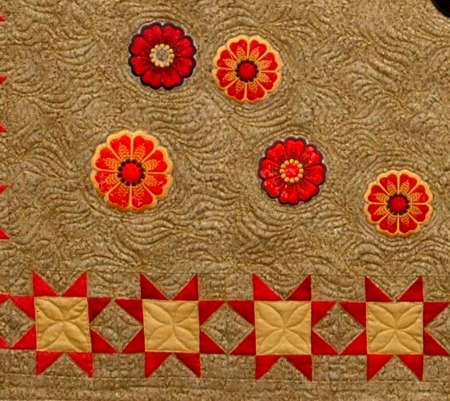
The Phoenix is a legendary bird from Greek mythology that was supposed to burn up after it died and emerge, re-born from the flames. We used applique designs from our Phoenix Applique Set to create this large, beautiful wall quilt. We chose red and yellow colors to enhance the Phoenix / fire theme.
The quilting required is pretty basic. The finished size is about 36" x 40".
|
|
You will need :
- about 2 yards of fabric for the background,
- about 1 yard of red fabric for the stars and applique; we actually used scraps of different red fabrics, and this worked very well,
- about 1 yard of golden fabric for the applique and stars,
- backing and bating.
|
|
|
Cutting:
|
Out of the background fabric, cut
- the central part measuring 28 1/2" x 32 1/2",
- 136 squares measuring 1 1/2" x 1 1/2" and
- 136 strips measuring 1 1/2" x 2 1/2",
- 4 strips measuring 2" x 40 1/2",
- 4 strips 2 1/2" wide and the lenth of the width of the fabric for the binding.
Out of the red fabric, cut 272 squares measuring 1 1/2" x 1 1/2".
Out of golden fabric, cut 34 squares measuring 2 1/2" x 2 1/2" |
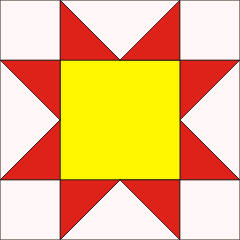
Assembly of the Star Block:
|
| Note: seam allowance is 1/4". Press every seam immediately after you make it. |
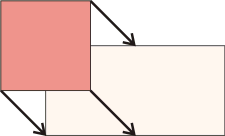
| Take the 136 rectangles of the background fabric and the red squares. You will use these to make flying geese strips. |
| Position the rectangle on your working table, face up. Position one of the squares, face down, on the left of the rectangle. Align the sides. |
|
| With a thin graphic pencil, draw a diagonal to connect the upper right corner and the lower left corner. |

|
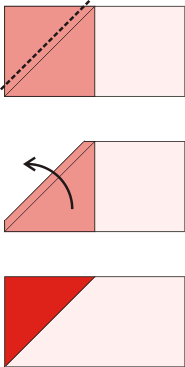
Machine stitch along the diagonal.
Cut the excess fabric, leaving 1/4" seam allowance.
Unfold the square and press. |
|
Repeat for the other side of the strip.
You will need 4 such flying geese parts for each block. |

|
| Sew two of the flying geese strips to left and right edges of the central 2 1/2" x 2 1/2" golden block. |

|
| Take two "flying geese" strips and four background 1 1/2" x 1 1/2" squares. Sew a square to each end of the "flying geese". |

|
| Sew these strips to the top and bottom edges of the central part. |
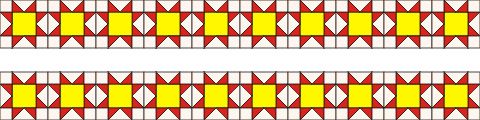
|
| Sew 34 total star blocks. |
| Assembly of the Top: |
| Sew 14 star blocks into 2 rows, 7 stars in each row. |

|
| Sew those rows to the upper and lower edges (short edges) of the central part. |
|
| Sew the remaining 20 star blocks into 2 rows, 10 stars in each row. |
|
| Sew the rows to the left and right edges of the central part. |
|
| Now sew the 2" x 40 1/2" background strips to the left and right edges of the top. Then sew the remaining 2" x 40 1/2" strips to the left and right edges. |

|
| Embroidery: |
| Read the instructions on how to embroider the Phoenix applique. Following the instructions prepare all phoenix parts. Lay them out on the central part part of the quilt top. Fuse in place. |
| Quilting and Finishing: |
Now place the backing on a flat surface (table) face down. Cover with batting. Spread your working piece over it.
Pin all three layers together with 1" pins and start quilting. Quilt in a free motion style through the applique and around it. Then all over the quilt. |
After the quilting is finished, press the work with heavy steam and square the work -- all corners should be 90 degrees and opposite sides should be of the same length.
Finish the raw edges with the binding.
|
|
Your wall quilt is done. Enjoy!
|
|
Back to Phoenix Applique Set
|
Back to the Project Page
|


