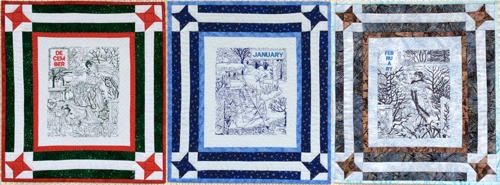
These three "calendar" quilts form a matched set that's a perfect seasonal decoration for your home.
The key is in picking the right fabrics. We recommend batiks or winter-patterned fabrics, but other quilting cotton fabrics also work well. It's time to go digging through your stash!
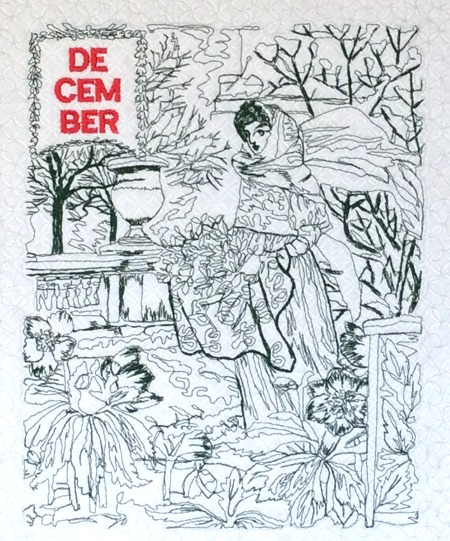
For these winter-themed quilts we used the December, January and February designs from the My Beautiful Garden series for the commercial (8" x 12") hoop.
The finished size is about 17" x 19".
|
|
You will need
- embroidery thread (either polyester or rayon), we used:
- dark green, charcoal and navy blue for the main embroidery, and
- red, ice blue and sky blue for the name of the months.
- white or cream polyester craft felt, used as stabilizer and batting;
- 1 fat quarter for each quilt of light-colored (we used white for December and January, and pale gray for February) fabric (for the central embroidered parts of the qults);
- small amount of fabrics for the borders and binding (read about our color choices below),
- backing,
- (optional) fabric coloring pencils, markers, or dyes in case you'd like to add some color to the embroidery
|
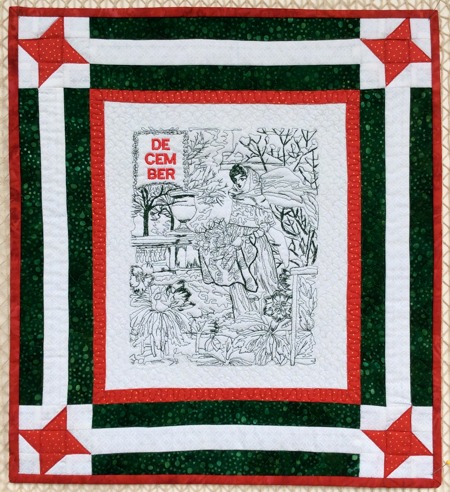
| December - a festive month: |
|
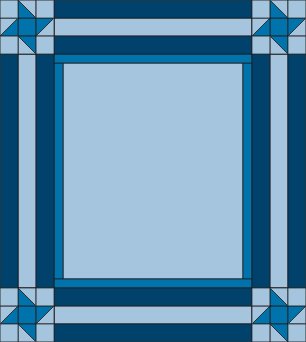
| We used white fabric for the central part, central strip on the borders and corner blocks; red fabric for the first border, stars in the corner blocks and binding; green fabric for the borders. |
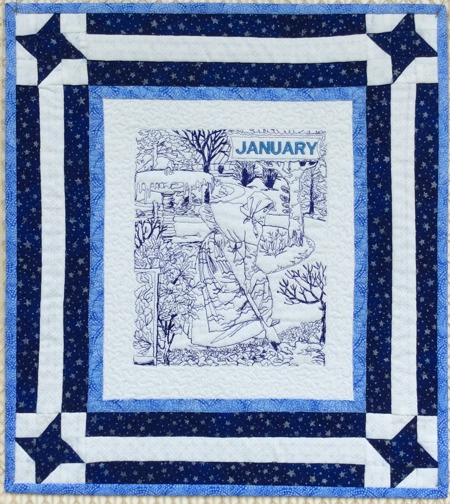
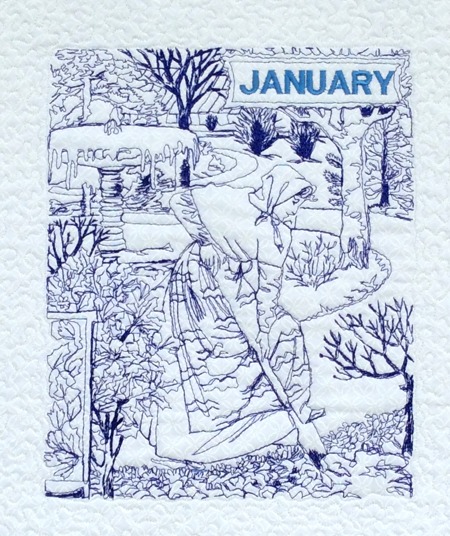
| January - a snowy month: |
|
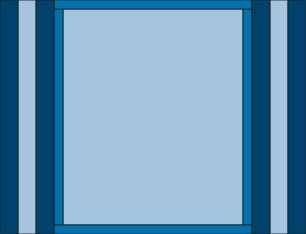
| We used white fabric for the central part, borders and corner blocks; royal blue with silver stars fabric for the stars in the corner blocks, and borders; bright blue for the first border and binding. |
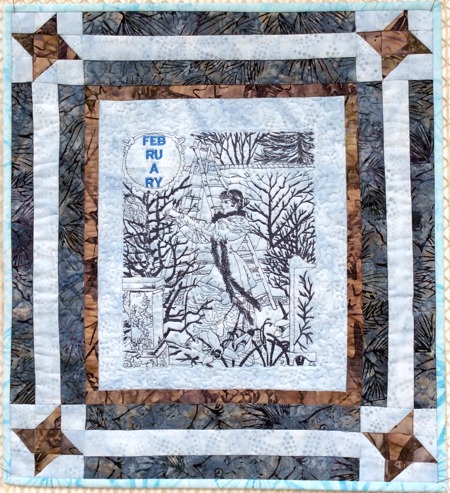
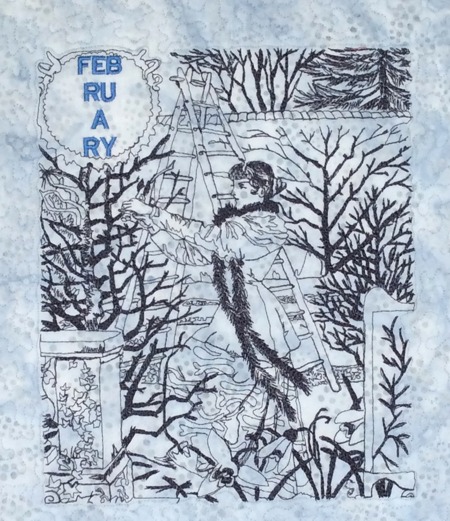
| February - a month of thaws and frosts: |
|
| We used pale blue-gray for the central part, borders, corner blocks and binding; dark gray with pine cones pattern for the second border; light gray-brown fabric for the first border and stars in the corner blocks. |
Cutting for 1 Quilt:
|
Out of pale fabric, cut
- a piece measuring 10 1/2" x 12 1/2" for the central part;
- 2 strips measuring 1 1/2" x 11 1/2" and 2 strips measuring 1 1/2" x 13 1/2" for the second border;
- 16 squares measuring 1 1/2" x 1 1/2" and 8 squares measuring 1 7/8" x 1 7/8" for the corner blocks.
Out of the second fabric for the border, cut
- 4 strips measuring 1 1/2" x 11 1/2" and
- 4 strips measuring 1 1/2" x 13 1/2"
Out of fabric for the first border and stars cut,
- 4 squares measuring 1 1/2" x 1 1/2",
- 8 squares measuring 1 7/8" x 1 7/8" ;
- 2 strips measuring 1" x 12 1/2", and
- 2 strips measuring 1" x 11 1/2".
|
Sewing the Star Blocks:
|
| Note: seam allowance is 1/4". Press every seam immediately after you make it. |
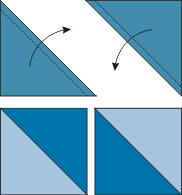
| Position the light and dark 1 7/8" squares in pairs, face to face. You'll get 8 pairs. |
 |
| With a pencil, draw a diagonal on the top square. Stitch 1/4" from the pencil line on both sides. |
 |
| Cut along the line. Open the new squares. Press the seam towards the dark part. Trim the "ears". Repeat for all the pairs. You should get 16 half square triangles measuring 1 1/2" x 1 1/2". |
 |
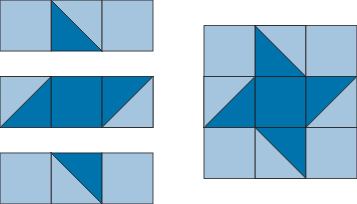
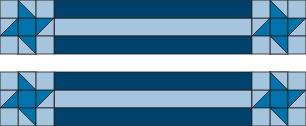
| Take the 16 half-square triangles, 16 light and 4 dark solid squares and arrange them in four 3x3 blocks: the dark square goes in the middle and light squares go in the corners. Position the half-triangles so that they form a "star" pattern. See the diagram below. |
 |
Assembly of the Top
|
| Sew the 1" x 12 1/2" strips to the left and right edges of the central part. |
 |
Sew the 1" x 11 1/2" strips to the upper and lower edges of the central part.
|
 |
For the second border:
Take 2 light and 4 dark 1 1/2" x 13 1/2" strips, sew them into 2 strips with the light strips in the center.
Take 2 light and 4 dark 1 1/2" x 11 1/2" strips, sew them into 2 strips with the light strips in the center. |
 |
Sew the 13 1/2" long borders to the left and right edges of the central part:
|
 |
| Sew the star blocks to the left and right edges of the 11 1/2" long borders. |
 |
| Sew the new borders to the upper and lower edges of the working piece. |
 |
| Embroidery: |
Spread the quilt top over the piece of polyester craft felt. Press with your hands. The felt will cling to the fabric. Hoop the central part.
Upload the file December, January or February into your machine and embroider it. |
|
|
|
| Quilting and Finishing: |
Now place the backing on a flat surface (table) face down. Spread your working piece over it. You do not need any additional batting! The polyester felt will ow work as the batting.
Pin all three layers together with 1" pins and start quilting. We quilted in a freemotion style, with matching threads, each part of the quilt - around the embroidery, the first and the second borders. |
After the quilting is finished, press the work with heavy steam and square the work -- all corners should be 90 degrees and opposite sides should be of the same length.
Finish the raw edges with the binding.
|
Your wall quilt is done. Enjoy!
|
| Check out our Spring, Summer and Autumn Calendar Quilts too! |
|
Back to December, January and February
|
Back to the Project Page
|


