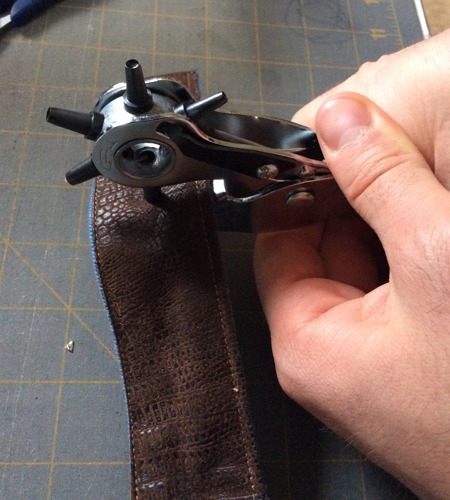
This is not a difficult project, but you will need some special tools such as a punch and an eyelet tool.
For the belt we used a design from the Stained Glass Bookmark Set. Any other bookmark design from our Bookmark section will work.
The belt described here is a size 42. It is oversized so that you can wear it on the hips. If you need a larger or smaller size, you'll have to recalculate the length. This can be done by adjusting the length of the ends. If you need more length adjustment you can increase or reduce the number of bookmarks.
You will need :
Embroidery:
Select threads according to to your taste.
Upload the file Stained Glass Bookmark into your embroidery machine.
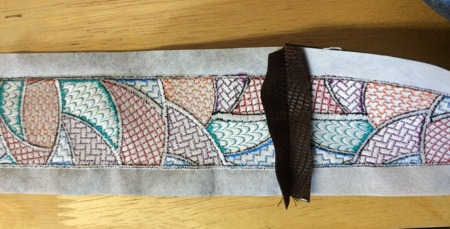
Stabilize the polyester leatherette with heavy-weight iron-on stabilizer. Hoop it, tighten the hoop.
Embroider the file. Please don't forget to cut out jump stitches after every color.
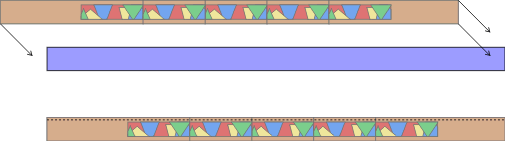
You will need 5 stitch-outs. 5 stitch-outs sewn together end-to-end are 35" long.
Making the Belt.
Note: seam allowance is 1/2", press each seam open after you make it.
Trim 3 stitch-outs, leaving 1/2" margins. Sew them together along the short ends.
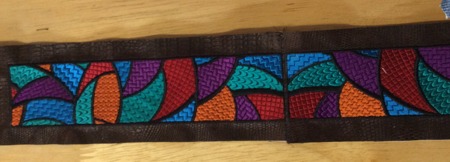
Open and press the seams.
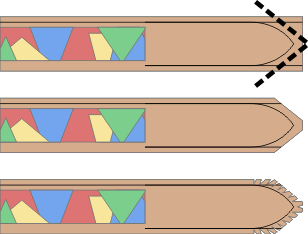
Trim the remaining 2 bookmarks in the following way.
The first bookmark: leave 1/2" margins along the long sides and one of the short edges. Leave a 7" margin at one short edge. This will be the buckle end.
The second bookmark: leave 1/2" margins along the long sides and one of the short edges. Leave an 8 1/2" margin along one short edge. This will be the eyelet end of the belt.
Sew these bookmarks to opposite ends of your working piece.

Measure the belt. Trim the denim strip to this length.
Position the belt and the denim strip (lining) face to face, pin. Stitch along one of the long sides.
Stitch the buckle end: stitch ONLY up to where the embroidery begins.

Stitch the eyelet end: stitch only up to where the embroidery begins. Stitch rounded corners at the end of the belt.

Trim the rounded end - cut off the corners, leaving seam allowance. Make notches along the curve.
Turn the work right side out. Take your time to straighten all the seams and the rounded end. Press.
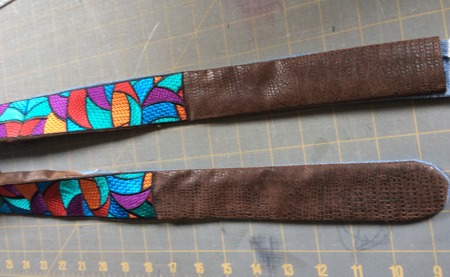
Tuck the unfinished raw edges 1/2" inside and press.
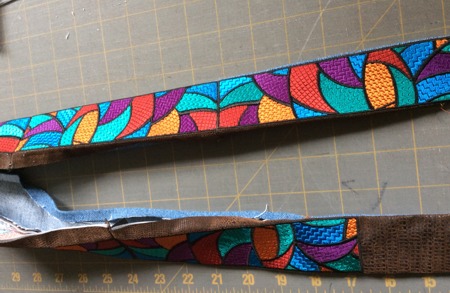
Topstitch along all edges 1/8" from the edge.
Installing the Buckle and Eyelets
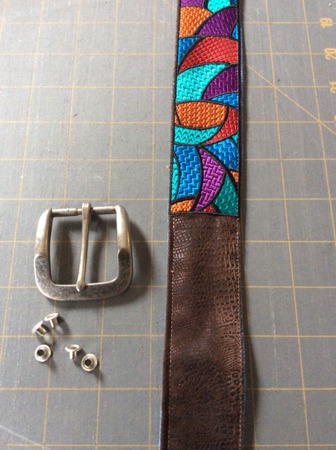
Measure the "buckle" end of the belt. If you make the belt the same size as ours, it should be 6 1/2". Measure 3" from the end and mark the position of the buckle's tongue.
Take the hole punch and make the hole.
Put the buckle on the belt, insert the tongue in the hole.
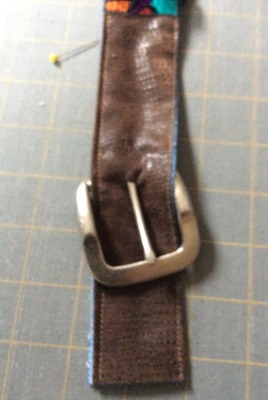
Fold the end back up to the embroidery. It will overlap the embroidery about 1/2". Pin. Topstitch in place.
Mark the position of the eyelets, 1 1/2" from one another.

Punch holes and install the eyelets. Follow the manufacturer's directions.
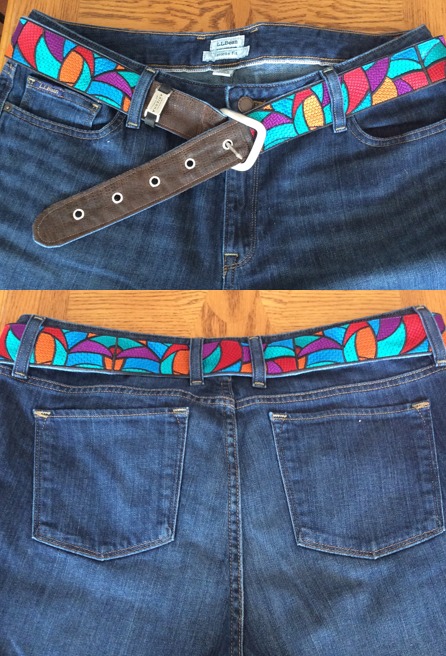
The belt is ready! Enjoy!
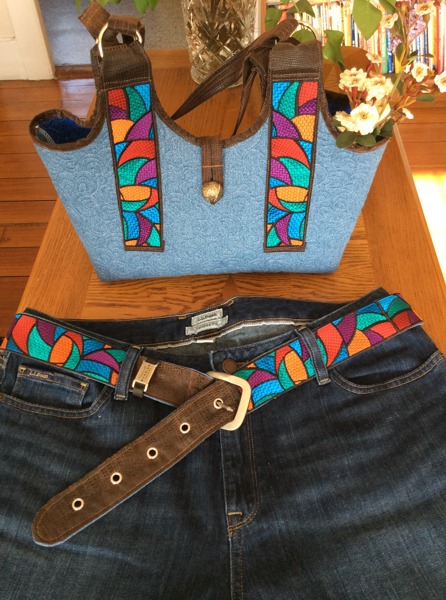
You can read about how to sew the bag on the Quilted Market Tote with Embroidered Handles page.
Enjoy!


